

When life gets hectic, I find myself searching for ways to simplify meal prep without sacrificing flavor. That’s where these 11 Korean meal prep recipes come in. They’re not just delicious; they’re designed to keep your week organized and stress-free. From vibrant bibimbap bowls to comforting potato soup, each dish brings something unique to the table. Let’s explore how these recipes can transform your meal planning.
Hearty Bibimbap Bowls
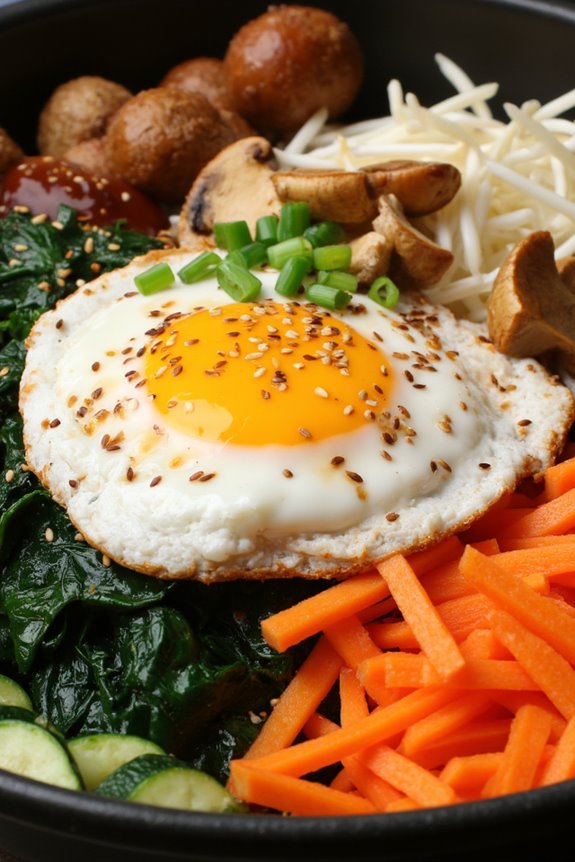
Bibimbap is a traditional Korean dish that translates to “mixed rice.” It’s a vibrant and hearty meal that combines a variety of vegetables, protein, and a fried egg, all served over a bed of fluffy rice and topped with a savory gochujang sauce.
This dish isn’t only delicious but also customizable, making it perfect for meal prep. You can incorporate seasonal vegetables and your choice of protein, whether that’s beef, chicken, tofu, or even a mix of all three.
Preparing Bibimbap bowls ahead of time is a fantastic way to guarantee you have a nutritious meal ready to go throughout the week. The components can be prepared in advance and stored separately, allowing for easy assembly when you’re ready to eat. This recipe will guide you through creating hearty bibimbap bowls for 4-6 people, ensuring that each bowl is packed with flavor and nutrition.
Ingredients
- 2 cups of short-grain rice
- 4 cups of water
- 1 cup of spinach
- 1 cup of bean sprouts
- 1 carrot, julienned
- 1 zucchini, julienned
- 1 cup of shiitake mushrooms, sliced
- 1 cup of cooked protein (beef, chicken, tofu, or a mix)
- 4-6 eggs
- 3 tablespoons of sesame oil
- 3 tablespoons of soy sauce
- 4-6 tablespoons of gochujang (Korean chili paste)
- Sesame seeds for garnish
- Green onions, chopped for garnish
Cooking Instructions
1. Cook the Rice: Begin by rinsing the short-grain rice under cold water until the water runs clear. This helps remove excess starch.
Combine the rinsed rice and 4 cups of water in a rice cooker or a pot. Cook according to the rice cooker’s instructions or bring it to a boil, then reduce the heat to low, cover, and simmer for about 20 minutes until the rice is tender and the water is absorbed. Set aside.
2. Prepare the Vegetables: While the rice is cooking, prepare the vegetables. Heat 1 tablespoon of sesame oil in a large skillet over medium heat. Add the spinach and sauté for about 2-3 minutes until wilted.
Remove the spinach from the skillet and set aside. In the same skillet, add another tablespoon of sesame oil and sauté the bean sprouts for about 2 minutes. Remove and set aside.
Repeat this process for the julienned carrots and zucchini, cooking them for about 3-4 minutes each until just tender but still crisp, then set aside.
3. Cook the Mushrooms: In the same skillet, add the sliced shiitake mushrooms with the remaining tablespoon of sesame oil and sauté for about 5 minutes until they’re soft.
Add soy sauce to taste, stirring to incorporate, and then remove from heat.
4. Cook the Eggs: In a separate non-stick skillet, heat a little oil over medium heat. Crack the eggs into the skillet and cook sunny-side up until the whites are set, but the yolks are still runny, about 3-4 minutes.
5. Assemble the Bowls: To assemble the bibimbap bowls, place a scoop of rice at the bottom of each bowl.
Arrange the sautéed spinach, bean sprouts, carrots, zucchini, mushrooms, and protein on top of the rice in an aesthetically pleasing manner. Top each bowl with a fried egg and a tablespoon of gochujang. Sprinkle with sesame seeds and chopped green onions for garnish.
6. Serve: Serve the bibimbap bowls immediately, encouraging diners to mix everything together before enjoying.
Extra Tips
When preparing Bibimbap bowls for meal prep, consider storing the components separately in airtight containers in the fridge. This keeps the vegetables fresh and prevents the rice from becoming mushy.
You can also experiment with different vegetables based on the season or your preferences—think bell peppers, radishes, or even sweet potatoes. If you prefer a spicier kick, feel free to add more gochujang or a drizzle of sriracha.
Enjoy your delicious and hearty bibimbap bowls!
Savory Bulgogi Beef
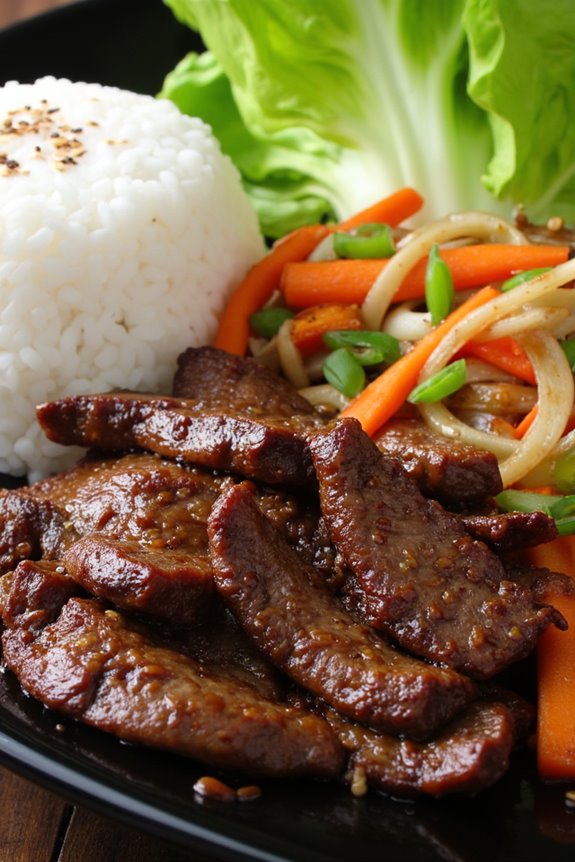
Bulgogi, a traditional Korean dish, is a tantalizing blend of marinated beef stir-fried to perfection. The process of marinating the beef not only enhances its flavor but also tenderizes it, making each bite a succulent delight. Typically served with rice and an assortment of vegetables, bulgogi is a popular choice for family meals and gatherings, embodying the essence of Korean comfort food.
Preparing bulgogi is relatively simple, making it an excellent option for meal prep. The marinade is quick to assemble and can be made ahead of time, allowing the flavors to deepen as the beef rests. This dish can be easily customized according to your taste preferences, whether you prefer it extra spicy or with additional vegetables. With this recipe, you can create a mouthwatering bulgogi beef that will surely impress your family and friends!
Ingredients (Serves 4-6):
- 1 ½ pounds of beef sirloin or ribeye, thinly sliced
- ½ cup soy sauce
- ¼ cup brown sugar
- 2 tablespoons sesame oil
- 4 cloves garlic, minced
- 1 tablespoon fresh ginger, grated
- 1 tablespoon rice vinegar
- 1 tablespoon gochugaru (Korean red pepper flakes) or to taste
- 1 medium onion, sliced
- 2 green onions, chopped
- 1 carrot, julienned
- 1 tablespoon sesame seeds
- Fresh lettuce leaves for serving (optional)
- Cooked rice for serving
Cooking Instructions:
- Prepare the Marinade: In a large bowl, combine the soy sauce, brown sugar, sesame oil, minced garlic, grated ginger, rice vinegar, and gochugaru. Whisk the ingredients together until the sugar is dissolved, creating a flavorful marinade.
- Marinate the Beef: Add the thinly sliced beef to the marinade, guaranteeing that all pieces are well coated. Cover the bowl with plastic wrap and refrigerate for at least 30 minutes, or ideally, for 2-4 hours to allow the flavors to penetrate the meat thoroughly.
- Stir-Fry the Vegetables: Heat a large skillet or wok over medium-high heat. Add a splash of oil, and once hot, toss in the sliced onion, julienned carrot, and chopped green onions. Stir-fry the vegetables for about 3-4 minutes until they’re slightly softened, then remove them from the skillet and set aside.
- Cook the Beef: In the same skillet, increase the heat to high and add the marinated beef along with any leftover marinade. Stir-fry for about 5-7 minutes until the beef is fully cooked and caramelized, stirring frequently to prevent burning.
- Combine and Garnish: Once the beef is cooked, return the stir-fried vegetables to the skillet and toss everything together for another minute to blend the flavors. Sprinkle sesame seeds over the top for an added crunch.
- Serve: Serve the savory bulgogi beef hot, with fresh lettuce leaves for wrapping and cooked rice on the side.
Extra Tips:
For the best results, slice the beef against the grain to guarantee tenderness. If you want to enhance the flavor even further, consider adding sliced mushrooms or bell peppers to the stir-fry.
Leftover bulgogi can be stored in the refrigerator for up to three days and tastes even better the next day as the flavors continue to meld. Enjoy this dish with a side of kimchi for an authentic Korean experience!
Spicy Tofu Stir-Fry
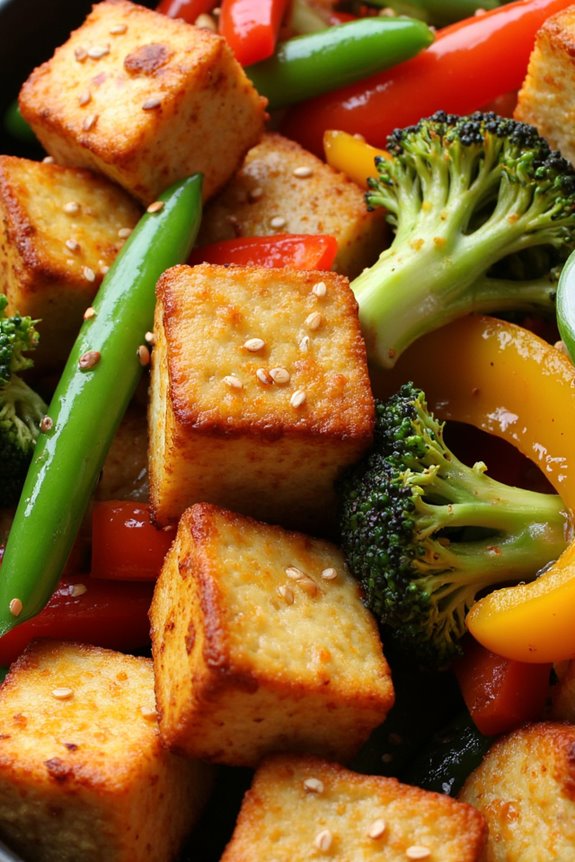
Spicy Tofu Stir-Fry is a vibrant and flavorful dish that brings the heat and the nutrients to your meal prep routine. This recipe combines crispy tofu with an array of colorful vegetables, all tossed in a spicy, savory sauce that packs a punch. Perfect for those who love a kick in their meals, this dish isn’t only delicious but also a wonderful vegetarian option that can easily be enjoyed by everyone.
With its quick cooking time and simple ingredients, Spicy Tofu Stir-Fry is an ideal choice for busy weeknights or meal prepping for the week ahead. The beauty of this dish lies in its versatility; you can easily swap out vegetables based on what you have on hand or your personal preferences.
Whether you’re a seasoned cook or a beginner in the kitchen, this recipe will guide you through creating a satisfying and nutritious dish that doesn’t compromise on flavor. Serve it over rice or noodles to complete the meal, and you’ll have a delightful feast that’s sure to please.
Ingredients (Serves 4-6):
- 14 oz firm tofu, drained and pressed
- 2 tablespoons cornstarch
- 2 tablespoons vegetable oil
- 2 cups bell peppers, sliced (mix of red, green, and yellow)
- 1 cup broccoli florets
- 1 cup snap peas
- 3 green onions, sliced
- 3 cloves garlic, minced
- 1 tablespoon fresh ginger, minced
- 3 tablespoons soy sauce
- 2 tablespoons gochujang (Korean chili paste)
- 1 tablespoon sesame oil
- 1 tablespoon rice vinegar
- Sesame seeds for garnish
Cooking Instructions:
- Prepare the Tofu: Start by draining and pressing the tofu to remove excess moisture. Cut the tofu into bite-sized cubes. In a bowl, toss the tofu cubes with cornstarch until evenly coated. This will help the tofu crisp up during cooking.
- Cook the Tofu: Heat 1 tablespoon of vegetable oil in a large non-stick skillet or wok over medium-high heat. Once hot, add the tofu in a single layer, cooking for about 5-7 minutes until golden brown and crispy on one side. Flip the tofu cubes and cook for an additional 5-7 minutes until evenly browned. Remove the crispy tofu from the skillet and set aside.
- Sauté the Vegetables: In the same skillet, add the remaining tablespoon of vegetable oil. Add the minced garlic and ginger, sautéing for about 30 seconds until fragrant. Then, add the sliced bell peppers, broccoli florets, and snap peas. Stir-fry the vegetables for about 4-5 minutes until they’re tender yet still crisp.
- Make the Sauce: In a small bowl, whisk together the soy sauce, gochujang, sesame oil, and rice vinegar until well combined. Pour the sauce over the sautéed vegetables and stir well to coat them evenly.
- Combine Tofu and Vegetables: Return the crispy tofu to the skillet with the vegetables. Gently toss everything together to make sure the tofu and vegetables are well coated in the spicy sauce. Cook for an additional 2-3 minutes to heat everything through.
- Garnish and Serve: Remove the skillet from heat. Garnish the stir-fry with sliced green onions and sesame seeds. Serve immediately over cooked rice or noodles for a complete meal.
Extra Tips:
For an extra layer of flavor, consider marinating the tofu in a mixture of soy sauce and gochujang for about 30 minutes before cooking. This will enhance the taste of the tofu, making it even more delicious.
Additionally, if you prefer a milder version, you can reduce the amount of gochujang or add a bit of honey or sugar to balance the heat. This dish is also fantastic for meal prep, as it stores well in the refrigerator for up to four days, allowing you to enjoy a spicy, healthy meal throughout the week!
Classic Kimchi Fried Rice
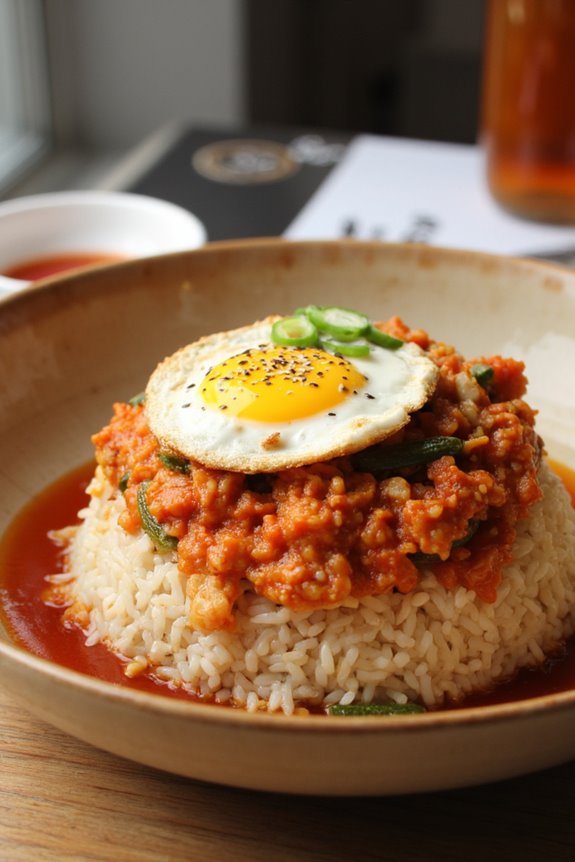
Classic Kimchi Fried Rice, also known as Kimchi Bokkeumbap, is a delicious and easy dish that encapsulates the vibrant flavors of Korean cuisine. This one-pan meal combines day-old rice with tangy, fermented kimchi, creating a perfect harmony of taste and texture. The dish isn’t only satisfying but also a fantastic way to utilize leftover rice and kimchi, making it an excellent option for meal prep.
The beauty of Kimchi Fried Rice lies in its versatility. You can customize it with various proteins such as tofu, chicken, or beef, and add vegetables like peas, carrots, or bell peppers to enhance its nutritional value. Served with a fried egg on top and garnished with green onions and sesame seeds, this dish is sure to impress family and friends alike.
Ingredients (Serves 4-6)
- 4 cups cooked white or brown rice (preferably day-old)
- 1 cup kimchi, chopped (with some juice)
- 2 tablespoons vegetable oil
- 1 small onion, diced
- 2-3 cloves garlic, minced
- 1 cup mixed vegetables (e.g., peas, carrots)
- 2 tablespoons soy sauce
- 1 tablespoon gochujang (Korean chili paste) – optional for spice
- 4 green onions, sliced
- 4 eggs (optional)
- Sesame seeds for garnish
Cooking Instructions
- Prepare the Ingredients: Start by gathering all your ingredients. If you haven’t done so already, verify that your leftover rice is separated and free of clumps. Chop the kimchi, dice the onion, and mince the garlic. This preparation will make cooking faster and more efficient.
- Sauté the Aromatics: In a large skillet or wok, heat the vegetable oil over medium heat. Once hot, add the diced onion and sauté for about 2-3 minutes until it becomes translucent. Then, add the minced garlic and cook for another 30 seconds, being careful not to let it burn.
- Add the Kimchi: Add the chopped kimchi along with its juice to the skillet. Stir-fry for about 2-4 minutes until the kimchi is slightly caramelized. This step enhances the flavor and adds depth to the dish.
- Incorporate the Rice: Add the cooked rice to the skillet, breaking up any clumps with a spatula. Mix well with the kimchi and aromatics, verifying the rice is evenly coated with the kimchi juice.
- Add Vegetables and Seasoning: Stir in the mixed vegetables and cook for about 3-4 minutes until they’re heated through. Drizzle the soy sauce and gochujang (if using) over the rice mixture, mixing well to combine all ingredients. Taste and adjust seasoning as necessary.
- Prepare the Eggs (Optional): In a separate frying pan, heat a bit of oil over medium heat and fry the eggs to your liking (sunny side up or over easy).
- Serve and Garnish: Once everything is well mixed and heated through, remove from heat. Serve the Kimchi Fried Rice hot, topped with a fried egg if desired, and garnish with sliced green onions and sesame seeds.
Extra Tips
For the best flavor, using day-old rice is recommended, as it tends to be drier and separates better during frying. If you don’t have day-old rice, spread freshly cooked rice on a baking sheet to cool and dry out for about 30 minutes before using.
Feel free to experiment by adding your favorite proteins or additional vegetables to tailor the dish to your taste preferences. Enjoy this vibrant meal as a quick lunch or dinner option that’s packed with flavor and nutrients!
Korean BBQ Chicken Thighs
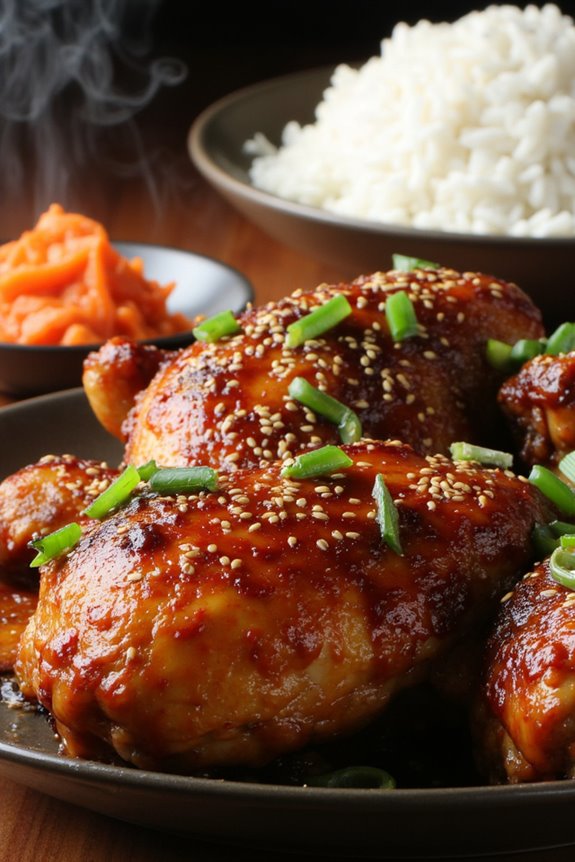
Korean BBQ Chicken Thighs are a delicious and savory dish that brings the rich flavors of Korean cuisine right to your kitchen. Known for their tender meat and sweet-spicy marinade, these chicken thighs are perfect for meal prepping, as they can be marinated ahead of time and cooked in batches. The marinade combines soy sauce, garlic, ginger, and gochujang, giving the chicken a distinctive umami flavor that pairs well with steamed rice and vegetables.
This dish isn’t only flavorful but also easy to make, making it an excellent choice for both novice and experienced cooks. Once marinated, the chicken thighs can be grilled, baked, or pan-fried, allowing for flexibility in cooking methods. Serve them up with a side of kimchi and a sprinkle of sesame seeds for a complete and satisfying meal that everyone will love.
Ingredients (Serves 4-6):
- 2 pounds chicken thighs, bone-in and skin-on
- 1/4 cup soy sauce
- 2 tablespoons gochujang (Korean red chili paste)
- 2 tablespoons brown sugar
- 1 tablespoon sesame oil
- 4 cloves garlic, minced
- 1 tablespoon fresh ginger, grated
- 1 tablespoon rice vinegar
- 2 green onions, sliced (for garnish)
- Sesame seeds (for garnish)
Cooking Instructions:
1. Prepare the Marinade: In a large bowl, combine the soy sauce, gochujang, brown sugar, sesame oil, minced garlic, grated ginger, and rice vinegar. Whisk until the ingredients are well blended and the sugar is dissolved. This marinade not only adds flavor but also helps tenderize the chicken.
2. Marinate the Chicken: Add the chicken thighs to the marinade, ensuring each piece is thoroughly coated. Cover the bowl with plastic wrap or transfer the chicken and marinade into a resealable plastic bag. Refrigerate for at least 30 minutes, but ideally for 2-4 hours to enhance the flavors.
3. Preheat the Cooking Surface: If you’re grilling, preheat your grill to medium-high heat. If baking, preheat your oven to 400°F (200°C). For pan-frying, heat a large skillet over medium heat and add a little oil to prevent sticking.
4. Cook the Chicken:
- Grilling: Place the marinated chicken thighs skin-side down on the grill. Cook for about 6-8 minutes, then flip and grill for another 6-8 minutes or until the internal temperature reaches 165°F (75°C).
- Baking: Place the chicken thighs on a baking sheet lined with parchment paper, skin-side up. Bake for 25-30 minutes or until crispy and cooked through.
- Pan-frying: Add the chicken thighs to the hot skillet, skin-side down. Cook for about 6-8 minutes until golden brown, then flip and cook for an additional 6-8 minutes, ensuring they’re cooked through.
5. Rest and Garnish: Once cooked, remove the chicken from the heat and let it rest for about 5 minutes. This allows the juices to redistribute. Slice the chicken and serve garnished with sliced green onions and sesame seeds.
Extra Tips: For the best flavor, consider marinating the chicken overnight. This gives the marinade time to penetrate the meat deeply. You can also customize the heat level by adjusting the amount of gochujang based on your preference. If you have leftover marinade, you can simmer it in a saucepan for a few minutes to create a delicious sauce to drizzle over the chicken before serving. Enjoy your Korean BBQ Chicken Thighs with steamed rice and vegetables for a complete meal!
Nutritious Japchae (Sweet Potato Noodles)
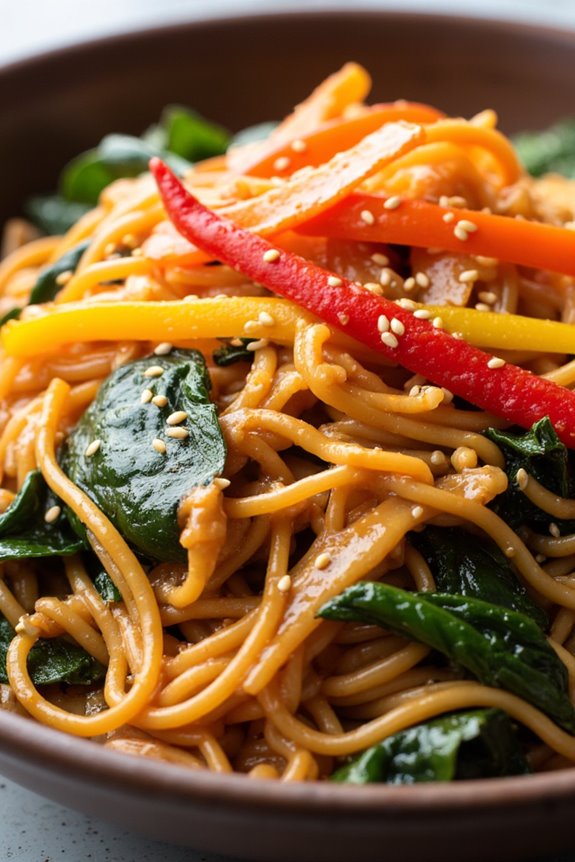
Japchae is a beloved Korean dish that features chewy sweet potato noodles stir-fried with a vibrant mix of vegetables and a savory sauce. This dish isn’t only delicious but also packed with nutrients, making it a great option for meal prep. The sweet potato noodles, or dangmyeon, are gluten-free and rich in fiber, providing a satisfying base for the colorful array of sautéed vegetables, such as spinach, carrots, and bell peppers.
The combination of these ingredients creates a delightful balance of flavors and textures that’s certain to satisfy any palate.
To prepare Japchae, you’ll want to gather all your ingredients and have everything ready before you start cooking. It’s a relatively quick dish to whip up, perfect for busy weeknights or as a make-ahead meal for lunch. The noodles can be cooked in advance, and the dish can be stored in the fridge for a few days, allowing the flavors to meld beautifully.
Whether you’re serving it as a side or a main dish, Japchae is versatile and can be customized with your favorite proteins, such as beef, chicken, or tofu.
Ingredients (serving size: 4-6 people)
- 8 oz sweet potato noodles (dangmyeon)
- 2 tablespoons vegetable oil
- 1 medium onion, sliced
- 2 cloves garlic, minced
- 1 medium carrot, julienned
- 1 bell pepper (red or yellow), sliced
- 2 cups spinach
- 3 green onions, chopped
- 2 tablespoons soy sauce
- 1 tablespoon sesame oil
- 1 tablespoon sugar
- 1 tablespoon sesame seeds (optional)
- Salt and pepper to taste
Cooking Instructions
- Prepare the sweet potato noodles: Begin by soaking the sweet potato noodles in warm water for about 30 minutes or until they soften. Once they’re pliable, drain and set aside. If you prefer, you can also cook the noodles in boiling water for about 5-7 minutes until tender, then drain and rinse under cold water to stop the cooking process.
- Sauté the vegetables: Heat 2 tablespoons of vegetable oil in a large skillet or wok over medium-high heat. Add the sliced onion and minced garlic, stirring for about 1-2 minutes until fragrant. Next, add the julienned carrot and sliced bell pepper, cooking for an additional 3-4 minutes until the vegetables are tender but still crisp.
- Add the spinach: Once the carrots and bell peppers are cooked, add the spinach to the skillet. Stir everything together and cook for about 1-2 minutes until the spinach wilts down. Make sure to stir continuously to evenly cook the vegetables.
- Combine noodles and sauce: Add the softened sweet potato noodles to the skillet with the sautéed vegetables. In a small bowl, mix the soy sauce, sesame oil, and sugar together, then pour this sauce over the noodles and vegetables. Toss everything together gently to make certain the noodles are evenly coated with the sauce and mixed with the vegetables.
- Season and serve: Taste the Japchae and adjust the seasoning with salt and pepper as needed. Add the chopped green onions and sesame seeds (if using) for extra flavor and garnish. Serve the Japchae warm, or allow it to cool and store it in the refrigerator for meal prep.
Extra Tips
When preparing Japchae, feel free to customize the vegetable mix to suit your taste or what you have on hand. Common additions include mushrooms, zucchini, or broccoli.
If you want to incorporate protein, consider adding sliced beef, chicken, or tofu—marinate it beforehand for extra flavor. Additionally, Japchae tastes even better the next day as the flavors meld, making it a great dish for meal prep.
Always store the dish in an airtight container in the refrigerator to keep it fresh for up to four days.
Flavorful Korean Fried Chicken

Korean Fried Chicken, known for its irresistibly crispy exterior and succulent meat, has gained immense popularity worldwide. This dish is characterized by its unique double-frying technique, which guarantees that the chicken remains juicy while achieving a crunch that’s simply addicting. Tossed in a spicy, sweet, and sticky sauce, each bite delivers a delightful explosion of flavors that will leave your taste buds dancing. Perfect for meal prep, this dish can be enjoyed as a main course or a snack, making it an excellent choice for any occasion.
In addition to its incredible taste, Korean Fried Chicken can be customized to suit your spice tolerance and flavor preferences. Whether you prefer it mildly sweet or fiery hot, the sauce can be adjusted accordingly. Pair it with some pickled radishes or a side of steamed rice for a complete meal. This recipe serves 4-6 people, making it an ideal option for family dinners or gatherings with friends.
Ingredients:
- 2 lbs chicken wings or drumsticks
- 1 cup all-purpose flour
- 1 cup cornstarch
- 1 teaspoon garlic powder
- 1 teaspoon onion powder
- 1 teaspoon salt
- 1 teaspoon black pepper
- 1 teaspoon baking powder
- Vegetable oil for frying
- 1/2 cup gochujang (Korean red chili paste)
- 1/4 cup honey
- 1/4 cup soy sauce
- 2 tablespoons rice vinegar
- 1 tablespoon sesame oil
- 2 cloves garlic, minced
- 1 tablespoon ginger, minced
- Sesame seeds for garnish
- Chopped green onions for garnish
Cooking Instructions:
- Prepare the Chicken: Begin by rinsing the chicken pieces under cold water and patting them dry with paper towels. This step is vital to remove excess moisture, which helps achieve a crispy coating later.
- Make the Coating: In a large bowl, combine the flour, cornstarch, garlic powder, onion powder, salt, black pepper, and baking powder. Mix well until all dry ingredients are evenly distributed. This will be the coating that gives your chicken its crunch.
- Coat the Chicken: Dredge each piece of chicken in the flour mixture, making sure they’re fully coated. Shake off any excess flour to prevent clumping. For an extra crispy texture, you can double-dip the chicken by dipping it back into the flour mixture after an initial coating.
- Heat the Oil: In a large pot or deep fryer, pour in enough vegetable oil to submerge the chicken pieces (about 2-3 inches deep). Heat the oil over medium-high heat until it reaches 350°F (175°C). It’s important to maintain the temperature for even cooking.
- Fry the Chicken: Carefully add the coated chicken pieces to the hot oil in batches, making sure not to overcrowd the pot. Fry for 8-10 minutes or until golden brown and crispy. Use a slotted spoon to transfer the fried chicken to a cooling rack lined with paper towels to drain excess oil.
- Prepare the Sauce: While the chicken is frying, combine the gochujang, honey, soy sauce, rice vinegar, sesame oil, minced garlic, and ginger in a saucepan over medium heat. Stir well and bring the mixture to a simmer. Cook for about 5-7 minutes until the sauce thickens slightly.
- Toss the Chicken in Sauce: Once all the chicken is fried and drained, place it in a large mixing bowl. Pour the hot sauce over the chicken and gently toss until all pieces are well coated.
- Garnish and Serve: Transfer the sauced chicken to a serving platter and sprinkle with sesame seeds and chopped green onions for garnish. Serve immediately while hot and crispy.
Extra Tips:
For the best results, consider marinating the chicken in a mixture of soy sauce, garlic, and ginger for a few hours or overnight before coating and frying. This not only enhances the flavor but also tenderizes the meat.
If you prefer a less spicy version, you can adjust the amount of gochujang in the sauce or substitute it with a milder chili paste. Enjoy your Korean Fried Chicken with a side of pickled vegetables or steamed rice to balance the flavors!
Easy Gochujang Chicken Meal Prep
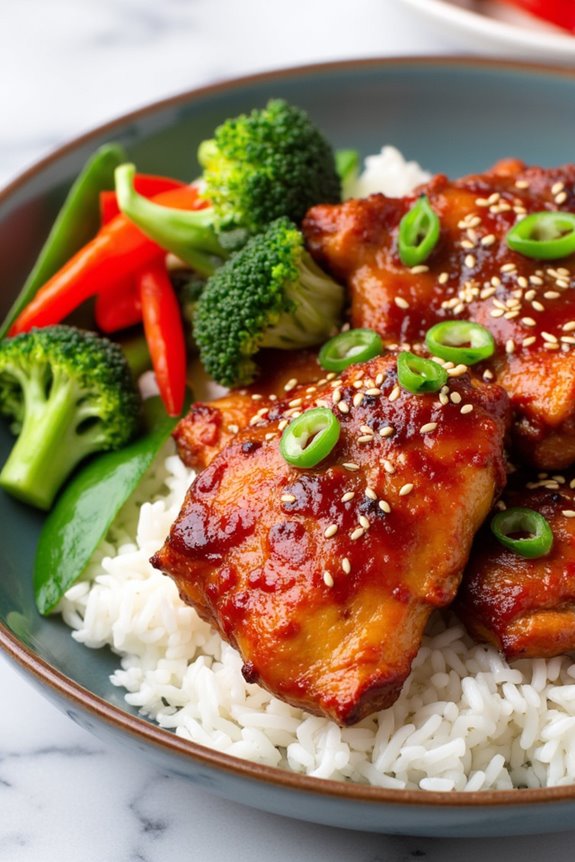
Korean cuisine is known for its bold flavors and delicious combinations, and this Easy Gochujang Chicken Meal Prep is no exception. Perfect for busy weekdays, this meal prep recipe combines the spicy and savory notes of gochujang with tender chicken, making it both satisfying and healthy. The dish isn’t only packed with protein but also offers a delightful balance of flavors that will keep your taste buds excited throughout the week.
Additionally, it’s versatile and can be paired with a variety of sides, including rice, vegetables, or even a fresh salad. This recipe is designed to serve 4-6 people, making it ideal for families or meal prepping for the week ahead. With a straightforward list of ingredients and simple cooking instructions, you can whip up this dish in no time.
The gochujang sauce can be adjusted to your spice preference, so feel free to add more or less according to your taste. Follow the steps below to create your own batch of Easy Gochujang Chicken!
Ingredients (serving size: 4-6 people)
- 1.5 lbs (680g) boneless, skinless chicken thighs
- 1/4 cup gochujang (Korean chili paste)
- 2 tablespoons soy sauce
- 1 tablespoon sesame oil
- 2 tablespoons honey or brown sugar
- 4 cloves garlic, minced
- 1 tablespoon ginger, minced
- 1 tablespoon rice vinegar
- 1 tablespoon vegetable oil
- 2 green onions, chopped (for garnish)
- Sesame seeds (for garnish)
- Cooked rice or quinoa (for serving)
- Steamed vegetables (for serving)
Cooking Instructions
- Prepare the Chicken: Start by trimming any excess fat from the chicken thighs and cutting them into bite-sized pieces. This will help the chicken cook evenly and absorb the gochujang marinade better.
- Make the Marinade: In a mixing bowl, combine the gochujang, soy sauce, sesame oil, honey (or brown sugar), minced garlic, minced ginger, and rice vinegar. Whisk the ingredients together until they form a smooth marinade. This mixture will infuse the chicken with rich flavor.
- Marinate the Chicken: Add the chopped chicken pieces to the bowl with the marinade. Confirm all chicken pieces are well coated. Cover the bowl with plastic wrap or a lid and let it marinate in the refrigerator for at least 30 minutes, or up to overnight for maximum flavor.
- Cook the Chicken: Heat the vegetable oil in a large skillet or wok over medium-high heat. Once the oil is hot, add the marinated chicken, including any leftover marinade. Cook the chicken for about 6-8 minutes, stirring occasionally, until the chicken is cooked through and caramelized on the outside. Confirm the internal temperature of the chicken reaches 165°F (75°C).
- Prepare for Meal Prep: Once the chicken is cooked, remove it from the heat. Allow it to cool slightly before portioning it out into meal prep containers. If desired, serve the chicken over a bed of cooked rice or quinoa and add steamed vegetables on the side.
- Garnish and Store: Top each portion with chopped green onions and a sprinkle of sesame seeds for an added touch of flavor and texture. Seal the containers with lids and store them in the refrigerator for up to 4 days.
Extra Tips
When preparing Easy Gochujang Chicken Meal Prep, feel free to customize the dish with your favorite vegetables or side dishes. Adding bell peppers, broccoli, or snap peas can enhance both nutritional value and flavor.
If you prefer a milder dish, reduce the amount of gochujang or balance it with more honey. For a complete meal, consider adding a side of kimchi or pickled vegetables to elevate the Korean flavors. Enjoy your delicious and convenient meals throughout the week!
Refreshing Korean Cucumber Salad
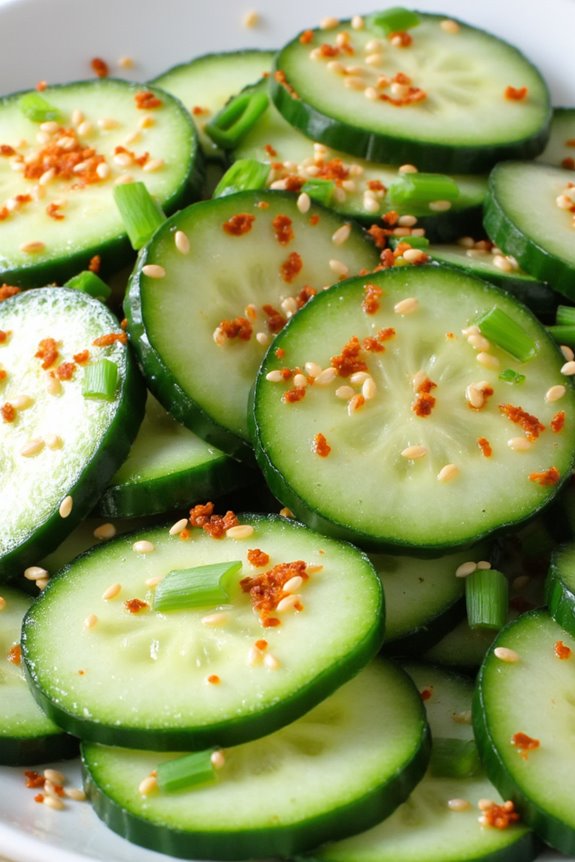
Korean Cucumber Salad, also known as Oi Muchim, is a vibrant and zesty dish that perfectly complements a variety of Korean meals. This salad isn’t only invigorating but also incredibly easy to prepare, making it a fantastic addition to your meal prep repertoire.
With its crunchy cucumbers tossed in a flavorful dressing, it serves as a light and healthy side dish that can be enjoyed alongside rice, grilled meats, or as part of a bento box. This salad is particularly popular during the warmer months when cucumbers are at their peak freshness.
The combination of sesame oil, vinegar, and Korean chili flakes creates a delightful balance of flavors that’s both tangy and spicy. Best of all, it can be made ahead of time and stored in the refrigerator, allowing the flavors to meld together beautifully.
Ingredients (Serves 4-6 people):
- 4 medium cucumbers
- 1 teaspoon salt
- 2 tablespoons rice vinegar
- 1 tablespoon sesame oil
- 1 tablespoon sugar
- 1-2 teaspoons gochugaru (Korean red pepper flakes)
- 2 cloves garlic, minced
- 2 green onions, finely chopped
- 1 tablespoon sesame seeds
Cooking Instructions:
1. Prepare the Cucumbers:
Start by washing the cucumbers under cold water. If preferred, you can peel them for a smoother texture. Cut the cucumbers into thin slices, either in rounds or half-moons, depending on your preference.
2. Salt the Cucumbers:
Place the sliced cucumbers in a bowl and sprinkle with salt. Toss to coat evenly and let them sit for about 15-20 minutes. This process helps to draw out excess moisture from the cucumbers, making them crunchier and preventing the salad from becoming too watery.
3. Make the Dressing:
In a separate bowl, combine the rice vinegar, sesame oil, sugar, gochugaru, and minced garlic. Whisk everything together until the sugar is fully dissolved. This dressing will offer a perfect balance of sweet, sour, and spicy notes.
4. Combine Ingredients:
After the cucumbers have released some moisture, drain any excess liquid and gently squeeze them to remove more water if needed. Add the cucumbers to the bowl with the dressing, along with the chopped green onions and sesame seeds. Toss everything together until the cucumbers are well coated in the dressing.
5. Chill and Serve:
Allow the salad to sit for at least 10 minutes before serving. This gives the flavors a chance to meld together. You can serve it immediately or refrigerate it for up to a few hours. The salad is best enjoyed chilled.
Extra Tips:
To enhance the flavor of your Korean Cucumber Salad, consider adding some thinly sliced radishes or carrots for added crunch and color. You can also adjust the amount of gochugaru based on your spice preference.
For a more authentic flavor, use Korean sesame oil, which has a deeper, nuttier taste compared to regular sesame oil. This salad can be stored in an airtight container in the fridge for up to 3 days, making it a perfect make-ahead option for busy weeknights.
Comforting Korean Potato Soup

Comforting Korean Potato Soup, known as Gamja-guk, is a warm and hearty dish that’s perfect for any time of the year, especially during colder months. This traditional recipe brings together the earthy flavors of potatoes, the subtle sweetness of onions, and the rich umami of Korean seasonings. It’s a simple yet satisfying meal that can be enjoyed on its own or served alongside rice and other banchan (side dishes).
The soup isn’t only comforting but also nutritious, making it a great choice for a family dinner or a cozy night in. This dish is easy to prepare and can be made in one pot, making cleanup a breeze. It’s a flexible recipe, allowing you to add your favorite vegetables or proteins. With its creamy texture and rich flavor, Comforting Korean Potato Soup is sure to become a staple in your meal prep rotation.
Whether you’re familiar with Korean cuisine or trying it for the first time, this soup will surely warm your heart and home.
Ingredients (serving size: 4-6 people)
- 4 medium-sized potatoes, peeled and diced
- 1 medium onion, chopped
- 2 cloves garlic, minced
- 4 cups vegetable or chicken broth
- 2 tablespoons soy sauce
- 1 tablespoon sesame oil
- 1 teaspoon ground black pepper
- 1 teaspoon salt (adjust to taste)
- 1 green onion, chopped (for garnish)
- Optional: 1 cup of diced carrots or zucchini for added nutrition
Cooking Instructions
- Prepare the Ingredients: Start by peeling and dicing the potatoes into small cubes. Chop the onion and mince the garlic. If you’re adding carrots or zucchini, chop them into bite-sized pieces as well. Having everything prepared before you start cooking will make the process smoother.
- Sauté the Aromatics: In a large pot, heat the sesame oil over medium heat. Once hot, add the chopped onion and sauté for about 3-4 minutes until the onion becomes translucent. Add the minced garlic and sauté for an additional minute, stirring frequently to avoid burning.
- Add Potatoes and Broth: Stir in the diced potatoes and any optional vegetables you’re using. Pour in the vegetable or chicken broth, ensuring that the potatoes are fully submerged. Bring the mixture to a boil over high heat.
- Season the Soup: Once boiling, reduce the heat to low and stir in the soy sauce, black pepper, and salt. Cover the pot and let it simmer for about 20-25 minutes, or until the potatoes are tender and easily pierced with a fork.
- Mash for Creaminess: After the potatoes are cooked through, use a potato masher or fork to mash some of the potatoes directly in the pot. This will create a creamy texture while still leaving some chunks for heartiness. Simmer for an additional 5 minutes if you prefer a thicker consistency.
- Serve and Garnish: Remove the pot from heat and ladle the soup into bowls. Garnish with chopped green onions for a fresh touch. Serve hot with a side of rice or your favorite banchan.
Extra Tips
When making Comforting Korean Potato Soup, feel free to customize it to your taste by adding proteins like tofu, chicken, or beef to make it more filling.
Adjust the seasoning to your preference, especially the salt and soy sauce, as different brands can vary in saltiness. For added depth of flavor, consider incorporating a splash of fish sauce or a sprinkle of Korean chili flakes.
This soup stores well in the refrigerator for up to three days, making it an excellent option for meal prep. Just reheat gently on the stove before serving.
Simple Seaweed Salad
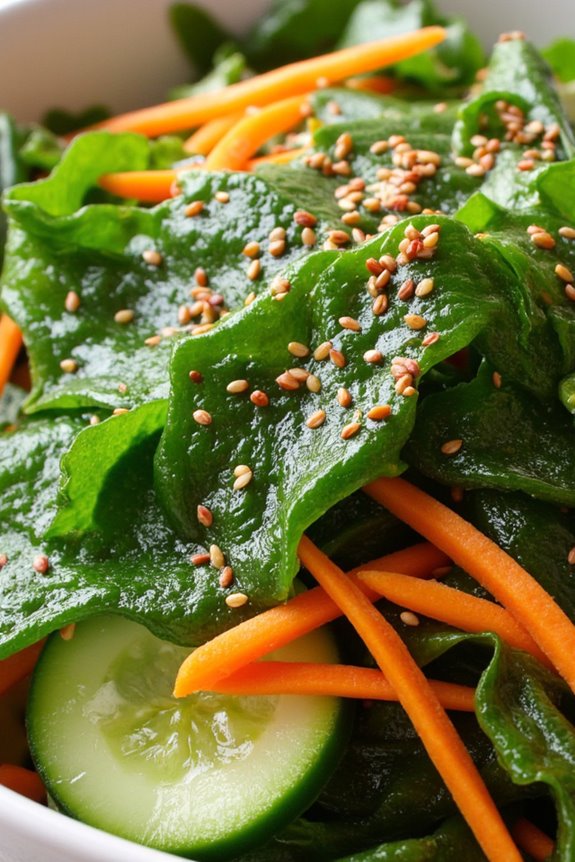
Simple Seaweed Salad is a revitalizing and healthy dish that perfectly complements any Korean meal. It’s packed with nutrients and boasts a delightful umami flavor, making it a favorite side dish in Korean cuisine. The salad is easy to prepare, requiring minimal cooking, and can be made ahead of time for meal prepping. With its vibrant colors and textures, this dish not only tastes great but also adds a beautiful touch to your dining table.
The key ingredient in this salad is dried seaweed, which is rich in vitamins and minerals, including iodine, calcium, and iron. This recipe focuses on a simple dressing that enhances the natural flavors of the seaweed while adding a tangy kick. Served chilled, Simple Seaweed Salad can be enjoyed as a revitalizing appetizer or a side dish alongside grilled meats and rice.
Ingredients (Serves 4-6):
- 1 cup dried wakame seaweed
- 1 medium cucumber, thinly sliced
- 1 carrot, julienned
- 2 green onions, chopped
- 2 tablespoons soy sauce
- 1 tablespoon rice vinegar
- 1 tablespoon sesame oil
- 1 teaspoon sugar
- 1 tablespoon sesame seeds
- Pinch of salt
- Optional: red pepper flakes for spice
Cooking Instructions:
- Rehydrate the Seaweed: Start by placing 1 cup of dried wakame seaweed in a bowl and cover it with warm water. Allow it to soak for about 10-15 minutes until it expands and becomes tender. Once ready, drain and gently squeeze out the excess water.
- Prepare the Vegetables: While the seaweed is soaking, wash and prepare the vegetables. Thinly slice the cucumber, julienne the carrot, and chop the green onions. This will add freshness and crunch to the salad.
- Make the Dressing: In a small bowl, whisk together the soy sauce, rice vinegar, sesame oil, sugar, and a pinch of salt. This dressing will bring all the flavors together and enhance the taste of the seaweed and vegetables.
- Combine Ingredients: In a large mixing bowl, combine the rehydrated seaweed, sliced cucumber, julienned carrot, and chopped green onions. Pour the dressing over the salad and toss gently to make sure all the ingredients are well-coated.
- Garnish and Serve: Finally, sprinkle sesame seeds on top of the salad for added texture and flavor. If you like some heat, feel free to add a pinch of red pepper flakes. For the best taste, refrigerate the salad for about 30 minutes before serving to allow the flavors to meld together.
Extra Tips:
When preparing Simple Seaweed Salad, feel free to customize it to your liking by adding other vegetables or proteins, such as radishes or tofu. If you’re prepping the salad ahead of time, keep the dressing separate until just before serving to maintain the crispness of the vegetables.
This dish can also be enjoyed as a light lunch on its own or paired with grilled fish for a complete meal.