

Japanese cuisine offers a wonderful balance of flavor and health, and these 11 vibrant recipes showcase that perfectly. Each dish, from comforting Miso Soup to refreshing Zucchini Noodles, is not only delicious but also filled with nutritious ingredients. If you’re on the hunt for lighter meal options that are still full of taste, you’re going to love these. Let’s explore these delightful recipes that will elevate your dining experience.
Miso Soup With Tofu and Seaweed
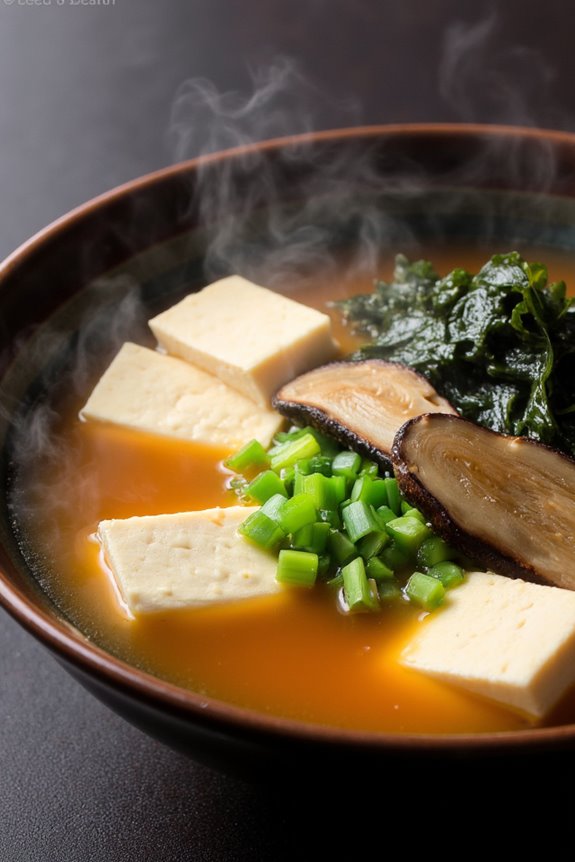
Miso Soup is a traditional Japanese dish that’s enjoyed for breakfast, lunch, or dinner. It’s warm, comforting, and packed with flavor, making it a staple in Japanese households. The combination of miso paste, dashi broth, tofu, and seaweed creates a deliciously savory soup that isn’t only easy to prepare but also nutritious. This recipe highlights the delicate balance of flavors and textures, making it a perfect accompaniment to a rice dish or simply enjoyed on its own.
This Miso Soup With Tofu and Seaweed is incredibly versatile and can be customized to include a variety of ingredients, such as vegetables or mushrooms. However, the classic version focuses on the essential components that bring together the umami taste of miso and the subtle crunch of seaweed. Whether you’re looking for a quick meal or a light starter, this miso soup will satisfy your cravings while nourishing your body.
Ingredients (serves 4-6):
- 4 cups dashi broth (or vegetable broth for a vegetarian option)
- 3 tablespoons miso paste (white or red, depending on preference)
- 1 block (14 oz) firm tofu, diced
- 1 cup dried wakame seaweed
- 2 green onions, finely chopped
- 1 cup sliced mushrooms (shiitake or enoki recommended)
- 1 teaspoon soy sauce (optional)
- A pinch of salt (to taste)
Cooking Instructions:
- Prepare the Dashi Broth: If you’re using instant dashi powder, dissolve it in 4 cups of water and bring it to a gentle simmer in a medium-sized pot. If you’re making your own dashi, simmer kombu (dried kelp) and bonito flakes in water for about 20 minutes, then strain to retain the broth.
- Soak the Wakame Seaweed: While the broth is heating, place the dried wakame seaweed in a bowl of warm water to rehydrate it. Let it soak for about 10 minutes, then drain and chop it into bite-sized pieces.
- Add Tofu and Mushrooms: Once the dashi broth is simmering, gently add the diced tofu and sliced mushrooms. Allow them to cook for about 3-4 minutes, ensuring the tofu warms through and the mushrooms soften.
- Incorporate Miso Paste: In a small bowl, take a ladle of hot broth and mix in the miso paste until smooth. This step helps to dissolve the miso more evenly. Once combined, add it back into the pot with the rest of the broth. Stir gently to combine, but don’t boil the soup after adding the miso as it can affect the flavor.
- Add Wakame and Green Onions: Stir in the chopped wakame seaweed and the finely chopped green onions. Allow the soup to simmer for an additional 2-3 minutes until the ingredients are well combined and heated through.
- Season and Serve: Taste the soup and adjust the seasoning with soy sauce or salt if needed. Serve hot in bowls, garnishing with extra green onions if desired.
Extra Tips:
When making Miso Soup, it’s essential to avoid boiling the soup after adding the miso paste, as this can destroy the beneficial probiotics found in miso.
Feel free to experiment with different types of miso for varying flavors—white miso is milder and sweeter, while red miso has a stronger flavor. Additionally, you can customize the soup by adding seasonal vegetables such as spinach, carrots, or radish for added nutrition and texture.
Enjoy your homemade miso soup as a delightful and healthy dish!
Zucchini Noodles With Spicy Tuna
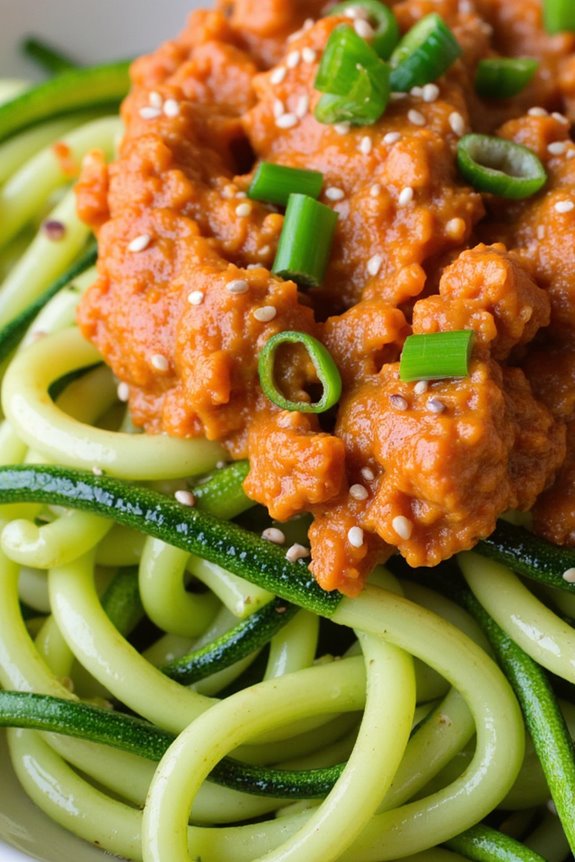
Zucchini noodles, often referred to as “zoodles,” have become a popular alternative to traditional pasta, offering a lighter and healthier option without sacrificing flavor. In this recipe, we combine fresh zucchini noodles with a spicy tuna mixture that’s both satisfying and nutritious. This dish isn’t only easy to prepare but also packed with protein and healthy fats, making it an excellent choice for a quick weeknight dinner or a meal prep option for the week.
The vibrant flavors of the spicy tuna pair perfectly with the crispness of the zucchini noodles, creating a delightful balance of textures. This dish is versatile, allowing you to adjust the spice levels to your liking and add your favorite vegetables for an added crunch. Whether you’re following a low-carb diet or simply looking to incorporate more vegetables into your meals, Zucchini Noodles With Spicy Tuna is a delicious and healthy option that everyone will enjoy.
Ingredients (Serves 4-6):
- 4 medium zucchinis
- 1 can (5 oz) of tuna in water, drained
- 2 tablespoons mayonnaise (preferably Japanese Kewpie mayonnaise)
- 1 tablespoon sriracha sauce (adjust for spice preference)
- 1 teaspoon soy sauce
- 1 teaspoon sesame oil
- 2 green onions, finely chopped
- 1 tablespoon sesame seeds
- Salt and pepper to taste
Cooking Instructions:
1. Prepare the Zucchini Noodles: Start by washing the zucchinis thoroughly. Using a spiralizer, julienne peeler, or a mandoline, create long strands of zucchini noodles. If you don’t have these tools, you can simply slice the zucchinis into thin strips.
Once done, place the zoodles in a colander, sprinkle with a little salt, and let them sit for about 10-15 minutes to release excess moisture. This will guarantee your dish doesn’t become watery.
2. Make the Spicy Tuna Mixture: In a medium bowl, combine the drained tuna, mayonnaise, sriracha, soy sauce, and sesame oil. Mix everything well until the tuna is evenly coated with the spicy sauce.
Taste and adjust the seasoning with salt and pepper if necessary. This combination brings a creamy and spicy flavor that will enhance the zoodles.
3. Sauté the Zucchini Noodles: Heat a non-stick skillet over medium heat. Add a splash of olive oil or a small amount of sesame oil to the pan.
Once hot, add the zucchini noodles and sauté for about 2-3 minutes, just until they’re slightly softened but still retain a bit of crunch. Avoid overcooking to maintain the fresh texture of the zucchini.
4. Combine and Serve: Remove the skillet from heat and add the spicy tuna mixture directly to the sautéed zucchini noodles. Gently toss everything together until the zoodles are evenly coated with the spicy tuna.
Finally, garnish with chopped green onions and sprinkle sesame seeds on top for added flavor and crunch.
5. Enjoy Your Dish: Serve the Zucchini Noodles With Spicy Tuna immediately, either warm or at room temperature. This dish can be enjoyed on its own or paired with a side salad for a complete meal.
Extra Tips:
When preparing Zucchini Noodles With Spicy Tuna, feel free to experiment with additional toppings and mix-ins such as cucumber slices, shredded carrots, or avocado for extra nutrition.
If you prefer a milder flavor, reduce the amount of sriracha or replace it with a less spicy sauce. Additionally, for a more substantial meal, consider adding grilled shrimp or chicken to the dish. Enjoy your culinary creation!
Grilled Salmon With Teriyaki Glaze
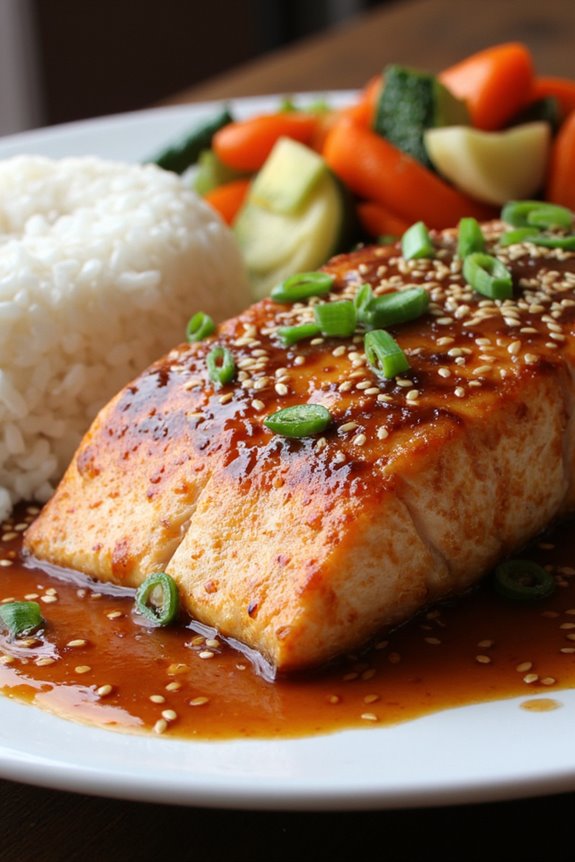
Grilled Salmon with Teriyaki Glaze is a delightful dish that brings together the rich flavors of salmon with the sweet and savory notes of a traditional Japanese teriyaki sauce. This dish not only showcases the natural taste of the salmon but also provides a healthy and nutritious meal option for any occasion.
The combination of grilling and glazing allows the salmon to retain its moisture while imparting a wonderful char and flavor from the teriyaki sauce. It’s perfect for a weeknight dinner or an elegant gathering with friends and family.
This recipe is simple yet impressive, making it an excellent choice for both novice and experienced cooks. The teriyaki glaze can be prepared quickly, and marinating the salmon for a short time enhances the flavor profile without overpowering the delicate taste of the fish.
Served alongside steamed rice and sautéed vegetables, this dish is sure to satisfy your taste buds while keeping your meal healthy and balanced.
Ingredients (Serves 4-6):
- 4-6 salmon fillets (6 ounces each)
- 1/2 cup soy sauce
- 1/4 cup mirin (sweet rice wine)
- 1/4 cup brown sugar
- 2 tablespoons rice vinegar
- 2 cloves garlic, minced
- 1 tablespoon fresh ginger, grated
- 1 tablespoon sesame oil
- 1 tablespoon cornstarch mixed with 2 tablespoons water (for thickening)
- Sesame seeds and chopped green onions for garnish (optional)
Cooking Instructions:
- Prepare the Teriyaki Sauce: In a saucepan over medium heat, combine the soy sauce, mirin, brown sugar, rice vinegar, minced garlic, and grated ginger. Stir well and bring to a gentle simmer. Allow the mixture to simmer for about 5 minutes until the sugar is dissolved.
- Thicken the Sauce: In a small bowl, mix the cornstarch with water to create a slurry. Gradually add this slurry to the simmering sauce while stirring continuously. Cook for an additional 1-2 minutes until the sauce thickens to your desired consistency. Remove from heat and let it cool slightly.
- Marinate the Salmon: Place the salmon fillets in a shallow dish or a resealable plastic bag. Pour half of the cooled teriyaki sauce over the salmon, ensuring each fillet is well coated. Reserve the remaining sauce for glazing. Cover the dish or seal the bag and refrigerate for at least 30 minutes or up to 2 hours for better flavor.
- Preheat the Grill: Preheat your grill to medium-high heat. If using a grill pan, heat it over medium-high heat on the stovetop.
- Grill the Salmon: Remove the salmon from the marinade and let any excess marinade drip off. Lightly oil the grill grates or the grill pan to prevent sticking. Place the salmon fillets skin-side down on the grill. Grill for about 5-6 minutes without moving them to develop grill marks.
- Glaze and Flip: Using a brush, apply some of the reserved teriyaki sauce on the top of the salmon fillets. Carefully flip the fillets and grill for an additional 4-5 minutes, basting with more teriyaki sauce as they cook. The salmon should be opaque and flake easily with a fork when done.
- Serve: Once fully cooked, remove the salmon from the grill and transfer it to a serving platter. Drizzle any remaining teriyaki glaze over the top and garnish with sesame seeds and chopped green onions if desired. Serve immediately.
Extra Tips:
For the best results, choose high-quality, fresh salmon fillets, as the flavor and texture are crucial to the dish. If you’re short on time, you can purchase pre-made teriyaki sauce from the store, but homemade provides a distinct flavor that enhances the dish.
Additionally, feel free to experiment with different sides such as grilled vegetables or a fresh salad to complement the salmon. If you prefer a less sweet teriyaki glaze, reduce the amount of brown sugar or add some lime juice for a tangy twist.
Soba Noodle Salad With Sesame Dressing
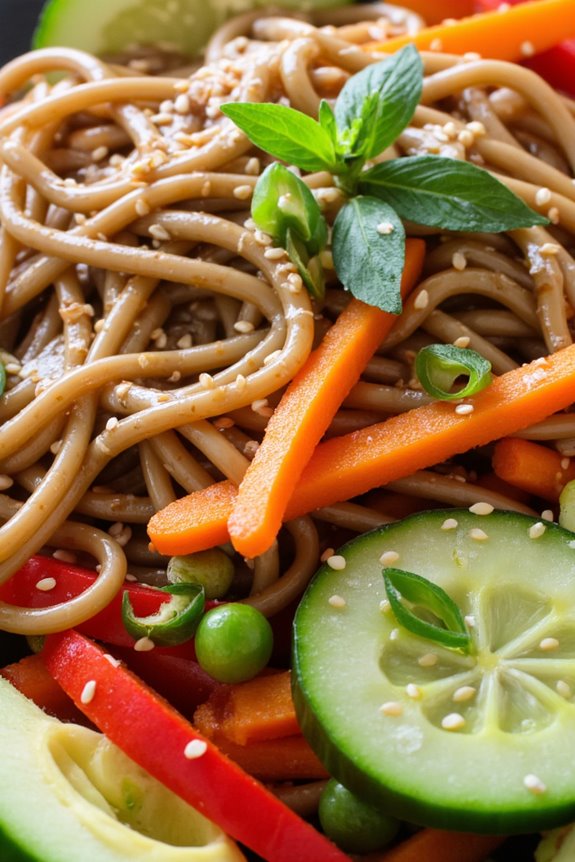
Soba Noodle Salad with Sesame Dressing is a revitalizing and nutritious dish that beautifully combines the nutty flavor of buckwheat noodles with vibrant vegetables and a savory dressing. This Japanese-inspired salad isn’t only light and satisfying but also packed with essential nutrients, making it a perfect meal for warm days or as a side dish for any occasion.
The dish is versatile and can be customized with your choice of vegetables, making it an excellent way to incorporate seasonal produce into your diet.
To make this Soba Noodle Salad truly shine, the sesame dressing adds a rich and aromatic touch that elevates the flavor profile of the salad. The combination of toasted sesame oil, soy sauce, and a hint of sweetness creates a balanced dressing that coats the noodles and vegetables beautifully. This dish serves 4-6 people, making it ideal for family gatherings, picnics, or meal prep for the week ahead.
Ingredients:
- 8 oz soba noodles
- 1 cup cucumber, julienned
- 1 cup carrots, julienned
- 1 bell pepper, thinly sliced
- 1 cup edamame, shelled
- ¼ cup green onions, chopped
- 2 tablespoons sesame seeds, toasted
- ¼ cup soy sauce
- 2 tablespoons rice vinegar
- 2 tablespoons sesame oil
- 1 tablespoon honey or maple syrup
- 1 teaspoon grated ginger
- Salt and pepper, to taste
Cooking Instructions:
- Cook the Soba Noodles: Bring a large pot of water to a boil. Add the soba noodles and cook according to package instructions, usually about 4-5 minutes. Stir occasionally to prevent sticking. Once cooked, drain the noodles and rinse them under cold water to stop the cooking process. This will also help to cool them down for the salad.
- Prepare the Vegetables: While the soba noodles are cooking, prepare the vegetables. Julienne the cucumber and carrots, and thinly slice the bell pepper. Confirm that all vegetables are cut into uniform sizes to create an attractive presentation and confirm even distribution in the salad.
- Make the Dressing: In a small bowl, whisk together the soy sauce, rice vinegar, sesame oil, honey or maple syrup, and grated ginger. Taste the dressing and adjust the seasoning with salt and pepper if necessary. The dressing should have a balanced flavor that isn’t too salty or too sweet.
- Combine Ingredients: In a large bowl, add the cooled soba noodles, prepared vegetables, and shelled edamame. Pour the sesame dressing over the salad and gently toss until all ingredients are well combined and coated with the dressing.
- Serve: Transfer the salad to a serving platter or individual bowls. Sprinkle the toasted sesame seeds and chopped green onions on top for added flavor and garnish. Serve immediately, or refrigerate for 30 minutes to allow the flavors to meld together before serving.
Extra Tips:
For an added depth of flavor, consider marinating the vegetables in the dressing for a short period before combining them with the soba noodles.
Additionally, feel free to incorporate other toppings such as avocado, radishes, or even grilled chicken for added protein.
If you’re preparing this salad in advance, keep the dressing separate until you’re ready to serve to prevent the noodles from becoming soggy. Enjoy your healthy and delicious Soba Noodle Salad!
Japanese Vegetable Stir-Fry
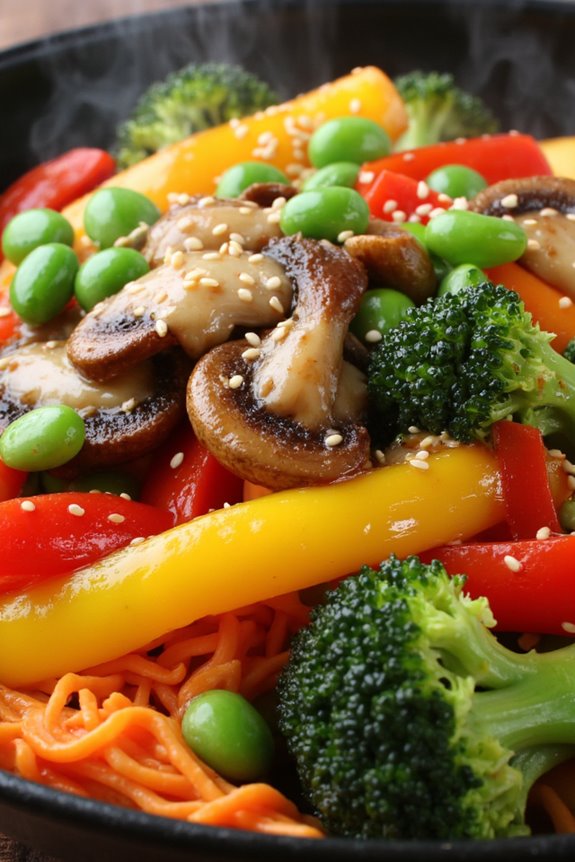
Japanese Vegetable Stir-Fry is a vibrant and healthy dish that showcases the fresh flavors and textures of seasonal vegetables. This dish isn’t only quick to prepare but also packs a punch regarding nutrition, making it a perfect addition to your meal rotation.
The combination of colorful vegetables stir-fried in a light soy sauce and sesame oil dressing highlights the natural sweetness of each ingredient, resulting in a delightful and satisfying dish that can be served as a main course or a side.
Incorporating a variety of vegetables such as bell peppers, carrots, and broccoli, this stir-fry isn’t only visually appealing but also rich in vitamins and minerals. It’s versatile enough to accommodate whatever vegetables you have on hand, allowing for creativity and customization.
Serve it alongside steamed rice or noodles, or enjoy it on its own for a light yet filling meal.
Ingredients (Serves 4-6):
- 1 cup broccoli florets
- 1 cup bell peppers (red and yellow), sliced
- 1 cup carrots, julienned
- 1 cup snap peas
- 1 cup shiitake mushrooms, sliced
- 4 green onions, chopped
- 3 cloves garlic, minced
- 2 tablespoons fresh ginger, minced
- 3 tablespoons soy sauce
- 2 tablespoons sesame oil
- 1 tablespoon vegetable oil
- 1 tablespoon sesame seeds (for garnish)
- Salt and pepper to taste
Cooking Instructions:
1. Prepare the Vegetables: Begin by washing and cutting all the vegetables into uniform sizes to promote even cooking. Broccoli should be cut into small florets, bell peppers sliced into thin strips, and carrots julienned.
Keep all the vegetables ready before starting to cook, as stir-frying is a fast process.
2. Heat the Pan: In a large wok or frying pan, heat the vegetable oil over medium-high heat. Make sure the oil is hot but not smoking, which will help achieve that perfect stir-fry texture. This should take about 1-2 minutes.
3. Add Aromatics: Once the oil is hot, add the minced garlic and ginger. Stir-fry for about 30 seconds until fragrant, being careful not to let them burn. This step builds a flavorful base for the stir-fry.
4. Stir-Fry the Vegetables: Add the broccoli, bell peppers, and carrots to the pan. Stir-fry for 3-4 minutes, or until the vegetables begin to soften but still retain some crunch.
Stir constantly to promote even cooking and prevent sticking.
5. Incorporate Snap Peas and Mushrooms: Next, add the snap peas and shiitake mushrooms. Continue to stir-fry for another 2-3 minutes. The snap peas should be bright green and crisp, while the mushrooms should be tender.
6. Add Soy Sauce and Sesame Oil: Pour in the soy sauce and sesame oil, stirring to coat all the vegetables evenly. Cook for an additional 1-2 minutes until the sauce is heated through and slightly thickened.
7. Finish and Serve: Remove the stir-fry from heat and season with salt and pepper to taste. Transfer to a serving dish and garnish with chopped green onions and sesame seeds before serving.
Extra Tips:
For a more substantial meal, consider adding protein such as tofu, shrimp, or chicken to the stir-fry. Simply cook the protein separately and add it back to the pan when you incorporate the soy sauce.
Also, feel free to experiment with different vegetables based on what’s in season or what you have available. This dish is highly adaptable, so you can easily make it your own while enjoying all the health benefits it has to offer.
Edamame Hummus With Rice Crackers
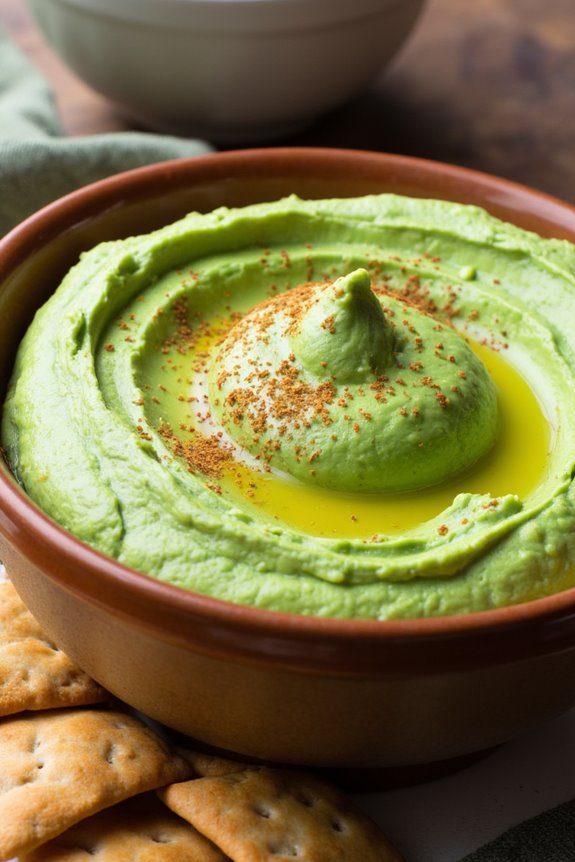
Edamame Hummus is a vibrant and nutritious twist on the classic chickpea hummus. This Japanese-inspired dip utilizes young soybeans, known as edamame, which are packed with protein and essential nutrients. The creamy texture and rich flavor of edamame, combined with tahini, garlic, and a hint of lemon, create a delightful spread that pairs perfectly with crunchy rice crackers.
This dish isn’t only a fantastic appetizer for gatherings but also a healthy snack option that can be enjoyed any time of day.
Making Edamame Hummus is quick and simple, requiring only a few ingredients and minimal preparation. You can serve it with rice crackers for a satisfying crunch, making it an ideal choice for those looking for a wholesome alternative to traditional chips and dips. This recipe serves 4-6 people and is perfect for sharing at a party or enjoying with family.
Ingredients:
- 2 cups shelled edamame (fresh or frozen)
- 1/4 cup tahini
- 1 clove garlic, minced
- 2 tablespoons lemon juice
- 2 tablespoons olive oil
- 1/2 teaspoon salt
- 1/4 teaspoon black pepper
- 1/4 teaspoon cayenne pepper (optional, for a kick)
- 1/4 cup water (more if needed)
- Rice crackers (for serving)
Cooking Instructions:
- Prepare the Edamame: If you’re using frozen edamame, boil them in salted water for about 5-7 minutes until tender. If fresh, steam the edamame for about 3-5 minutes until soft. Drain and allow to cool slightly before transferring to a food processor.
- Blend the Ingredients: In a food processor, combine the cooked edamame, tahini, minced garlic, lemon juice, olive oil, salt, black pepper, and cayenne pepper (if using). Pulse the mixture until it starts to come together, scraping down the sides as needed.
- Adjust the Consistency: With the food processor running, gradually add water to the mixture until you achieve a smooth and creamy consistency. You may need to stop and scrape the sides a couple of times to guarantee everything is well blended. If the hummus is too thick, add more water, a tablespoon at a time.
- Taste and Adjust Seasoning: Once the hummus is smooth, taste it and adjust the seasoning if needed. Add more salt, lemon juice, or garlic according to your preference.
- Serve the Hummus: Transfer the edamame hummus to a serving bowl. Drizzle a little olive oil on top and garnish with a sprinkle of cayenne pepper or sesame seeds if desired. Serve with rice crackers for dipping.
Extra Tips:
For an added depth of flavor, consider roasting the garlic before adding it to the hummus. Roasted garlic will give a sweeter, milder taste.
Additionally, feel free to experiment with the texture of the hummus by including other ingredients like herbs (basil or cilantro) or spices (cumin or smoked paprika) to create your own unique version.
Enjoy your Edamame Hummus as a healthy snack that everyone will love!
Chicken Yakitori Skewers

Chicken Yakitori Skewers are a popular Japanese dish that showcases tender chicken pieces grilled to perfection and glazed with a savory-sweet sauce known as tare. Traditionally enjoyed at festivals and izakayas (Japanese pubs), these skewers aren’t only delicious but also easy to prepare at home. The combination of juicy chicken and the umami-rich glaze makes for a delightful treat that can be served as an appetizer or a main course.
To make the dish even more enjoyable, you can customize your yakitori by incorporating vegetables like green onions or bell peppers on the skewers. The grilling process enhances the flavors, giving the chicken a smoky aroma that pairs beautifully with the tare sauce. Perfect for outdoor barbecues or a cozy dinner, Chicken Yakitori Skewers are bound to impress family and friends alike.
Ingredients (Serves 4-6)
- 1.5 lbs boneless chicken thighs, cut into bite-sized pieces
- 8-10 bamboo skewers (soaked in water for 30 minutes)
- 1/4 cup soy sauce
- 1/4 cup mirin (Japanese sweet rice wine)
- 2 tablespoons sake (Japanese rice wine)
- 2 tablespoons sugar
- 2 green onions, cut into 1-inch pieces
- Sesame seeds (for garnish, optional)
Cooking Instructions
- Prepare the Marinade: In a small bowl, whisk together the soy sauce, mirin, sake, and sugar until the sugar is completely dissolved. This mixture will serve as both a marinade and a glaze for the chicken skewers.
- Marinate the Chicken: Place the chicken pieces in a large resealable plastic bag or a bowl. Pour half of the marinade over the chicken, making sure all pieces are well-coated. Seal the bag or cover the bowl and let it marinate in the refrigerator for at least 30 minutes, preferably 1-2 hours for maximum flavor.
- Skewer the Chicken: After marination, thread the chicken onto the soaked bamboo skewers, alternating with pieces of green onion if desired. Leave a little space between the pieces to guarantee even cooking.
- Preheat the Grill: Preheat your grill or grill pan over medium-high heat. If using an outdoor grill, make sure the grates are clean and oiled to prevent sticking.
- Grill the Skewers: Place the chicken skewers on the grill and cook for about 4-5 minutes on one side. Flip the skewers and brush with the remaining marinade. Continue grilling for another 4-5 minutes or until the chicken is cooked through and has nice grill marks.
- Garnish and Serve: Once cooked, remove the skewers from the grill and let them rest for a couple of minutes. If desired, sprinkle sesame seeds over the skewers for added flavor and presentation. Serve warm with additional tare sauce on the side for dipping.
Extra Tips
For the best results, use chicken thighs as they remain juicier compared to chicken breasts. If you prefer a smoky flavor, consider adding a few wood chips to your grill or using a charcoal grill.
Remember to keep an eye on the skewers while grilling to prevent burning. You can also experiment with different vegetables or mushrooms on the skewers to enhance the dish further. Enjoy your homemade Chicken Yakitori Skewers as a delightful addition to any meal!
Cauliflower Rice Sushi Rolls
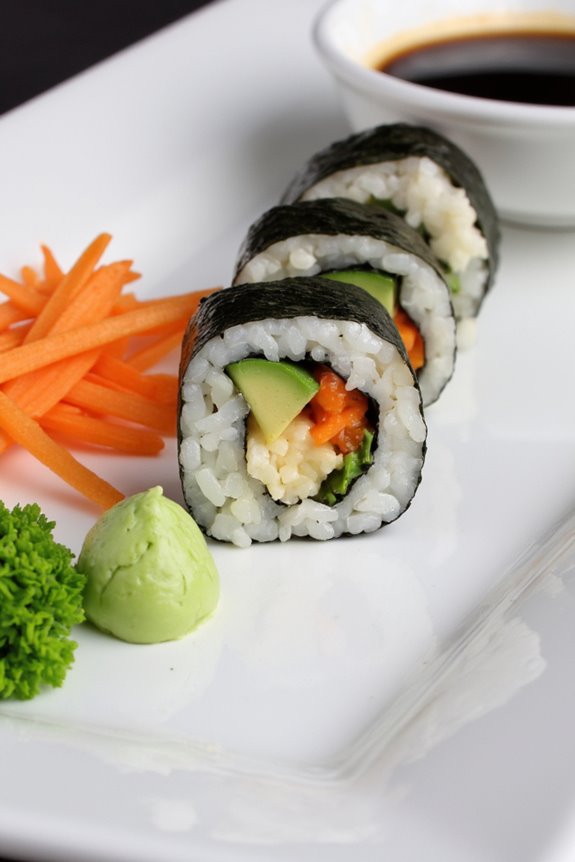
Cauliflower Rice Sushi Rolls are a delightful twist on traditional sushi, making them a healthier option without sacrificing flavor. This recipe utilizes cauliflower rice instead of sushi rice, creating a low-carb alternative that’s both nutritious and satisfying. The vibrant colors of fresh vegetables and the umami of the fillings come together beautifully, allowing for a versatile and customizable dish that anyone can enjoy.
Making these sushi rolls isn’t only a fun cooking activity but also a great way to introduce more vegetables into your diet. You can choose your favorite fillings, whether that’s fresh fish, avocado, or crisp cucumber. Plus, you can serve them with soy sauce, wasabi, or pickled ginger for an authentic taste. Perfect for a light lunch or a party appetizer, these Cauliflower Rice Sushi Rolls are sure to impress your family and friends while keeping your meals healthy!
Ingredients (Serving Size: 4-6 people)
- 1 medium head of cauliflower (to make about 4 cups of cauliflower rice)
- 2 tablespoons rice vinegar
- 1 tablespoon sesame oil
- 1 teaspoon salt
- 4 sheets of nori (seaweed)
- 1 medium cucumber, julienned
- 1 medium carrot, julienned
- 1 avocado, sliced
- Optional: cooked shrimp, crab meat, or tofu for protein
- Soy sauce, for serving
- Wasabi and pickled ginger, for garnish
Instructions
- Prepare the Cauliflower Rice: Begin by removing the leaves and stem of the cauliflower. Cut the cauliflower into florets, then pulse them in a food processor until they resemble rice grains. Alternatively, you can grate the cauliflower using a box grater. Transfer the cauliflower rice to a clean kitchen towel or cheesecloth and squeeze out excess moisture.
- Season the Cauliflower Rice: In a large bowl, combine the drained cauliflower rice with rice vinegar, sesame oil, and salt. Mix thoroughly until the grains are evenly coated. Let it sit for about 10 minutes to absorb the flavors.
- Prepare the Fillings: While the cauliflower rice is resting, prepare your fillings. Julienne the cucumber and carrot into thin strips, and slice the avocado. If using protein, make certain that it’s cooked and cut into manageable pieces.
- Assemble the Sushi Rolls: Place a bamboo sushi mat on a flat surface and lay a sheet of nori on top, shiny side down. Wet your hands with water to keep the cauliflower rice from sticking, then take a handful of the seasoned cauliflower rice and press it evenly over the nori, leaving about an inch at the top edge.
- Add Fillings: Arrange your chosen fillings (cucumber, carrot, avocado, and any protein) in a line across the center of the cauliflower rice. Be careful not to overfill to ensure easy rolling.
- Roll the Sushi: Starting from the edge closest to you, use the bamboo mat to lift the nori and roll it over the fillings tightly. Gently press as you roll to keep it compact. Once you reach the bare edge of the nori, wet it lightly with water to seal the roll.
- Slice and Serve: Using a sharp knife, slice the sushi roll into bite-sized pieces, wiping the knife with a damp cloth between cuts for clean slices. Arrange the rolls on a serving platter and serve with soy sauce, wasabi, and pickled ginger on the side.
Extra Tips
When making Cauliflower Rice Sushi Rolls, feel free to experiment with various fillings to suit your taste preferences or dietary restrictions. You can even add fresh herbs like cilantro or basil for an extra burst of flavor.
Keep your hands wet while working with the cauliflower rice and nori to prevent sticking, and consider chilling the filled rolls for about 15 minutes before slicing to help them hold their shape better. Enjoy your healthy sushi-making adventure!
Cucumber and Avocado Salad
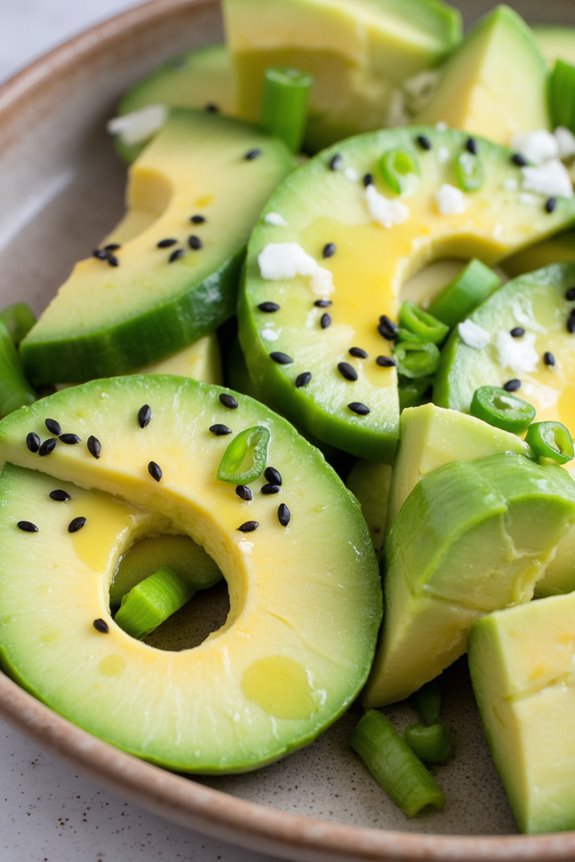
Cucumber and Avocado Salad is a revitalizing and nutritious dish that captures the essence of Japanese cuisine. This salad is perfect for a light meal or as a side dish to accompany your main course. The combination of crisp cucumbers, creamy avocado, and the subtle tang of rice vinegar creates a delightful balance of flavors and textures.
Additionally, this salad isn’t only easy to prepare but also packed with vitamins and healthy fats, making it an excellent choice for anyone looking to maintain a balanced diet.
This dish showcases the simplicity and beauty of fresh ingredients, which is a hallmark of Japanese cooking. The bright colors and fresh flavors make it an appealing option for any occasion, whether it’s a family dinner or a summer picnic. With just a few ingredients and minimal preparation, you can whip up a delicious Cucumber and Avocado Salad that will impress your guests and satisfy your taste buds.
Ingredients (Serves 4-6)
- 2 large cucumbers
- 2 ripe avocados
- 1 tbsp sesame oil
- 2 tbsp rice vinegar
- 1 tbsp soy sauce
- 1 tsp sugar
- Salt, to taste
- Black sesame seeds, for garnish
- Chopped green onions, for garnish
Cooking Instructions
- Prepare the Cucumbers: Start by washing the cucumbers thoroughly. Slice them in half lengthwise and remove the seeds using a spoon. Then, cut the cucumbers into thin half-moon slices. Place the slices in a large bowl and sprinkle a pinch of salt over them. Let them sit for about 10 minutes to draw out excess moisture, which will enhance their crunchiness and flavor.
- Slice the Avocados: While the cucumbers are draining, cut the avocados in half and remove the pits. Carefully scoop the flesh out with a spoon and slice it into bite-sized pieces. To prevent browning, you can squeeze a little lime or lemon juice over the avocado pieces.
- Make the Dressing: In a small bowl, combine the sesame oil, rice vinegar, soy sauce, and sugar. Whisk the mixture together until the sugar is completely dissolved and the dressing is well blended.
- Combine Ingredients: After the cucumbers have rested, drain any excess liquid and add them to the bowl with the avocado. Pour the dressing over the cucumber and avocado mixture, gently tossing everything together to make sure the ingredients are well coated.
- Garnish and Serve: Transfer the salad to a serving platter or bowl. Sprinkle black sesame seeds and chopped green onions on top for added flavor and visual appeal. Serve immediately for the best taste.
Extra Tips
To elevate the flavors of your Cucumber and Avocado Salad, consider adding ingredients like cherry tomatoes, radishes, or even grilled tofu for protein.
If you prefer a bit of heat, a sprinkle of red pepper flakes can provide a nice kick. This salad is best enjoyed fresh, but if you need to prepare it in advance, keep the dressing separate until just before serving to maintain the crispness of the cucumbers and the creaminess of the avocado.
Enjoy this vibrant dish as a revitalizing complement to any meal!
Matcha Green Tea Chia Pudding
Matcha Green Tea Chia Pudding is a delightful and nutritious dessert that combines the health benefits of chia seeds with the vibrant flavor of matcha green tea. This recipe isn’t only easy to prepare but also offers a unique twist on traditional puddings.
Chia seeds are known for their high fiber and omega-3 fatty acid content, while matcha provides a boost of antioxidants and a gentle energy lift. Perfect for breakfast, a snack, or dessert, this pudding is sure to impress with its creamy texture and vibrant green color.
Making Matcha Green Tea Chia Pudding requires minimal ingredients and comes together in just a few simple steps. With a little patience while the chia seeds soak up the liquid, you can create a delightful dish that’s both visually appealing and satisfying. This recipe serves 4-6 people, making it perfect for sharing with family or friends.
Ingredients
- 1 cup unsweetened almond milk (or any milk of choice)
- 1/4 cup chia seeds
- 2 tablespoons matcha green tea powder
- 2-3 tablespoons honey or maple syrup (to taste)
- 1 teaspoon vanilla extract
- A pinch of salt
- Fresh fruit and nuts for topping (optional)
Cooking Instructions
1. Prepare the Base Mixture: In a medium-sized mixing bowl, combine the unsweetened almond milk, matcha green tea powder, honey or maple syrup, vanilla extract, and a pinch of salt. Whisk thoroughly until the matcha is fully dissolved and the mixture is smooth.
This step is vital as it guarantees that the matcha is evenly distributed throughout the pudding.
2. Incorporate Chia Seeds: Add the chia seeds to the matcha mixture. Stir well to incorporate the seeds evenly. Chia seeds will expand and thicken the pudding as they absorb the liquid, so it’s important to verify they’re evenly mixed in to prevent clumping.
3. Let It Thicken: Cover the bowl with plastic wrap or a lid and place it in the refrigerator. Allow the mixture to sit for at least 4 hours, or preferably overnight.
This resting period is essential for the chia seeds to absorb the liquid and form a pudding-like consistency.
4. Serve: Once the pudding has thickened, give it a good stir to break up any clumps. Spoon the pudding into individual serving dishes or bowls.
Top with fresh fruit, nuts, or additional sweetener if desired. This adds not only flavor but also texture, making your pudding more enjoyable.
5. Enjoy: Your Matcha Green Tea Chia Pudding is ready to be enjoyed! It can be served chilled or at room temperature, making it a versatile dish for any occasion.
Extra Tips
For an added flavor dimension, consider infusing your almond milk with a hint of vanilla or coconut before mixing in the matcha and chia seeds.
You can also experiment with different types of milk, such as coconut or oat milk, to find your favorite flavor combination. If you prefer a sweeter pudding, adjust the amount of honey or maple syrup according to your taste.
Finally, feel free to get creative with toppings—try adding granola, sliced bananas, or a sprinkle of toasted coconut for an extra crunch!
Sweet Potato Tempura With Dipping Sauce

Sweet Potato Tempura is a delightful dish that perfectly balances the sweetness of the sweet potatoes with a light, crispy batter. This Japanese-inspired recipe isn’t only easy to prepare but also brings a unique twist to your typical tempura. The combination of the tender, sweet interior of the sweet potatoes with the crunchy exterior creates a satisfying texture that’s certain to please everyone at the table.
To complement the tempura, a savory dipping sauce adds an extra layer of flavor, making this dish perfect as an appetizer or a side dish. Incorporating seasonal ingredients, this Sweet Potato Tempura isn’t just delicious but also provides a healthy alternative to heavier fried foods. The batter is made from simple ingredients, making it easy to whip up in your own kitchen.
Whether you’re hosting a dinner party or simply looking for a tasty snack, this dish is a wonderful way to enjoy the natural sweetness of sweet potatoes while indulging in a classic Japanese cooking technique.
Ingredients (Serves 4-6)
- 2 medium sweet potatoes, peeled and cut into thin wedges
- 1 cup all-purpose flour
- 1/2 cup cornstarch
- 1 teaspoon baking powder
- 1 cup cold water
- Vegetable oil (for frying)
- 1 tablespoon soy sauce
- 1 tablespoon rice vinegar
- 1 teaspoon mirin (optional)
- 1 teaspoon sesame oil
- Salt (to taste)
Cooking Instructions
- Prepare the Sweet Potatoes: Start by peeling the sweet potatoes and cutting them into thin wedges, about 1/4 inch thick. Make sure they’re evenly cut to promote uniform cooking. Soak them in cold water for about 10 minutes to remove excess starch and help them crisp up when fried.
- Make the Tempura Batter: In a large mixing bowl, combine the all-purpose flour, cornstarch, baking powder, and a pinch of salt. Gradually add the cold water while mixing gently with chopsticks or a fork. Be careful not to overmix; you want the batter to remain a bit lumpy for that classic tempura texture.
- Heat the Oil: In a deep frying pan or pot, pour enough vegetable oil to cover the bottom by about 2 inches. Heat the oil over medium-high heat until it reaches about 350°F (175°C). You can test if the oil is ready by dropping a small amount of batter into it; if it bubbles and rises to the surface, the oil is hot enough.
- Fry the Sweet Potatoes: Dredge the sweet potato wedges in the tempura batter, allowing any excess to drip off. Carefully place a few pieces at a time into the hot oil, making sure not to overcrowd the pan. Fry for about 3-4 minutes or until they turn golden brown and crispy. Use a slotted spoon to remove them and place them on a paper towel-lined plate to absorb excess oil.
- Prepare the Dipping Sauce: In a small bowl, combine soy sauce, rice vinegar, mirin (if using), sesame oil, and a pinch of salt. Mix well and adjust the seasoning to your taste. This sauce will provide a savory contrast to the sweetness of the tempura.
- Serve: Arrange the fried sweet potato tempura on a serving platter alongside the dipping sauce. Enjoy the crispy tempura while it’s still warm for the best texture and flavor.
Extra Tips
For the best results, use very cold water when making the batter, as this helps create a lighter, crispier texture. You can also experiment with adding spices or herbs to the batter for added flavor.
Additionally, be mindful of the oil temperature; too hot can lead to burnt tempura, while too cool can result in greasy pieces. Always fry in small batches to maintain the oil temperature. Enjoy your Sweet Potato Tempura as a delicious and healthier option for snacking or entertaining!