

When it comes to ice cream, Japan offers some truly unique and delightful flavors that are worth exploring. From the earthy notes of matcha green tea to the surprising kick of wasabi, each scoop tells a story of culinary creativity. I’ve gathered 13 cool recipes that showcase these distinct tastes, perfect for impressing friends or simply treating yourself. Let’s uncover the invigorating world of Japanese ice cream together and see what surprises await.
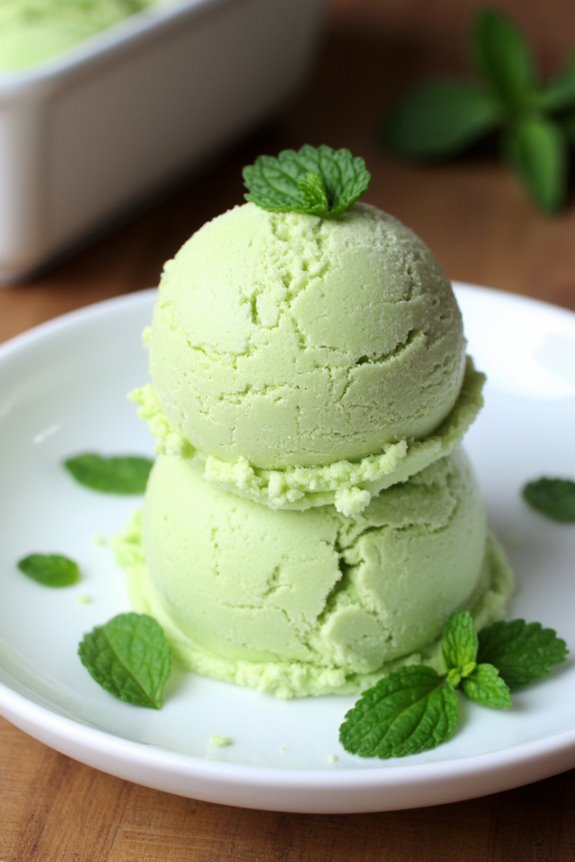
Matcha Green Tea Ice Cream
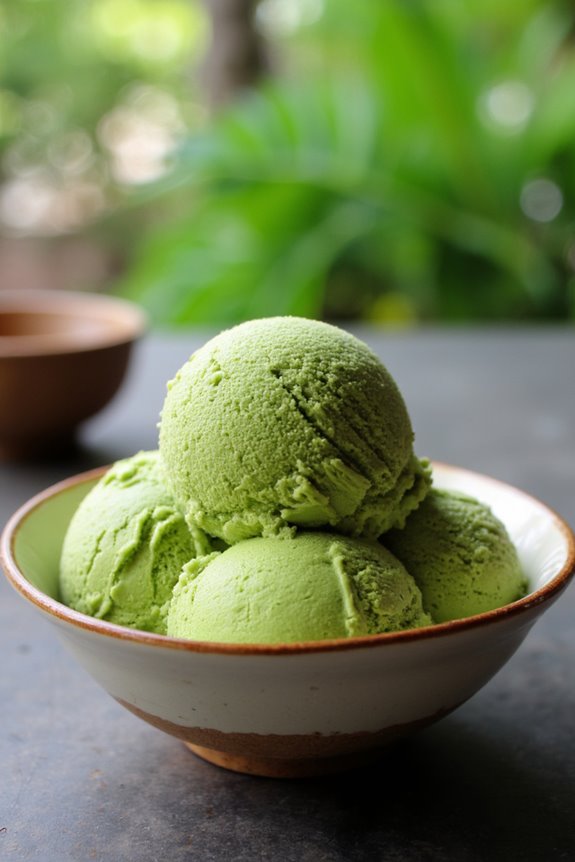
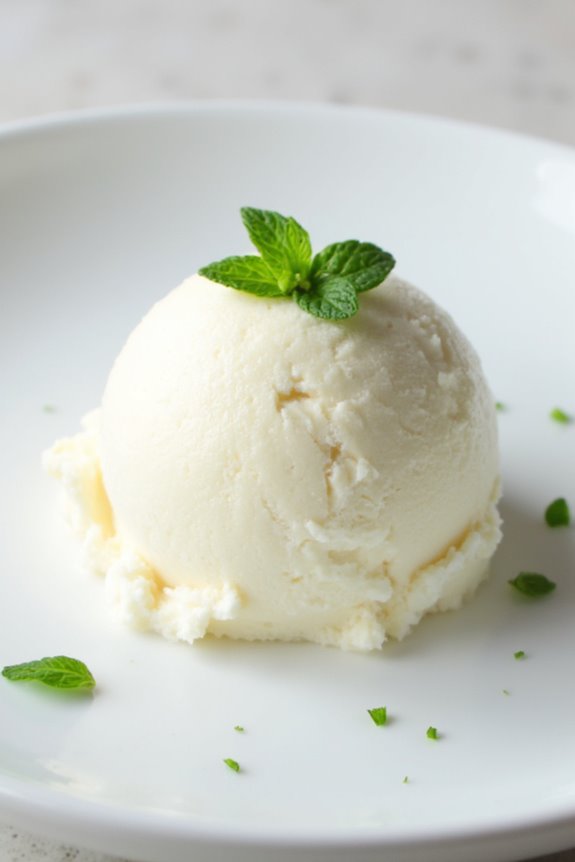
Matcha Green Tea Ice Cream is a delightful and creamy dessert that captures the unique flavor of matcha, a finely powdered green tea. This Japanese-inspired treat isn’t only invigorating but also rich in antioxidants, making it a guilt-free indulgence. The vibrant green color and distinct taste of matcha will transport you to a tranquil tea house in Japan with every spoonful.
Perfect for warm days or as a special dessert for gatherings, this ice cream is sure to impress your friends and family.
Making Matcha Green Tea Ice Cream at home is simpler than you might think. With just a few ingredients and a little patience, you can whip up this delicious treat in no time. The process involves infusing the cream with matcha and sweetening it to achieve the perfect balance of flavors.
Whether you have an ice cream maker or plan to freeze it manually, this recipe can be easily adapted to suit your needs.
Ingredients (Serves 4-6)
- 2 cups heavy cream
- 1 cup whole milk
- 3/4 cup granulated sugar
- 4 large egg yolks
- 2 tablespoons matcha green tea powder
- 1 teaspoon vanilla extract
- A pinch of salt
Cooking Instructions
1. Prepare the Matcha Mixture: In a small bowl, sift the matcha green tea powder to remove any lumps. Add a few tablespoons of the heavy cream to the matcha and whisk until smooth. This guarantees that the matcha is evenly distributed without clumps.
2. Heat the Cream and Milk: In a medium saucepan, combine the remaining heavy cream, whole milk, and sugar. Heat the mixture over medium heat, stirring occasionally until the sugar is completely dissolved and the mixture is warm but not boiling.
3. Whisk the Egg Yolks: In a separate bowl, Whisk the Egg Yolks until they’re pale and slightly thickened. This step is essential for creating a custard base that will give your ice cream a creamy texture.
4. Temper the Egg Yolks: Slowly pour about a cup of the warm cream mixture into the bowl with the egg yolks while whisking constantly. This process, known as tempering, prevents the yolks from cooking too quickly. Once combined, pour the yolk mixture back into the saucepan.
5. Cook the Custard: Cook the mixture over low heat, stirring constantly with a wooden spoon or spatula until it thickens enough to coat the back of the spoon. This should take about 5-7 minutes. Be careful not to let it boil, as this can cause the eggs to scramble.
6. Combine and Chill: Remove the saucepan from the heat and stir in the matcha mixture, vanilla extract, and a pinch of salt. Mix well to guarantee the matcha is fully incorporated.
Transfer the mixture to a bowl, cover, and refrigerate for at least 4 hours or overnight until fully chilled.
7. Churn the Ice Cream: Once the mixture is chilled, churn it in an ice cream maker according to the manufacturer’s instructions until it reaches a soft-serve consistency. If you don’t have an ice cream maker, you can pour the mixture into a shallow dish and freeze it, stirring every 30 minutes until it reaches the desired consistency.
8. Freeze and Serve: Transfer the churned ice cream to an airtight container and freeze for at least 4 hours to firm up. Once ready to serve, scoop into bowls or cones and enjoy!
Extra Tips
For an exquisite experience, try serving your Matcha Green Tea Ice Cream with a drizzle of honey or a sprinkle of roasted sesame seeds for added texture.
If you want to experiment with flavors, consider blending in some white chocolate or coconut milk for a unique twist. Remember to always use high-quality matcha, as it has a major impact on the flavor and color of your ice cream.
Black Sesame Ice Cream
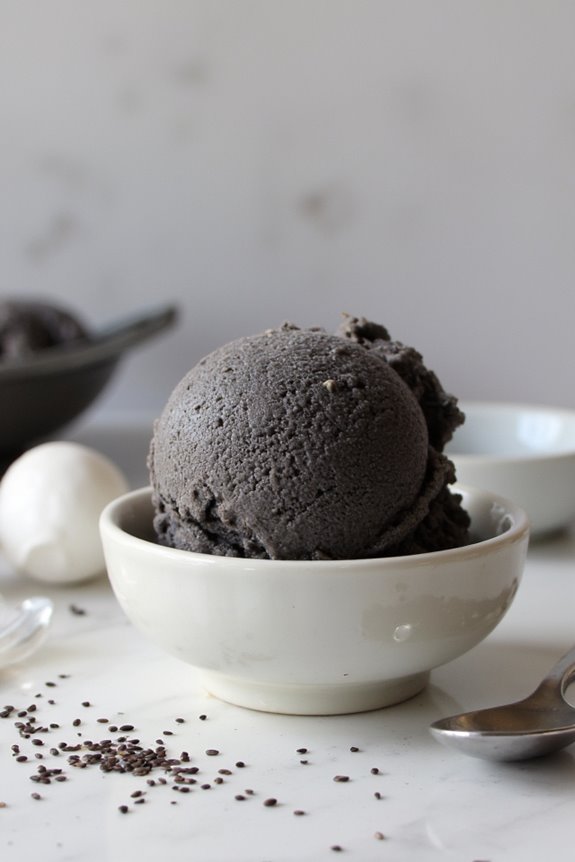
Black sesame ice cream is a delightful and unique dessert that showcases the rich, nutty flavor of toasted black sesame seeds. This Japanese-inspired treat isn’t only creamy but also has a beautiful grayish-black hue that’s sure to impress your guests.
The combination of sweet and savory flavors creates a perfect balance that makes this ice cream a must-try for anyone looking to explore new tastes. Whether served on its own or alongside fresh fruit, this ice cream is a revitalizing finish to any meal.
Making black sesame ice cream at home is a simple process that requires minimal ingredients. The key to achieving a smooth and creamy texture lies in the base, which combines heavy cream, milk, and sugar with the distinct flavor of black sesame seeds.
Allowing the mixture to chill thoroughly before churning in an ice cream maker is vital for developing the rich flavor and attaining the desired consistency. Once prepared, this ice cream can be enjoyed immediately or stored for later indulgence.
Ingredients (Serves 4-6):
- 1 cup black sesame seeds
- 2 cups heavy cream
- 1 cup whole milk
- 3/4 cup granulated sugar
- 1 teaspoon vanilla extract
- Pinch of salt
Cooking Instructions:
- Toast the Sesame Seeds: In a dry skillet over medium heat, add the black sesame seeds. Toast them for about 5 minutes, stirring frequently, until they become fragrant and slightly darker in color. Be careful not to burn them. Once toasted, remove the seeds from the heat and let them cool.
- Grind the Sesame Seeds: Once the sesame seeds have cooled, transfer them to a food processor or spice grinder. Pulse until they form a fine paste. You may need to scrape down the sides of the processor to confirm all the seeds are ground evenly.
- Prepare the Ice Cream Base: In a medium saucepan, combine the heavy cream, whole milk, sugar, vanilla extract, and a pinch of salt. Whisk the mixture over medium heat until the sugar has completely dissolved. Don’t allow it to boil.
- Incorporate the Sesame Paste: Remove the saucepan from heat and add the ground black sesame paste to the cream mixture. Whisk until fully combined and smooth.
- Chill the Mixture: Pour the ice cream base into a bowl, cover it with plastic wrap, and refrigerate for at least 4 hours or overnight. This step is essential for enhancing the flavors and guaranteeing a creamy texture.
- Churn the Ice Cream: After chilling, pour the mixture into an ice cream maker and churn according to the manufacturer’s instructions. This usually takes about 20-25 minutes, or until the ice cream reaches a soft-serve consistency.
- Freeze the Ice Cream: Transfer the churned ice cream into an airtight container, smoothing the top with a spatula. Freeze for at least 2-4 hours, or until firm.
- Serve: Once the ice cream is firm, scoop it into bowls and enjoy! You can garnish it with additional toasted sesame seeds or serve alongside fresh fruit if desired.
Extra Tips:
To enhance the flavor of your black sesame ice cream, consider adding a tablespoon of honey or maple syrup to the base mixture for added sweetness.
If you don’t have an ice cream maker, you can still make this dessert by pouring the mixture into a shallow dish and stirring it every 30 minutes until it reaches a creamy consistency.
Additionally, the black sesame paste can be prepared in advance and stored in the fridge for up to a week, making your ice cream preparation even easier.
Yuzu Citrus Sorbet

Yuzu Citrus Sorbet is a revitalizing dessert that perfectly captures the essence of Japanese flavors. Yuzu, a citrus fruit with a tart and fragrant profile, elevates this sorbet to a unique treat that’s both tangy and sweet. This recipe isn’t only simple to follow but also requires minimal ingredients, making it a great option for a light dessert after any meal or as a palate cleanser between courses.
This delightful sorbet is perfect for warm weather or as a special treat to impress your guests. Its vibrant flavor and appealing color will surely make it a standout on your dessert table. Plus, the absence of dairy makes it a wonderful option for those who are lactose intolerant or looking for a vegan-friendly dessert. Let’s plunge into crafting this delicious Yuzu Citrus Sorbet!
Ingredients (Serves 4-6):
- 1 cup yuzu juice (freshly squeezed, about 4-5 yuzu fruits)
- 1 cup granulated sugar
- 1 cup water
- 1 tablespoon lemon juice (freshly squeezed)
- A pinch of salt
Cooking Instructions:
- Prepare the Yuzu Juice: Start by washing the yuzu fruits thoroughly. Cut each fruit in half and use a juicer or a reamer to extract the juice. Strain the juice through a fine mesh sieve into a bowl to remove any seeds and pulp. You should have about 1 cup of yuzu juice.
- Make the Simple Syrup: In a small saucepan, combine 1 cup of granulated sugar and 1 cup of water. Heat over medium heat, stirring occasionally until the sugar fully dissolves. This process creates a simple syrup that will sweeten your sorbet. Once the sugar is dissolved, remove the saucepan from heat and let it cool to room temperature.
- Combine Ingredients: In a large mixing bowl, combine the yuzu juice, the cooled simple syrup, and 1 tablespoon of lemon juice. Add a pinch of salt to enhance the flavors. Stir the mixture well until everything is fully incorporated.
- Chill the Mixture: Cover the bowl with plastic wrap or a lid and place it in the refrigerator for about 1-2 hours. This step helps the mixture to become completely chilled, which is essential for achieving the right texture in your sorbet.
- Churn the Sorbet: Once chilled, pour the mixture into an ice cream maker. Follow the manufacturer’s instructions to churn the sorbet until it reaches a soft-serve consistency. This usually takes about 20-30 minutes.
- Freeze the Sorbet: Transfer the churned sorbet into an airtight container and spread it evenly. Press a piece of parchment paper over the surface of the sorbet to prevent ice crystals from forming. Freeze for at least 4 hours, or until solid.
- Serve and Enjoy: Once the sorbet is frozen, scoop it into bowls or dessert cups. Garnish with fresh mint leaves or additional yuzu zest if desired. Enjoy your revitalizing Yuzu Citrus Sorbet!
Extra Tips:
For the best results, confirm your yuzu juice is freshly squeezed, as bottled juices can lack the vibrant flavor needed for this sorbet.
If you don’t have access to fresh yuzu, you can substitute with a mix of lemon and lime juice to achieve a similar tangy profile, though the unique flavor of yuzu is irreplaceable.
Additionally, if you don’t have an ice cream maker, you can pour the mixture into a shallow dish and freeze it, stirring every 30 minutes to break up ice crystals until it reaches the desired texture. Enjoy!
Mochi Ice Cream
Mochi ice cream is a delightful Japanese dessert that combines the chewy texture of mochi, a rice cake made from glutinous rice, with the creamy goodness of ice cream. This unique treat has gained popularity around the world, offering an interesting contrast in textures and flavors.
It’s a perfect dessert for warm weather or any special occasion, and it can be customized with a variety of ice cream flavors to suit your taste. Making mochi ice cream at home can be a fun and rewarding experience, allowing you to explore the flavors of Japan right in your kitchen.
To accomplish the perfect mochi ice cream, you’ll need to prepare the mochi dough and your choice of ice cream. The process involves a few steps, but the result is well worth the effort. Once you master the art of making mochi, you can experiment with different fillings and flavors, creating your very own signature mochi ice cream.
Gather your ingredients and get ready to impress your friends and family with this delightful dessert!
Ingredients (Serves 4-6)
- 1 cup sweet rice flour (also known as mochiko)
- 1/4 cup granulated sugar
- 1 cup water
- Cornstarch (for dusting)
- 1 pint of your favorite ice cream (softened)
Cooking Instructions
- Prepare the Ice Cream: Start by selecting your favorite ice cream flavor and let it soften at room temperature for about 10-15 minutes. This will make it easier to scoop and shape later. Once softened, scoop the ice cream into small balls (about 1 inch in diameter) and place them on a parchment-lined baking sheet. Freeze the ice cream balls for about 1-2 hours, until they’re firm.
- Make the Mochi Dough: In a microwave-safe bowl, combine the sweet rice flour and granulated sugar. Gradually add the water, stirring until you have a smooth mixture. Cover the bowl with plastic wrap and microwave for 1 minute. Remove and stir, then cover again and microwave for an additional minute. Stir once more, then microwave for a final 30 seconds. The mixture should be thick and sticky.
- Prepare Your Work Surface: Dust a clean surface with cornstarch to prevent sticking. Carefully transfer the cooked mochi dough onto this surface. While the dough is still warm, sprinkle more cornstarch on top to avoid it sticking to your hands.
- Roll and Shape the Mochi: Use your hands to gently flatten and stretch the mochi dough into a rectangle about 1/4 inch thick. Cut the dough into squares (about 3 inches each). Make sure to dust the squares with cornstarch to prevent sticking.
- Wrap the Ice Cream: Take one of the frozen ice cream balls and place it in the center of a mochi square. Gently fold the edges of the mochi over the ice cream, pinching to seal it completely. Confirm there are no openings or gaps. Repeat this process for each ice cream ball.
- Final Freeze: Once all the mochi ice cream balls are formed, place them back on the parchment-lined baking sheet and freeze them for an additional 30 minutes to firm up.
Extra Tips
When making mochi ice cream, it’s important to work quickly with the mochi dough while it’s warm since it becomes more difficult to manipulate as it cools. If you find the dough too sticky, you can dust it with more cornstarch.
Additionally, you can experiment with different ice cream flavors and even create a variety of mochi ice creams to cater to your guests’ preferences. For a fun twist, consider adding fillings like fruit or sweet red bean paste inside the mochi along with the ice cream!
Sweet Red Bean Ice Cream
Sweet Red Bean Ice Cream, or “Azuki Ice Cream,” is a delightful Japanese dessert that combines the creaminess of traditional ice cream with the unique flavor of sweetened red beans (azuki beans). This treat isn’t only delicious but also offers a different experience from standard ice cream flavors. The red beans add a subtle sweetness and a slightly grainy texture that contrasts beautifully with the smoothness of the ice cream.
Making Sweet Red Bean Ice Cream at home is a rewarding process that allows you to enjoy this unique dessert any time you want. The recipe requires simple ingredients and can be made without an ice cream maker, making it accessible for everyone. Whether you’re looking to impress guests or simply indulge in a sweet treat, this ice cream will be a delightful addition to your dessert repertoire.
Ingredients (serving size: 4-6 people)
- 1 cup sweetened red bean paste (store-bought or homemade)
- 2 cups heavy cream
- 1 cup whole milk
- 3/4 cup granulated sugar
- 1 teaspoon vanilla extract
- 1/2 teaspoon salt
- 1 tablespoon corn syrup (optional, for creaminess)
Cooking Instructions
- Prepare the Red Bean Paste: If you haven’t purchased sweetened red bean paste, you’ll need to make your own. Start by rinsing 1 cup of azuki beans under cold water. Place them in a pot, cover with water, and bring to a boil. Simmer until the beans are tender (about 1 hour). Drain the beans and return them to the pot, adding 1 cup of sugar. Cook on low heat until the mixture thickens and becomes paste-like, stirring frequently. Allow it to cool before using.
- Mix the Base: In a mixing bowl, combine the heavy cream, whole milk, granulated sugar, vanilla extract, and salt. Use a whisk to blend the ingredients until the sugar is fully dissolved and the mixture is smooth.
- Incorporate the Red Bean Paste: Gently fold the sweetened red bean paste into the cream mixture. Make sure the paste is evenly distributed throughout the mixture, but be careful not to overmix; you want to maintain some texture from the beans.
- Chill the Mixture: Transfer the mixture to a container and cover it. Place it in the refrigerator for at least 2 hours, or until it’s completely chilled. This step is essential for achieving a creamy texture once it’s churned.
- Freeze the Ice Cream: If you have an ice cream maker, follow the manufacturer’s instructions to churn the mixture until it reaches a soft-serve consistency. If you don’t have an ice cream maker, pour the mixture into a freezer-safe container and place it in the freezer. Every 30 minutes, stir the mixture vigorously with a fork for the first 3 hours to help break up ice crystals and create a smooth texture.
- Serve: Once the ice cream is set and has a scoopable consistency, serve it in bowls or cones. You can garnish it with additional red bean paste or mochi for an extra special touch.
Extra Tips
To enhance the flavor of your Sweet Red Bean Ice Cream, consider adding a pinch of matcha powder for a subtle earthy note or a splash of coconut milk for a tropical twist.
If you prefer a silkier texture, the optional corn syrup helps inhibit ice crystal formation, resulting in a creamier ice cream. Remember to let the ice cream sit at room temperature for a few minutes before serving to make scooping easier. Enjoy your homemade Japanese treat!
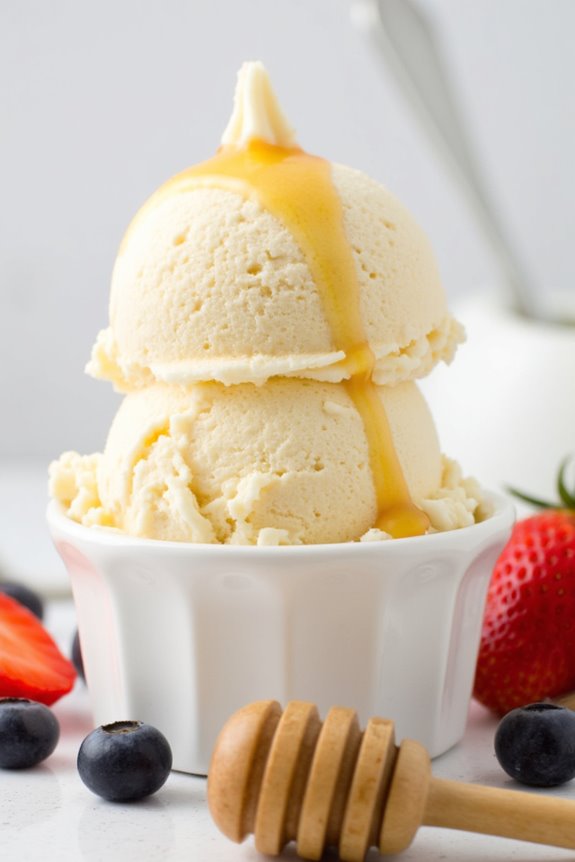
Sake Ice Cream
Sake Ice Cream is a delightful and unique dessert that beautifully combines the rich flavors of traditional Japanese sake with the creamy texture of ice cream. This recipe is perfect for those looking to explore a new twist on classic ice cream, providing a sophisticated and revitalizing treat for warm days or special occasions.
The subtle sweetness of sake enhances the overall flavor profile, making it an intriguing option for adventurous eaters and sake enthusiasts alike.
Making Sake Ice Cream at home is surprisingly easy and requires just a few simple ingredients. With the right preparation, you can create a smooth and creamy ice cream that’s sure to impress your friends and family. Serve it in small bowls or cones and enjoy the delightful fusion of flavor that this Japanese-inspired dessert offers.
Ingredients (Serves 4-6)
- 1 cup sake
- 1 cup heavy cream
- 1 cup whole milk
- 3/4 cup granulated sugar
- 1 teaspoon vanilla extract
- 1 tablespoon cornstarch
- A pinch of salt
Cooking Instructions
- Prepare the Sake Mixture: In a medium saucepan, combine the sake and sugar over medium heat. Stir gently until the sugar is completely dissolved. This will create a sweet base for your ice cream.
- Mix the Dairy Ingredients: In a separate bowl, whisk together the heavy cream, whole milk, vanilla extract, cornstarch, and salt. Make sure the cornstarch is fully dissolved to avoid any lumps in your ice cream.
- Combine and Heat: Pour the dairy mixture into the saucepan with the dissolved sake and sugar. Cook over medium heat, stirring constantly, until the mixture begins to thicken slightly, about 5-7 minutes. Don’t let it boil, as you want to maintain a smooth texture.
- Cool the Mixture: Once thickened, remove the saucepan from heat and allow the mixture to cool to room temperature. Once cooled, transfer it to the refrigerator and chill for at least 2 hours or until completely cold.
- Churn the Ice Cream: Once the mixture is chilled, pour it into an ice cream maker and churn according to the manufacturer’s instructions, usually about 20-25 minutes, until it reaches a soft-serve consistency.
- Freeze the Ice Cream: Transfer the churned ice cream into an airtight container and freeze for at least 4 hours or until firm. This will help it achieve the perfect scoopable texture.
- Serve and Enjoy: Once the ice cream is fully frozen, scoop it into bowls or cones, and enjoy the unique flavors of your homemade Sake Ice Cream!
Extra Tips
When making Sake Ice Cream, it’s crucial to use a good quality sake for the best flavor. If you prefer a stronger sake flavor, you can slightly increase the amount used, but be mindful of balancing the sweetness.
Additionally, make sure that your ice cream maker is fully chilled before use for the best results. For added texture and flavor, consider mixing in some chopped fruits or nuts during the last few minutes of churning. Enjoy your deliciously unique dessert!
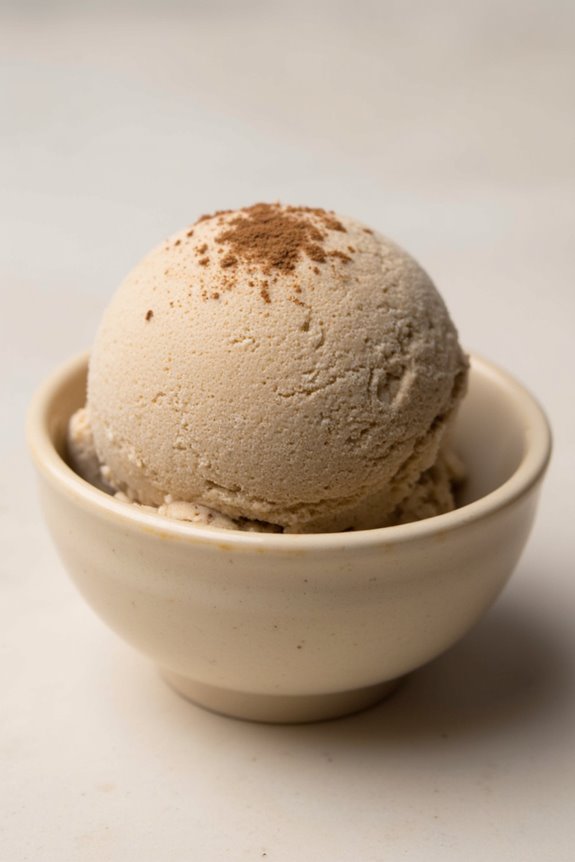
Kinako (Roasted Soybean Flour) Ice Cream
Kinako ice cream is a delightful treat that showcases the nutty flavor of roasted soybean flour, offering a unique twist on traditional ice cream. This Japanese-inspired dessert is creamy, subtly sweet, and boasts a rich, toasty aroma that’s certain to impress your family and friends.
The combination of kinako with the smooth texture of ice cream creates a harmonious blend, making it an ideal dessert for any occasion, especially in the warm summer months.
Making kinako ice cream at home is easier than you might think. With just a few simple ingredients and some patience, you can whip up this delicious treat that’s bound to become a favorite in your household.
Whether served on its own, drizzled with a bit of honey, or paired with fresh fruits, kinako ice cream is a versatile dessert that brings a taste of Japan to your kitchen.
Ingredients (Serves 4-6):
- 1 cup heavy cream
- 1 cup whole milk
- 3/4 cup granulated sugar
- 1/2 cup kinako (roasted soybean flour)
- 1/2 teaspoon vanilla extract
- 1/4 teaspoon salt
- 1 tablespoon cornstarch (optional for thickness)
Cooking Instructions:
1. Mix the Base: In a medium saucepan, combine the heavy cream, whole milk, and granulated sugar. Whisk the mixture over medium heat until the sugar has completely dissolved and the mixture is warm but not boiling.
This step guarantees that the sugar integrates well into the cream, creating a smooth base.
2. Incorporate Kinako: Gradually whisk in the kinako, vanilla extract, and salt into the warm cream mixture. If you prefer a thicker consistency, you can also mix in the cornstarch at this stage.
Keep whisking until everything is well blended and smooth, allowing the kinako to impart its flavor and aroma.
3. Chill the Mixture: Remove the saucepan from heat and let the mixture cool to room temperature. Once cooled, cover the bowl with plastic wrap and refrigerate for at least 4 hours or overnight.
Chilling the mixture helps to develop the flavor and guarantees a creamy texture once churned.
4. Churn the Ice Cream: After chilling, pour the mixture into an ice cream maker, following the manufacturer’s instructions. Churn until it reaches a soft-serve consistency, which usually takes about 20-25 minutes.
This step introduces air into the mixture, creating a light and fluffy texture.
5. Freeze: Transfer the churned ice cream into an airtight container and smooth the top with a spatula. Place in the freezer for at least 4 hours or until firm.
This final freezing step allows the ice cream to harden to the perfect scoopable consistency.
Extra Tips:
When making kinako ice cream, feel free to adjust the sweetness according to your taste preferences.
If you want a more pronounced kinako flavor, increase the amount slightly, but be cautious not to overpower the creaminess. Additionally, you can experiment by adding mix-ins like chocolate chips or nuts during the last few minutes of churning for added texture.
For a sophisticated touch, consider drizzling the finished ice cream with a little honey or topping it with fresh seasonal fruits before serving. Enjoy your homemade kinako ice cream!
Hojicha (Roasted Green Tea) Ice Cream
Hojicha ice cream is a delightful and unique dessert that showcases the warm, toasty flavors of roasted green tea. Originating from Japan, hojicha is made by roasting sencha or bancha green tea leaves, which imparts a nutty aroma and a rich, earthy flavor that makes it a perfect base for ice cream. This creamy treat isn’t only delicious but also provides a revitalizing alternative to traditional ice creams, making it a fantastic choice for any occasion.
Making hojicha ice cream at home is surprisingly simple and requires only a handful of ingredients. The process involves infusing heavy cream and milk with roasted green tea, allowing the flavors to meld beautifully. Once combined, the mixture is churned into a smooth and creamy ice cream that’s sure to impress your friends and family. With its unique flavor profile and creamy texture, hojicha ice cream is perfect for serving at gatherings or enjoying on a warm day.
Ingredients (Serves 4-6):
- 1 cup heavy cream
- 1 cup whole milk
- 1/2 cup granulated sugar
- 2 tablespoons hojicha powder (roasted green tea)
- 4 large egg yolks
- 1 teaspoon vanilla extract
- A pinch of salt
Instructions:
- Prepare the Hojicha Infusion: In a saucepan, combine the heavy cream, whole milk, and hojicha powder. Heat the mixture over medium heat, stirring constantly until it’s hot but not boiling. This allows the flavors from the hojicha to infuse into the cream and milk. Remove from heat and let it steep for about 10 minutes.
- Whisk the Egg Yolks: In a separate bowl, whisk the egg yolks and granulated sugar together until the mixture becomes pale and slightly thickened. This step is vital for creating a rich and creamy ice cream base.
- Temper the Egg Yolks: Slowly pour a small amount of the hot hojicha mixture into the egg yolk mixture while whisking constantly. This process, known as tempering, prevents the eggs from scrambling. Once the yolks are warmed, gradually add the rest of the hojicha mixture, whisking continuously.
- Cook the Mixture: Return the combined mixture to the saucepan and cook over medium-low heat, stirring constantly with a wooden spoon or spatula until it thickens slightly and coats the back of the spoon (around 170°F or 77°C). Be careful not to let it boil.
- Strain the Mixture: Once thickened, remove the saucepan from heat and strain the mixture through a fine-mesh sieve into a clean bowl. This step removes any undissolved hojicha powder and guarantees a smooth texture.
- Add Flavorings: Stir in the vanilla extract and a pinch of salt to enhance the flavors. Allow the mixture to cool to room temperature, then cover it with plastic wrap and refrigerate for at least 4 hours, or overnight for best results.
- Churn the Ice Cream: Once chilled, pour the mixture into an ice cream maker and churn according to the manufacturer’s instructions until it reaches a soft-serve consistency. This typically takes about 20-25 minutes.
- Freeze the Ice Cream: Transfer the churned ice cream to an airtight container and freeze for at least 4 hours, or until firm. This final freeze will give the ice cream the perfect scoopable texture.
Extra Tips:
To enhance the flavor of your hojicha ice cream, try using high-quality hojicha powder sourced from a reputable tea shop. Additionally, if you prefer a more pronounced tea flavor, you can increase the amount of hojicha powder slightly, but be cautious not to overpower the mixture.
For a fun twist, consider adding mix-ins like chocolate chips or crushed nuts during the last few minutes of churning. Enjoy your homemade hojicha ice cream!
Coconut Milk and Mango Ice Cream
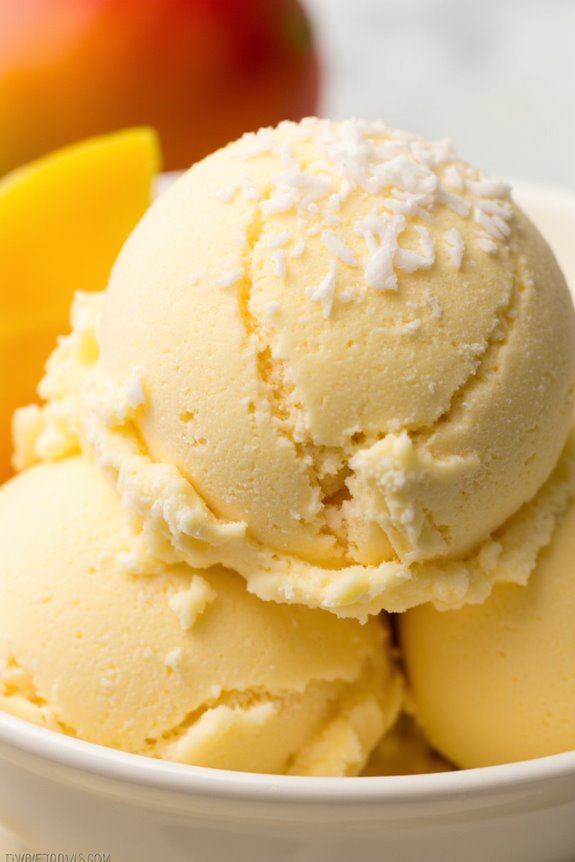
Coconut Milk and Mango Ice Cream is a delightful frozen treat that combines the creamy richness of coconut milk with the tropical sweetness of ripe mangoes. This recipe is perfect for those hot summer days or as a rejuvenating dessert to impress your guests.
With its smooth texture and vibrant flavor, this ice cream captures the essence of tropical paradises and is also dairy-free, making it suitable for a variety of dietary preferences.
Making this ice cream isn’t only simple but also allows you to enjoy the natural flavors of fresh mangoes. The blend of coconut milk lends a luscious creaminess that mimics traditional ice cream, while the fresh mango puree adds a burst of fruity goodness.
Whether you’re serving it in a cone or in a bowl, this Coconut Milk and Mango Ice Cream is sure to be a hit with both kids and adults alike.
Ingredients (serving size: 4-6 people)
- 2 ripe mangoes, peeled and pitted
- 1 cup coconut milk (full fat for creaminess)
- 1/2 cup sugar (or to taste)
- 1 teaspoon vanilla extract
- 1 tablespoon lime juice
- A pinch of salt
Cooking Instructions
1. Prepare the Mangoes: Start by cutting the ripe mangoes into chunks. Make sure the mangoes are sweet and fully ripe for the best flavor. Place the chunks in a blender or food processor.
2. Blend the Ingredients: Add the coconut milk, sugar, vanilla extract, lime juice, and a pinch of salt to the blender with the mango chunks. Blend everything together until you have a smooth and creamy mixture.
Taste the mixture and adjust the sweetness if needed by adding more sugar.
3. Chill the Mixture: Once blended, transfer the mango and coconut mixture into a bowl. Cover it with plastic wrap or a lid and refrigerate for about 1-2 hours.
This chilling step helps the mixture to be cold enough for churning, which enhances the texture of the ice cream.
4. Churn the Ice Cream: After chilling, pour the mixture into an ice cream maker. Follow the manufacturer’s instructions for churning. Typically, this will take about 20-25 minutes, and you should see the mixture begin to thicken and resemble soft serve ice cream.
5. Freeze the Ice Cream: Once churned, transfer the ice cream to an airtight container and smooth the top with a spatula. Cover the container and place it in the freezer for at least 4 hours, or until the ice cream is firm.
6. Serve and Enjoy: Once the ice cream is fully frozen, scoop it into bowls or cones and serve immediately.
You can garnish it with extra mango slices or shredded coconut for added flair.
Extra Tips
For the best flavor, choose the ripest mangoes you can find, as their natural sweetness will enhance the overall taste of the ice cream.
If you don’t have an ice cream maker, you can still make this treat by placing the mixture in a shallow dish and freezing it, stirring every 30 minutes until it reaches the desired consistency.
Additionally, feel free to experiment with different flavor combinations by adding other fruits or spices, such as a hint of cardamom or a splash of rum for an adult twist!
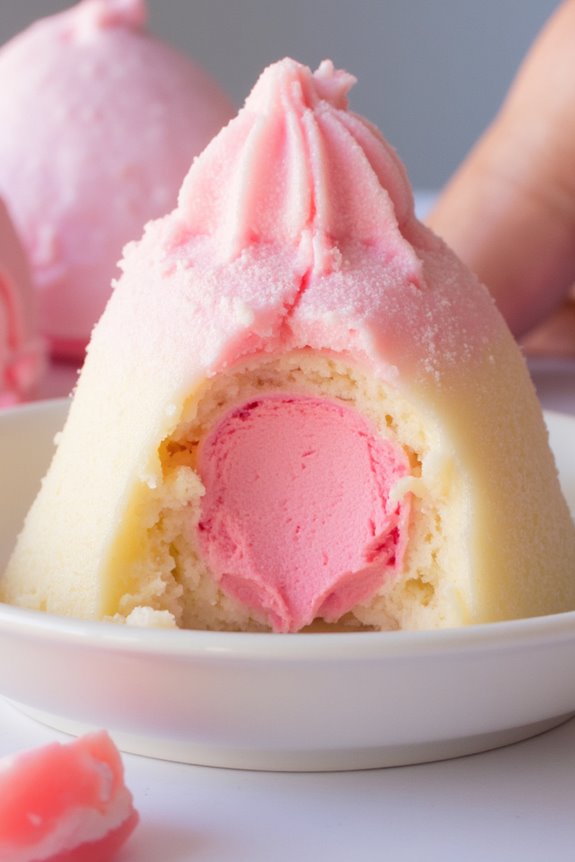
Strawberry-Sakura Ice Cream
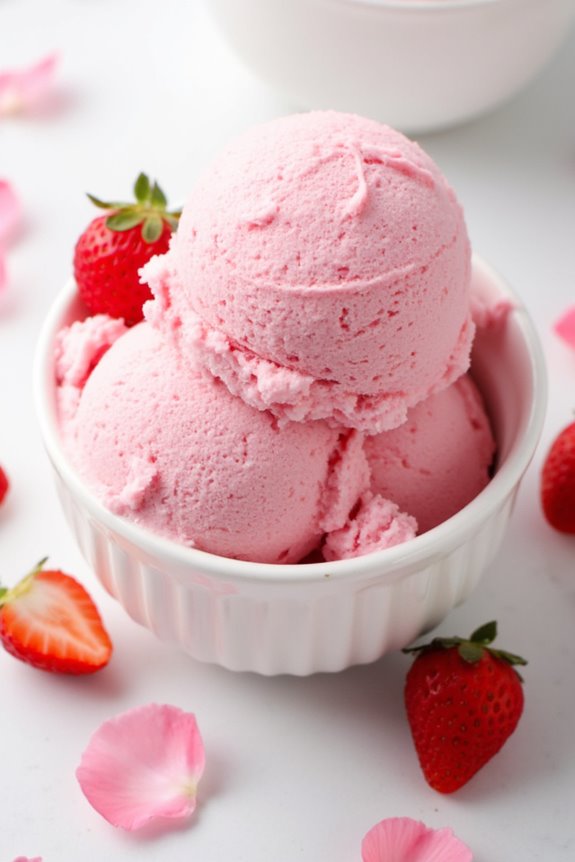
Indulge in the delightful flavors of Japan with this Strawberry-Sakura Ice Cream, a perfect blend of sweet strawberries and delicate sakura essence. This creamy frozen treat isn’t only a feast for the taste buds but also a visual delight, showcasing a beautiful pink hue reminiscent of cherry blossoms in full bloom.
Ideal for warm weather or special occasions, this ice cream will transport you to the serene beauty of Japan’s spring season with every scoop.
Making Strawberry-Sakura Ice Cream at home is surprisingly simple and requires just a few ingredients. The combination of fresh strawberries and sakura (cherry blossom) flavoring creates a unique taste profile that’s both invigorating and fragrant.
Whether you’re serving it at a family gathering or enjoying a quiet evening at home, this ice cream will surely impress your guests and leave them craving more.
Ingredients (Serves 4-6):
- 2 cups fresh strawberries, hulled and sliced
- 1 cup heavy cream
- 1 cup whole milk
- 3/4 cup granulated sugar
- 1 teaspoon vanilla extract
- 1-2 tablespoons sakura syrup or cherry blossom extract
- A pinch of salt
Cooking Instructions:
1. Prepare the Strawberries: Begin by washing and hulling the fresh strawberries. Slice them into smaller pieces and place them in a mixing bowl. Add a tablespoon of sugar to the strawberries to enhance their natural sweetness and allow them to sit for about 15-20 minutes.
This process will help draw out the juices from the strawberries, making them more flavorful.
2. Blend the Strawberry Mixture: After the strawberries have macerated, transfer them to a blender or food processor. Blend until smooth, leaving a few small chunks for texture if desired. Set the blended strawberry mixture aside.
3. Mix the Base: In a separate large mixing bowl, whisk together the heavy cream, whole milk, remaining sugar, vanilla extract, sakura syrup (or cherry blossom extract), and a pinch of salt until the sugar is completely dissolved.
This will create a rich and creamy base for your ice cream.
4. Combine the Mixtures: Gently fold the blended strawberry mixture into the cream base. Make sure the strawberry mixture is evenly distributed throughout the base to guarantee a consistent flavor in every scoop.
5. Chill the Mixture: Cover the bowl with plastic wrap or a lid and place it in the refrigerator for at least 2 hours. Chilling the mixture will help improve the texture of the ice cream when it’s churned.
6. Churn the Ice Cream: Once the mixture is chilled, pour it into an ice cream maker and churn according to the manufacturer’s instructions. This usually takes about 20-25 minutes, resulting in a soft-serve consistency.
7. Freeze the Ice Cream: Transfer the churned ice cream into an airtight container and smooth the top with a spatula. Seal the container and place it in the freezer for at least 4 hours, or until firm.
8. Serve: When ready to Serve, scoop the Strawberry-Sakura Ice Cream into bowls or cones. Garnish with fresh strawberries or a drizzle of sakura syrup if desired.
Extra Tips:
For an even more authentic flavor, consider using real sakura petals when available or opting for high-quality sakura syrup from a specialty store.
Additionally, if you don’t have an ice cream maker, you can pour the mixture into a shallow dish, freeze it, and stir every 30 minutes for the first 2-3 hours to create a creamy texture.
Enjoy your homemade Strawberry-Sakura Ice Cream!
Wasabi Ice Cream
Wasabi ice cream is a unique and adventurous dessert that beautifully combines the creamy sweetness of traditional ice cream with the unexpected heat of wasabi. This intriguing fusion originates from Japan, where culinary experimentation meets traditional flavors. The result is a revitalizing treat that packs a punch and is sure to surprise your taste buds.
Perfect for those who enjoy bold flavors, wasabi ice cream can be served as a palate cleanser between courses or as a daring dessert that will leave your guests talking.
Creating wasabi ice cream at home can be a fun and rewarding experience. With just a few ingredients and a bit of patience, you can whip up this delightful concoction that’s both sweet and spicy. Whether you’re looking to impress at a dinner party or just want to try something new, this recipe will guide you through the process step by step, ensuring that your wasabi ice cream turns out creamy and flavorful.
Ingredients (Serves 4-6)
- 1 cup heavy cream
- 1 cup whole milk
- 3/4 cup granulated sugar
- 1/4 cup wasabi paste (adjust to taste)
- 1 teaspoon vanilla extract
- 1/2 teaspoon salt
- 3 large egg yolks
Cooking Instructions
- Prepare the Base: In a medium saucepan, combine the heavy cream, whole milk, and granulated sugar. Heat the mixture over medium heat, stirring occasionally, until the sugar has completely dissolved and the mixture is warm but not boiling. This will create a creamy base for your ice cream.
- Mix Wasabi: In a small bowl, mix the wasabi paste with a few tablespoons of the warm cream mixture to create a smooth paste. This step helps to evenly distribute the wasabi flavor throughout the ice cream.
- Whisk Egg Yolks: In a separate bowl, whisk the egg yolks until they’re pale and slightly thickened. This will give your ice cream a rich texture.
- Temper the Egg Yolks: Gradually pour the warm cream mixture into the egg yolks while whisking constantly. This process, known as tempering, prevents the yolks from curdling. Once combined, pour the mixture back into the saucepan.
- Thicken the Mixture: Cook the combined mixture over low heat, stirring continuously, until it thickens enough to coat the back of a spoon. This usually takes about 5-7 minutes. Be careful not to let it boil.
- Add Wasabi and Vanilla: Once the mixture has thickened, remove it from the heat and stir in the prepared wasabi paste, vanilla extract, and salt. Taste and adjust the wasabi according to your preference, keeping in mind that it will deepen in flavor as it freezes.
- Chill the Mixture: Allow the mixture to cool to room temperature, then cover and refrigerate for at least 4 hours or overnight. Chilling the base will help it churn into a smoother ice cream.
- Churn the Ice Cream: Once chilled, pour the mixture into your ice cream maker and churn according to the manufacturer’s instructions until it reaches a soft-serve consistency.
- Freeze the Ice Cream: Transfer the churned ice cream into an airtight container and freeze for at least 4 hours, or until firm.
- Serve: When ready to serve, scoop the wasabi ice cream into bowls or cones. Enjoy this unique dessert that combines sweet and spicy flavors!
Extra Tips
When making wasabi ice cream, it’s important to taste as you go to achieve the desired level of heat. Wasabi can vary in intensity, so start with less and gradually increase the amount until you find the perfect balance for your palate.
Additionally, consider pairing the ice cream with fresh fruits like mango or strawberries to complement the flavors and add a revitalizing contrast. Enjoy your culinary adventure with this bold and exciting dessert!
Uji Matcha Swirl Ice Cream
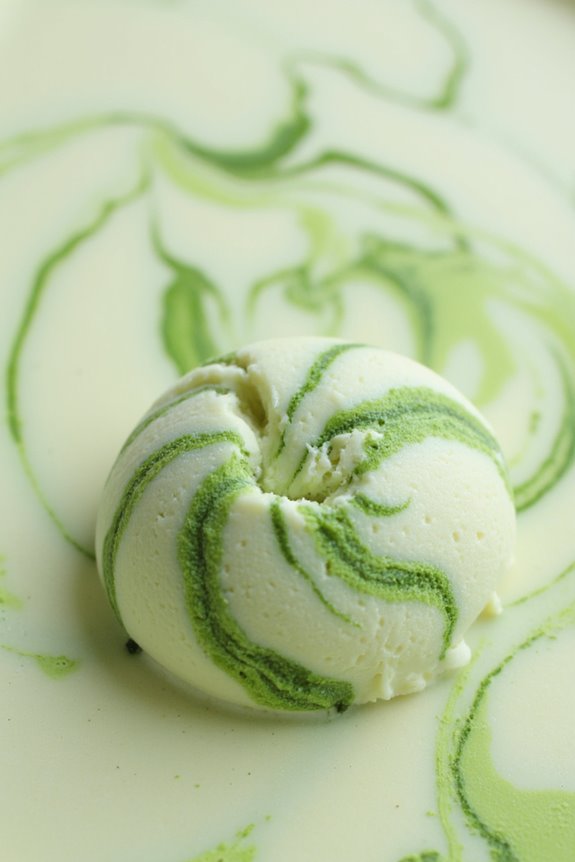
Uji Matcha Swirl Ice Cream is a delightful and invigorating dessert that combines the rich, earthy flavors of Uji matcha with a creamy, smooth ice cream base. Originating from the Uji region of Japan, known for its high-quality matcha, this ice cream offers a unique twist on the traditional frozen treat. The vibrant green swirls of matcha not only provide a striking visual contrast but also infuse each bite with the distinct taste of premium green tea.
Making Uji Matcha Swirl Ice Cream at home is easier than you might think, and it requires just a few ingredients. With a little patience and the right technique, you can create a creamy dessert that’s perfect for hot summer days or as a special treat for any occasion. This recipe serves 4-6 people, making it ideal for sharing with family and friends.
Ingredients:
- 2 cups heavy cream
- 1 cup whole milk
- 3/4 cup granulated sugar
- 1 teaspoon vanilla extract
- 4 large egg yolks
- 3 tablespoons Uji matcha green tea powder
- 1/4 cup hot water
Instructions:
- Prepare the Matcha Mixture: In a small bowl, whisk together the Uji matcha powder and hot water until the matcha is fully dissolved and forms a smooth paste. Set aside to cool slightly.
- Make the Custard Base: In a medium saucepan, combine the heavy cream, whole milk, and granulated sugar. Heat the mixture over medium heat, stirring occasionally, until it’s warm and the sugar is dissolved. Don’t let it boil.
- Whisk the Egg Yolks: In a separate bowl, whisk the egg yolks until they’re pale and slightly thickened. Once the milk mixture is warm, slowly pour about a cup of the warm mixture into the egg yolks, whisking constantly to temper the yolks. This prevents them from curdling.
- Combine and Thicken: Pour the tempered egg yolk mixture back into the saucepan with the remaining milk mixture. Cook over low heat, stirring constantly, until the mixture thickens enough to coat the back of a spoon (around 170°F or 77°C). Remove from heat.
- Cool the Base: Transfer the custard to a bowl and let it cool to room temperature. Once cooled, cover and refrigerate for at least 4 hours or overnight until completely chilled.
- Churn the Ice Cream: Once the custard is chilled, pour it into an ice cream maker and churn according to the manufacturer’s instructions until it reaches a soft-serve consistency.
- Swirl in the Matcha: Transfer half of the churned ice cream to a freezer-safe container. Drizzle half of the prepared matcha mixture over the ice cream. Using a knife or a spoon, gently swirl the matcha into the ice cream. Repeat with the remaining ice cream and matcha.
- Freeze: Cover the container and freeze the ice cream for at least 4 hours or until firm.
Extra Tips:
When making Uji Matcha Swirl Ice Cream, verify that your matcha powder is of high quality for the best flavor and color. If you find your ice cream is too hard after freezing, let it sit at room temperature for a few minutes before scooping.
Additionally, you can experiment with adding a touch of almond or coconut extract for a different flavor profile. Enjoy this creamy treat as a perfect ending to any meal or simply as an invigorating snack!
Japanese Cheesecake Ice Cream
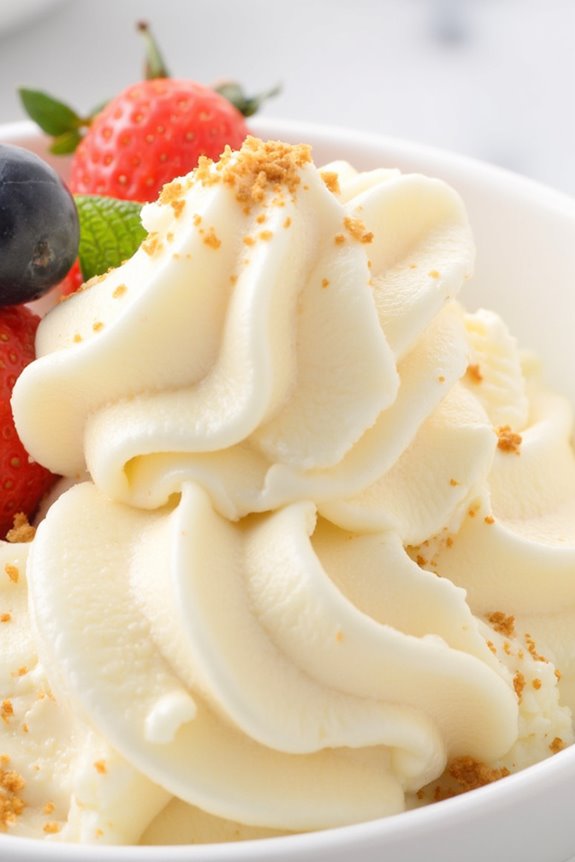
Japanese Cheesecake Ice Cream is a delightful fusion dessert that combines the light, fluffy texture of Japanese cheesecake with the creamy richness of ice cream. This unique treat captures the essence of both worlds, resulting in a dessert that’s both invigorating and indulgent.
The creaminess of the cheesecake base is perfectly balanced with the subtle sweetness, making it a perfect choice for warm days or simply when you crave something sweet.
Making this ice cream at home is an enjoyable experience that allows you to customize the flavors to your liking. It requires some basic ingredients, but the result is a smooth and velvety ice cream that everyone will love.
With a few key steps, you’ll be able to create a reinvigorating scoop that retains the iconic flavors of Japanese cheesecake. So gather your ingredients and get ready to treat yourself and your loved ones!
Ingredients (serving size: 4-6 people)
- 200g cream cheese, softened
- 100g granulated sugar
- 200ml heavy cream
- 150ml whole milk
- 2 large eggs
- 1 tablespoon lemon juice
- 1 teaspoon vanilla extract
- 1 tablespoon cornstarch
- A pinch of salt
Cooking Instructions
- Prepare the Cream Cheese Mixture: In a large mixing bowl, beat the softened cream cheese with a hand mixer or stand mixer until smooth and creamy. This will help eliminate any lumps and guarantee a silky texture for your ice cream.
- Combine Ingredients: Add the granulated sugar, heavy cream, whole milk, lemon juice, vanilla extract, and a pinch of salt to the bowl. Mix on low speed until combined, then increase to medium speed until the mixture is well blended and slightly fluffy.
- Incorporate Eggs: Gradually add the eggs one at a time, mixing thoroughly after each addition. This will help incorporate the eggs smoothly into the mixture, confirming that your ice cream has a rich and creamy texture.
- Add Cornstarch: Sprinkle the cornstarch over the mixture and mix on low until fully incorporated. The cornstarch will help stabilize the ice cream and give it that creamy, cheesecake-like consistency.
- Chill the Mixture: Cover the bowl with plastic wrap and refrigerate the mixture for at least 2 hours or until it’s completely chilled. Chilling the mixture beforehand is vital for achieving a smooth texture when churning.
- Churn the Ice Cream: Once chilled, pour the mixture into an ice cream maker and churn according to the manufacturer’s instructions. This process typically takes about 20-25 minutes. The mixture should thicken and become fluffy.
- Freeze: After churning, transfer the ice cream to an airtight container and smooth out the top. Freeze for at least 4 hours, or until firm. This final freezing step will give your ice cream its desired scoopable texture.
- Serve: When ready to serve, scoop the Japanese cheesecake ice cream into bowls or cones. You can garnish with fresh fruit, a drizzle of honey, or a sprinkle of graham cracker crumbs for added flavor and texture.
Extra Tips
For the best results, confirm that your cream cheese is at room temperature before starting to avoid lumps in your mixture.
If you don’t have an ice cream maker, you can pour the mixture into a freezer-safe container and stir it every 30 minutes for the first few hours to prevent ice crystals from forming. This will help maintain a creamy texture.
Experiment with flavors by adding a swirl of fruit puree or a hint of matcha for a unique twist!