

When you’re in need of a quick and satisfying meal, Filipino fried rice is a fantastic choice. These recipes turn basic rice into flavorful dishes that are easy to whip up. From the beloved Sinangag to the delicious Longganisa Fried Rice, each option offers a comforting and nourishing experience. If you think fried rice is predictable, these recipes will pleasantly surprise you by transforming simple ingredients into something special.
Classic Sinangag: The Perfect Base
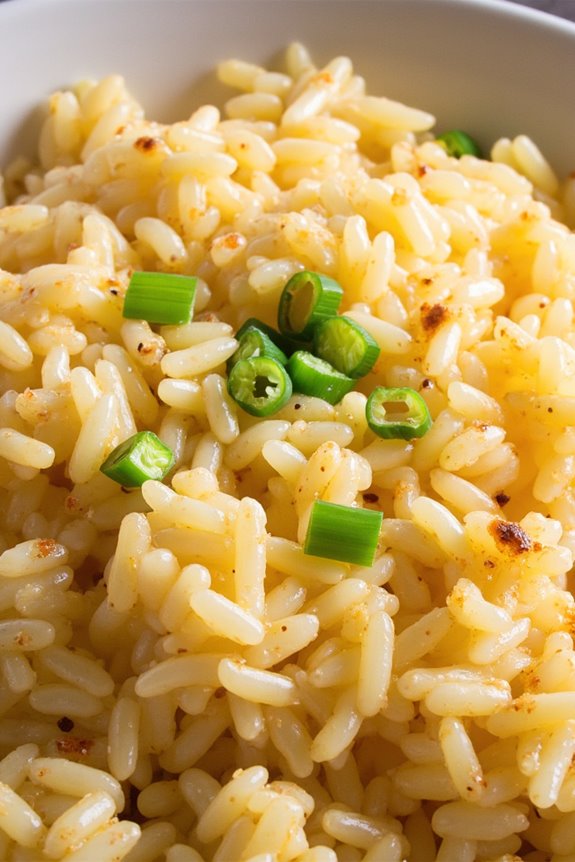
Classic Sinangag, or Filipino garlic fried rice, is a staple in Filipino cuisine that elevates breakfast dishes, complements savory meals, and can even stand alone as a satisfying snack. This simple yet flavorful dish is made from day-old rice sautéed in garlic and often enjoyed with eggs, meats, or vegetables.
Sinangag isn’t only an economical way to utilize leftover rice, but it also embodies the comfort of home-cooked meals, making it a beloved favorite among families and friends.
The key to a great Sinangag lies in the balance of flavors and the perfect texture of the rice. The garlic should be fragrant but not burnt, and the rice should be fluffy and coated evenly with oil. This recipe serves 4-6 people, making it an ideal side dish for gatherings or family breakfasts.
With just a few ingredients and simple techniques, you can whip up this delicious fried rice that will surely impress your guests.
Ingredients (Serving Size: 4-6 people)
- 4 cups of day-old cooked rice (preferably Jasmine or long-grain)
- 6 cloves of garlic, minced
- 3 tablespoons of vegetable oil
- 1 teaspoon of salt (adjust to taste)
- 2 teaspoons of soy sauce (optional)
- 2 green onions, chopped (for garnish)
Cooking Instructions
- Prepare the Rice: Start by confirming your day-old cooked rice is clump-free. If the rice has been refrigerated, break up any clumps with your fingers or a fork. This will help achieve the ideal texture when frying.
- Heat the Oil: In a large skillet or wok, heat the vegetable oil over medium heat. Verify the oil is hot but not smoking, as this is vital for cooking the garlic properly without burning it.
- Sauté the Garlic: Add the minced garlic to the hot oil and sauté for about 1-2 minutes or until it becomes fragrant and lightly golden. Stir continuously to prevent it from burning, which can impart a bitter taste to the rice.
- Add the Rice: Gradually add the prepared rice into the skillet, stirring well to coat the rice evenly with the garlic and oil. This step is essential for infusing the rice with the garlic flavor.
- Season the Rice: Sprinkle the salt over the rice, and if desired, add soy sauce for additional flavor. Continue to stir-fry for about 5-7 minutes, making sure the rice is heated through and slightly crispy on the edges.
- Garnish and Serve: Once the rice is cooked to your liking, remove it from heat. Transfer the Sinangag to a serving dish and garnish with chopped green onions. Serve hot alongside your favorite protein or as part of a hearty breakfast.
Extra Tips
For the best results, use rice that has been cooked and refrigerated for at least a few hours or overnight; this will help the grains firm up and prevent them from becoming mushy during cooking.
You can also experiment with other additions like diced vegetables, cooked meats, or eggs to customize your Sinangag. Additionally, if you prefer a stronger garlic flavor, feel free to adjust the amount of garlic to your taste.
Enjoy your homemade Classic Sinangag!
Garlic Fried Rice With Eggs
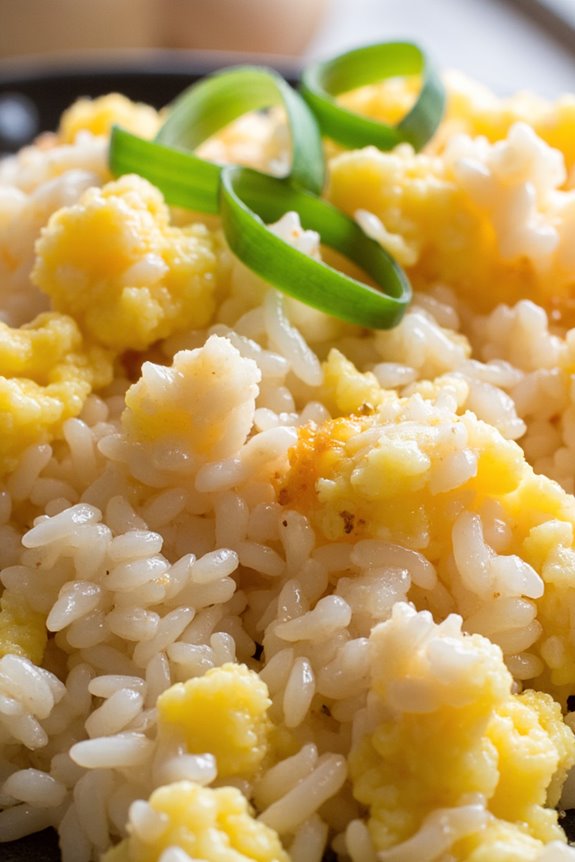
Garlic Fried Rice with Eggs, also known as “Sinangag,” is a beloved staple in Filipino cuisine that showcases the simplicity and flavor of leftover rice, particularly from the previous day’s meal. This dish isn’t only an excellent way to use up cold rice, but it also adds a delightful aromatic flavor profile with the infusion of garlic. The addition of scrambled eggs enhances the dish, making it a hearty option for breakfast, lunch, or dinner.
This versatile fried rice can be served alongside various proteins or enjoyed on its own, making it a favorite among many.
The preparation of Garlic Fried Rice with Eggs is straightforward, requiring minimal ingredients but delivering maximum flavor. The key to achieving that perfect garlic aroma lies in the cooking method, where the garlic is sautéed just right to avoid burning while allowing it to infuse its flavor into the rice.
Whether you’re a novice in the kitchen or a seasoned cook, this recipe will guide you through creating a delicious and satisfying meal that’s sure to please everyone at the table.
Ingredients (Serves 4-6):
- 4 cups cooked and cooled white rice (preferably a day old)
- 5-6 cloves garlic, minced
- 4 large eggs
- 2 tablespoons vegetable oil
- 2 tablespoons soy sauce (optional)
- Salt and pepper to taste
- Chopped green onions for garnish (optional)
Cooking Instructions:
- Prepare the Rice: Confirm your leftover rice is properly cooled and broken up. Cold rice is ideal for frying as it prevents clumping. If using freshly cooked rice, allow it to cool down to room temperature and spread it on a tray to dry out slightly.
- Sauté the Garlic: In a large skillet or wok, heat the vegetable oil over medium heat. Once the oil is hot, add the minced garlic. Sauté the garlic until it’s golden brown and fragrant, taking care not to burn it, as burnt garlic can impart a bitter taste to the dish.
- Add the Rice: Increase the heat to medium-high and add the cooled rice to the skillet. Stir well to combine the garlic and rice, breaking apart any clumps. Continue to stir-fry the rice for about 5-7 minutes, allowing it to heat through and absorb the garlic flavor.
- Scramble the Eggs: In a separate bowl, beat the eggs together. Push the rice to one side of the skillet, creating space for the eggs. Pour the beaten eggs into the empty space and scramble them until just set. Once cooked, mix the scrambled eggs into the rice thoroughly.
- Season the Fried Rice: Add soy sauce (if using), and season with salt and pepper to taste. Mix everything well to confirm the rice is evenly coated with the seasoning.
- Garnish and Serve: Once everything is well combined and heated through, remove the skillet from the heat. Transfer the Garlic Fried Rice with Eggs to a serving platter and garnish with chopped green onions if desired. Serve hot and enjoy!
Extra Tips:
For an even more flavorful Garlic Fried Rice with Eggs, consider adding additional ingredients such as cooked meats (like chicken or shrimp), vegetables (like peas or carrots), or even a splash of sesame oil for an aromatic touch.
Adjust the seasoning according to your taste, and feel free to experiment with different toppings or sides to complement the dish. Enjoy your cooking adventure with this Filipino classic!
Longganisa Fried Rice
Longganisa Fried Rice is a quintessential Filipino dish that elevates the humble fried rice to new heights with the addition of flavorful longganisa, a sweet and garlicky sausage that’s a staple in many Filipino households.
This dish isn’t only a great way to use leftover rice, but it also makes for a hearty breakfast or a delightful meal at any time of the day. The combination of savory longganisa, vibrant vegetables, and fragrant garlic creates a delicious medley that will surely please your taste buds.
Cooking Longganisa Fried Rice is simple and straightforward, making it perfect for both novice and experienced cooks. With just a few ingredients and steps, you can whip up this satisfying dish in no time.
It’s versatile, too; feel free to add your favorite vegetables or adjust the seasonings to suit your palate. Whether you’re serving it as a main dish or a side, Longganisa Fried Rice is sure to become a family favorite.
Ingredients (serves 4-6):
- 3 cups cooked jasmine rice (preferably day-old)
- 6 pieces longganisa (Filipino sweet sausage)
- 2 tablespoons vegetable oil
- 4 cloves garlic, minced
- 1 small onion, diced
- 1 cup mixed vegetables (carrots, peas, and corn)
- 2 eggs, beaten
- 3 tablespoons soy sauce
- 1-2 green onions, chopped (for garnish)
- Salt and pepper to taste
Cooking Instructions:
1. Prepare the Longganisa: Begin by removing the casing from the longganisa. Place the sausage in a skillet over medium heat, breaking it apart with a spatula as it cooks. Cook until browned and fully cooked, about 6-8 minutes.
Once done, remove from the skillet and set aside, leaving the rendered fat in the pan.
2. Sauté the Vegetables: In the same skillet, add the vegetable oil to the fat rendered from the longganisa. Add the minced garlic and diced onion, and sauté until the onions are translucent and fragrant, about 2-3 minutes.
This step will infuse the oil with the flavors of garlic and onion, which will enhance the overall taste of the fried rice.
3. Add Mixed Vegetables: Toss in the mixed vegetables into the skillet and stir-fry for an additional 2-3 minutes, until they’re heated through and slightly tender.
This adds both color and nutrition to your fried rice.
4. Incorporate the Rice: Add the day-old cooked rice to the skillet, breaking up any clumps with your spatula. Stir well to combine all the ingredients, ensuring that the rice gets coated with the garlic, onion, and vegetable mixture.
5. Scramble the Eggs: Push the rice mixture to one side of the skillet, creating a space in the pan. Pour the beaten eggs into this space and scramble them until just set.
Once cooked, mix the scrambled eggs into the rice thoroughly.
6. Season the Rice: Return the cooked longganisa to the skillet and pour in the soy sauce. Stir everything together until well combined, making sure the rice is evenly seasoned.
Taste and adjust with salt and pepper if necessary.
7. Garnish and Serve: Once everything is well mixed and heated through, remove the skillet from heat. Serve the Longganisa Fried Rice hot, garnished with chopped green onions for a fresh touch.
Extra Tips:
For the best results, use day-old rice as it’s drier and less sticky, which helps achieve that perfect fried rice texture.
If you don’t have leftover rice, spread freshly cooked rice on a tray and let it cool for a few minutes before using it in your fried rice. You can also customize the dish by adding other ingredients like bell peppers or leftover meats to enhance the flavor and variety.
Spam and Egg Fried Rice
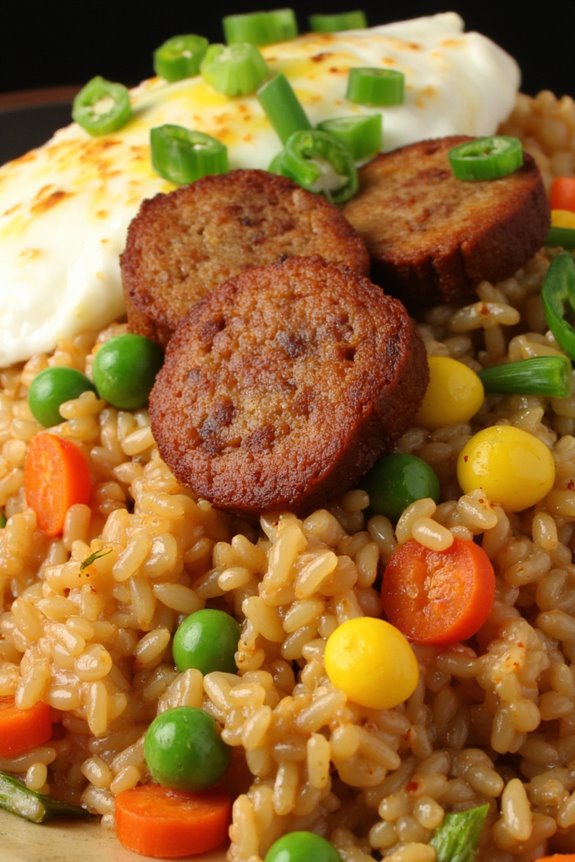
Spam and Egg Fried Rice is a beloved dish in Filipino households, combining the savory flavors of Spam with fluffy scrambled eggs and perfectly cooked rice. This simple yet satisfying meal isn’t only quick to prepare but also incredibly versatile, allowing you to customize it with your favorite vegetables or spices.
Whether you have leftover rice from the previous day or freshly cooked rice, this dish can be ready in just a matter of minutes. This dish isn’t only perfect for breakfast but can be enjoyed at any time of the day. The combination of Spam and eggs gives it a delightful texture and flavor that’s sure to please both kids and adults alike.
Serve it alongside a slice of fresh tomato or a simple salad for a complete meal that’s both filling and delicious.
Ingredients (serving size: 4-6 people)
- 4 cups cooked rice (preferably day-old)
- 1 can Spam (12 oz), diced
- 4 large eggs
- 1 medium onion, chopped
- 2 cloves garlic, minced
- 1 cup frozen peas and carrots mix
- 3 tablespoons soy sauce
- 2 tablespoons vegetable oil
- 1 teaspoon sesame oil (optional)
- Salt and pepper to taste
- Green onions, chopped (for garnish)
Cooking Instructions
- Prepare the Ingredients: Start by gathering all your ingredients. Dice the Spam into small cubes, chop the onion, and mince the garlic. If using day-old rice, break up any clumps to guarantee even cooking.
- Cook the Spam: In a large skillet or wok, heat 1 tablespoon of vegetable oil over medium heat. Add the diced Spam and cook for about 3-4 minutes until it’s crispy and golden brown. Remove the Spam from the skillet and set it aside.
- Sauté the Aromatics: In the same skillet, add the remaining tablespoon of vegetable oil. Sauté the chopped onion and minced garlic until the onion becomes translucent and fragrant, which should take about 2-3 minutes.
- Add Vegetables: Stir in the frozen peas and carrots mix and cook for another 2-3 minutes until the vegetables are heated through. If you’d like to add any other vegetables, now is the time to do so.
- Scramble the Eggs: Push the vegetable mixture to one side of the skillet. Crack the eggs into the empty side and scramble them gently, mixing them until they’re fully cooked. Once cooked, mix the scrambled eggs with the vegetables.
- Combine with Rice: Add the cooked rice to the skillet. Pour the soy sauce and sesame oil (if using) over the rice and stir everything together. Make sure the rice is evenly coated and the Spam is mixed back in. Season with salt and pepper to taste.
- Final Touches: Continue to stir-fry the mixture for another 2-3 minutes until everything is heated through. Taste and adjust the seasoning if necessary.
- Serve and Garnish: Once everything is well combined and hot, remove the skillet from the heat. Serve the Spam and Egg Fried Rice in bowls and garnish with chopped green onions.
Extra Tips
For a more authentic flavor, consider using jasmine rice or a similar variety. If you’re feeling adventurous, you can add a dash of fish sauce or oyster sauce for an extra layer of umami.
This dish is also perfect for using up any leftover vegetables you might’ve on hand, such as bell peppers or corn. Feel free to adjust the seasonings to your preference, and enjoy this comforting dish any time of the day!
Shrimp and Vegetable Fried Rice
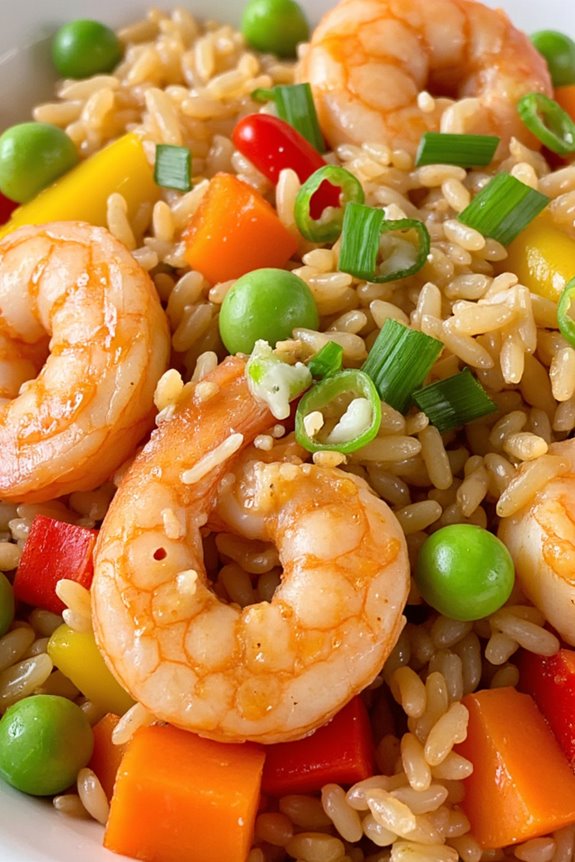
Shrimp and Vegetable Fried Rice is a delightful dish that captures the essence of Filipino cuisine, combining fresh seafood and vibrant vegetables with fragrant rice. This dish isn’t only delicious but also incredibly versatile, allowing you to customize the ingredients based on what you have available. It’s perfect as a main meal or as a side dish for your favorite grilled proteins.
The combination of shrimp and colorful vegetables creates a visually appealing and tasty dish that everyone will enjoy. Cooking fried rice is a great way to use leftover rice, as day-old rice has the right texture that allows it to fry evenly without becoming mushy.
In this recipe, we’ll be using a blend of shrimp, carrots, peas, and bell peppers to create a nutritious and flavorful meal. The addition of soy sauce and sesame oil enhances the dish’s umami flavor, making it a family favorite. Let’s get started on this easy and satisfying recipe for Shrimp and Vegetable Fried Rice!
Ingredients (Serves 4-6)
- 3 cups cooked jasmine rice (preferably day-old)
- 1 pound large shrimp, peeled and deveined
- 1 cup mixed vegetables (carrots, peas, and bell peppers)
- 3 tablespoons vegetable oil
- 3 cloves garlic, minced
- 1 small onion, diced
- 2 eggs, beaten
- 3 tablespoons soy sauce
- 1 tablespoon sesame oil
- 2 green onions, sliced
- Salt and pepper to taste
Cooking Instructions
- Prepare the Ingredients: Start by gathering all your ingredients. Confirm the shrimp is peeled and deveined, and the vegetables are diced into small, uniform pieces. If you’re using day-old rice, break up any clumps with your fingers to separate the grains.
- Cook the Shrimp: Heat 1 tablespoon of vegetable oil in a large skillet or wok over medium-high heat. Add the shrimp and sauté for about 2-3 minutes until they turn pink and opaque. Remove the shrimp from the skillet and set them aside on a plate.
- Sauté the Aromatics: In the same skillet, add another tablespoon of vegetable oil. Add the minced garlic and diced onion, cooking for about 1-2 minutes until the onions become translucent and the garlic is fragrant.
- Add the Vegetables: Stir in the mixed vegetables and cook for an additional 3-4 minutes until they’re tender but still crisp. Make sure to stir frequently to prevent sticking.
- Scramble the Eggs: Push the vegetable mixture to one side of the skillet and pour the beaten eggs into the empty side. Allow them to cook for a minute before scrambling them with a spatula. Once fully cooked, mix the eggs with the vegetables.
- Combine with Rice and Shrimp: Add the cooked rice and shrimp back into the skillet. Pour in the soy sauce and sesame oil, and gently stir everything together, making sure that the rice is evenly coated with the sauce and heated through.
- Season and Serve: Taste the fried rice and season it with salt and pepper as needed. Stir in the sliced green onions before serving hot.
Extra Tips
For the best flavor and texture, use cold, day-old rice as it helps to keep the grains separate and prevents clumping. You can also add other vegetables like corn or broccoli based on your preferences.
If you want to enhance the dish further, consider adding a splash of oyster sauce or a sprinkle of chili flakes for some heat. Finally, feel free to swap shrimp for chicken or tofu for a different protein option!
Beef Tapa Fried Rice
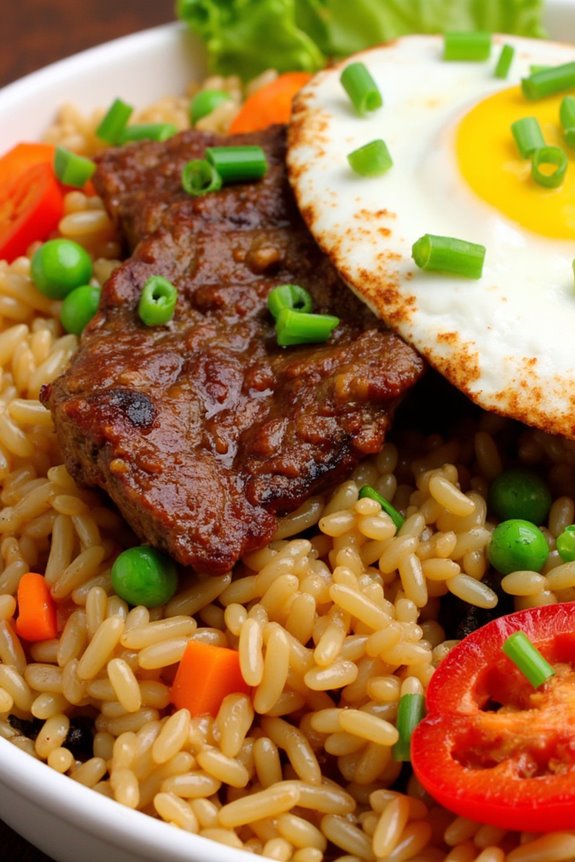
Beef Tapa Fried Rice is a delicious and hearty Filipino dish that combines the savory flavors of marinated beef with fragrant rice, making it a perfect meal for breakfast, lunch, or dinner.
Traditionally, beef tapa is made from thinly sliced beef marinated in a mixture of soy sauce, garlic, and vinegar, then pan-fried until tender and flavorful. When incorporated into fried rice, it adds a delightful twist that elevates the dish, making it both filling and satisfying.
This recipe is simple and can easily be customized based on personal preferences. You can add vegetables like carrots, peas, or bell peppers for extra color and nutrition. The use of day-old rice is recommended for the best texture, as it allows the grains to separate better during frying.
With the right combination of ingredients and techniques, you’ll create a Beef Tapa Fried Rice that’s sure to please family and friends.
Ingredients (Serves 4-6):
- 2 cups cooked jasmine rice (preferably day-old)
- 1 lb beef sirloin or flank steak, thinly sliced
- 1/4 cup soy sauce
- 2 tablespoons vinegar (preferably cane vinegar)
- 4 cloves garlic, minced
- 1 tablespoon sugar
- 2 tablespoons vegetable oil
- 3 large eggs, beaten
- 1/2 cup green onions, chopped
- Salt and pepper to taste
- Optional: 1/2 cup mixed vegetables (carrots, peas, bell peppers)
- Optional: Additional green onions for garnish
Cooking Instructions:
- Marinate the Beef: In a bowl, combine the thinly sliced beef with soy sauce, vinegar, minced garlic, and sugar. Mix well and let it marinate for at least 30 minutes to allow the flavors to meld. This step is essential for tenderizing the beef and infusing it with flavor.
- Cook the Beef: Heat 1 tablespoon of vegetable oil in a large pan or wok over medium-high heat. Remove the beef from the marinade (reserve the marinade) and add it to the hot pan. Stir-fry until the beef is browned and cooked through, about 5-7 minutes. Remove the beef from the pan and set aside.
- Prepare the Eggs: In the same pan, add a bit more oil if necessary, then pour in the beaten eggs. Scramble the eggs until just set and lightly cooked. Remove the scrambled eggs from the pan and set aside with the beef.
- Fry the Rice: Add the remaining tablespoon of oil to the pan and increase the heat to high. Add the cooked jasmine rice, breaking up any clumps. Stir-fry for about 3-4 minutes, allowing the rice to get slightly crispy and heated through.
- Combine Ingredients: Return the cooked beef and scrambled eggs to the pan with the rice. Add the reserved marinade and mix everything together thoroughly. If using, add the mixed vegetables at this stage. Stir-fry for another 2-3 minutes until everything is heated through and well combined.
- Season and Serve: Add salt and pepper to taste. Mix in the chopped green onions just before serving. Serve the Beef Tapa Fried Rice hot, garnished with additional green onions if desired.
Extra Tips:
For the best results, use day-old rice as it’s drier and less sticky, allowing for better frying.
If you prefer a bit of heat, you can add a dash of chili flakes or chopped fresh chili when stir-frying the rice. Additionally, feel free to experiment with different vegetables or even a splash of sesame oil for extra flavor.
Enjoy your Beef Tapa Fried Rice as a standalone dish or pair it with a side of fresh tomatoes for a revitalizing contrast!
Chorizo and Bell Pepper Fried Rice
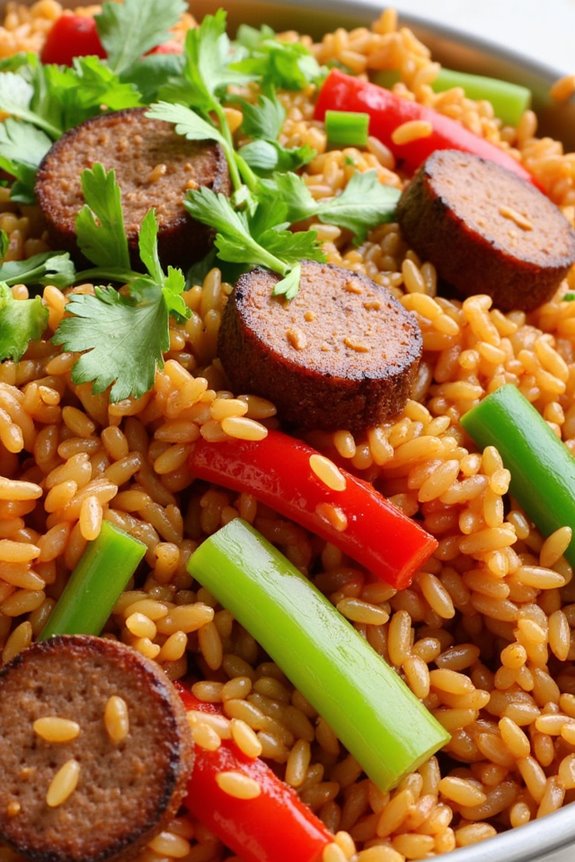
Chorizo and Bell Pepper Fried Rice is a delightful and vibrant dish that combines the savory flavors of Spanish chorizo with the sweetness of bell peppers, all mixed into fluffy rice. This recipe is perfect for those who want a quick yet satisfying meal that bursts with flavor and color.
It’s an excellent way to use up leftover rice, making it a great choice for a busy weeknight dinner or a fun brunch dish. The combination of spices in the chorizo and the crunch of the bell peppers adds a unique twist to traditional fried rice.
This dish isn’t only filling but also versatile, as you can add other vegetables or proteins based on your preferences. Whether served as a main dish or as a side, Chorizo and Bell Pepper Fried Rice is sure to impress your family and friends.
Ingredients (Serves 4-6)
- 2 cups cooked jasmine rice (preferably day-old)
- 200 grams Spanish chorizo, diced
- 1 medium onion, finely chopped
- 2 cloves garlic, minced
- 1 red bell pepper, diced
- 1 green bell pepper, diced
- 2 tablespoons soy sauce
- 1 tablespoon oyster sauce (optional)
- 2 eggs, beaten
- 2 tablespoons vegetable oil
- Salt and pepper to taste
- Green onions, sliced (for garnish)
- Fresh cilantro, chopped (for garnish)
Cooking Instructions
1. Prepare the Rice: If you haven’t done so already, cook the jasmine rice according to package instructions and let it cool. Ideally, use day-old rice, as it’s drier and prevents clumping in the frying process.
2. Cook the Chorizo: In a large skillet or wok, heat 1 tablespoon of vegetable oil over medium heat. Add the diced chorizo and cook until it starts to brown and release its oils, about 3-4 minutes. Remove the chorizo from the pan and set it aside, leaving the oil in the skillet.
3. Sauté the Vegetables: In the same skillet, add the remaining tablespoon of oil. Add the chopped onion and sauté until translucent, about 2-3 minutes. Next, add the minced garlic and cook for an additional 30 seconds until fragrant.
Then, add the diced red and green bell peppers and stir-fry for about 3-4 minutes until they become tender.
4. Add the Rice: Increase the heat to medium-high and add the cooked rice to the skillet. Break up any clumps with a spatula and mix it well with the vegetables. Stir-fry for about 2-3 minutes until the rice is heated through.
5. Incorporate Chorizo and Sauces: Add the cooked chorizo back into the skillet. Pour in the soy sauce and oyster sauce (if using), mixing everything thoroughly. Season with salt and pepper to taste.
6. Add the Eggs: Push the rice mixture to one side of the pan and pour the beaten eggs into the empty side. Allow them to cook for about 1-2 minutes until they start to set, then scramble them gently and mix them into the rice.
7. Final Touches: Remove the skillet from heat and garnish the fried rice with sliced green onions and chopped cilantro before serving.
Extra Tips
For an added depth of flavor, consider adding a splash of sesame oil towards the end of cooking. Additionally, you can customize this dish by incorporating other vegetables such as peas or carrots, or even adding shrimp or chicken for extra protein.
If you prefer a spicier kick, feel free to add some diced jalapeños or a drizzle of sriracha before serving. Remember to taste as you go and adjust the seasoning to suit your palate!
Chicken Adobo Fried Rice
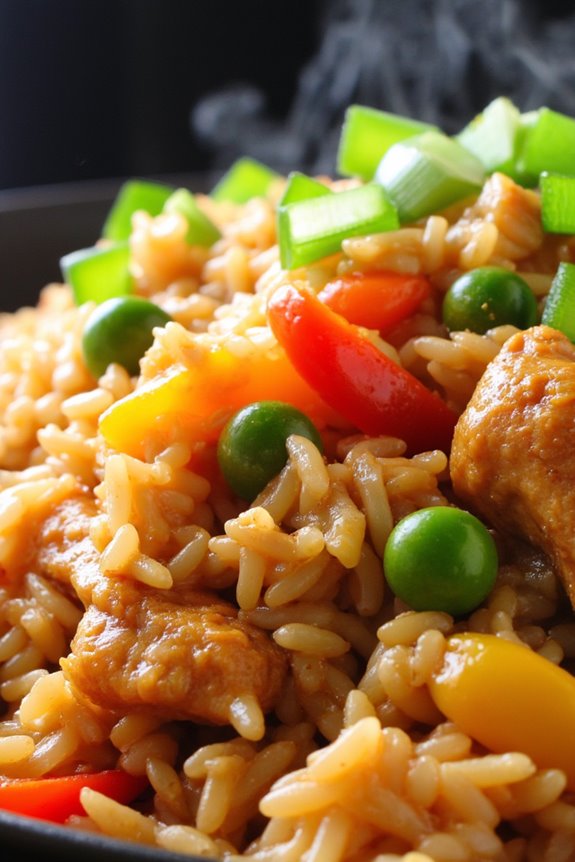
Chicken Adobo Fried Rice is a delightful fusion dish that combines the rich, savory flavors of the traditional Filipino chicken adobo with the comforting texture of fried rice. This dish is perfect for using leftover adobo chicken, as the flavors meld beautifully, creating a meal that’s both satisfying and packed with umami. The combination of tender chicken, soy sauce, vinegar, and spices, along with fluffy rice, makes this dish a favorite among families and food enthusiasts alike.
This recipe isn’t only straightforward but also offers a quick way to elevate your leftover chicken adobo into a new and exciting meal. The fried rice is enhanced with garlic, onions, and optional vegetables, allowing for a customizable experience based on your taste preferences. Serve it as a hearty breakfast, lunch, or dinner option, and enjoy the delicious flavors of the Philippines in every bite.
Ingredients (Serves 4-6)
- 2 cups cooked white rice (preferably day-old)
- 2 tablespoons vegetable oil
- 1 medium onion, diced
- 4 cloves garlic, minced
- 2 cups cooked chicken adobo, shredded (with some sauce)
- 1 cup mixed vegetables (peas, carrots, bell peppers)
- 2 tablespoons soy sauce
- 1 tablespoon vinegar
- 1/2 teaspoon ground black pepper
- 2 green onions, chopped (for garnish)
- Optional: fried egg (for topping)
Cooking Instructions
- Prepare the Ingredients: Before you start cooking, gather all your ingredients. Make certain your cooked rice is clumped-free, as day-old rice works best for fried rice dishes. Shred the chicken from the adobo, and chop the vegetables. This preparation will make the cooking process smoother.
- Sauté Aromatics: In a large skillet or wok, heat the vegetable oil over medium heat. Once the oil is hot, add the diced onion and sauté for about 2-3 minutes until it becomes translucent. Then, add the minced garlic and cook for an additional minute until fragrant. This step builds the foundation of flavor for your fried rice.
- Add Chicken and Vegetables: Stir in the shredded chicken adobo, including some of the sauce, and cook for about 3-4 minutes until heated through. Next, add the mixed vegetables and stir-fry for another 2-3 minutes until they’re tender yet crisp. This infuses the rice with the savory flavors of the adobo.
- Incorporate the Rice: Add the cooked rice to the skillet, breaking apart any clumps with a spatula. Stir-fry the rice with the chicken and vegetables for about 5 minutes, allowing the rice to absorb the flavors.
- Season the Fried Rice: Pour in the soy sauce, vinegar, and ground black pepper. Mix everything well and continue to stir-fry for another 2-3 minutes. Taste and adjust seasoning as needed. This step guarantees that every grain of rice is flavorful and well-seasoned.
- Garnish and Serve: Once everything is well combined and heated through, remove the skillet from heat. Transfer the Chicken Adobo Fried Rice to a serving platter and garnish with chopped green onions. If desired, top with a fried egg for an extra touch. Serve hot and enjoy!
Extra Tips
For the best flavor, allow your adobo chicken to marinate overnight before cooking, as this will enhance its taste.
When making fried rice, verify your rice is cold and dry, as this prevents it from becoming mushy during cooking.
You can also add other ingredients such as scrambled eggs, tofu, or different vegetables to suit your preference.
Experimenting with spices or adding chili for a kick can also elevate the dish. Enjoy your delicious Chicken Adobo Fried Rice!
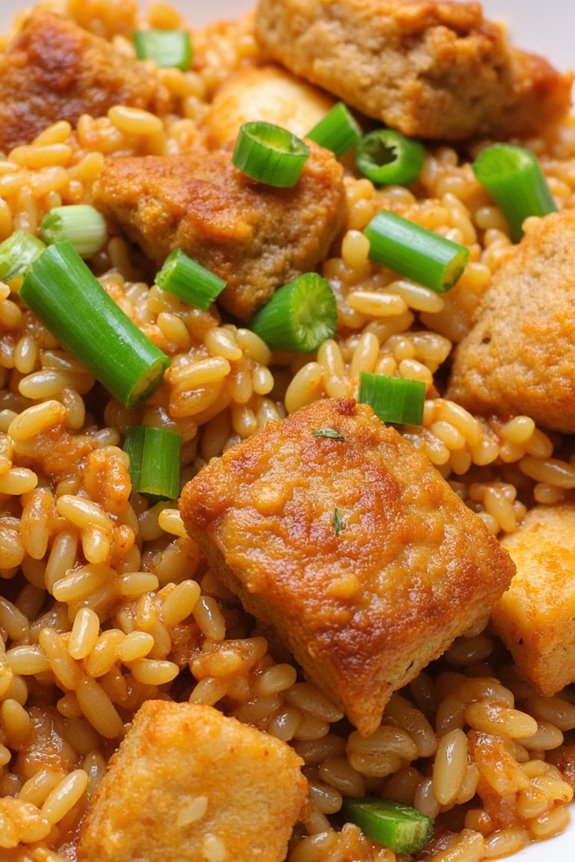
Sinangag With Tofu and Veggies
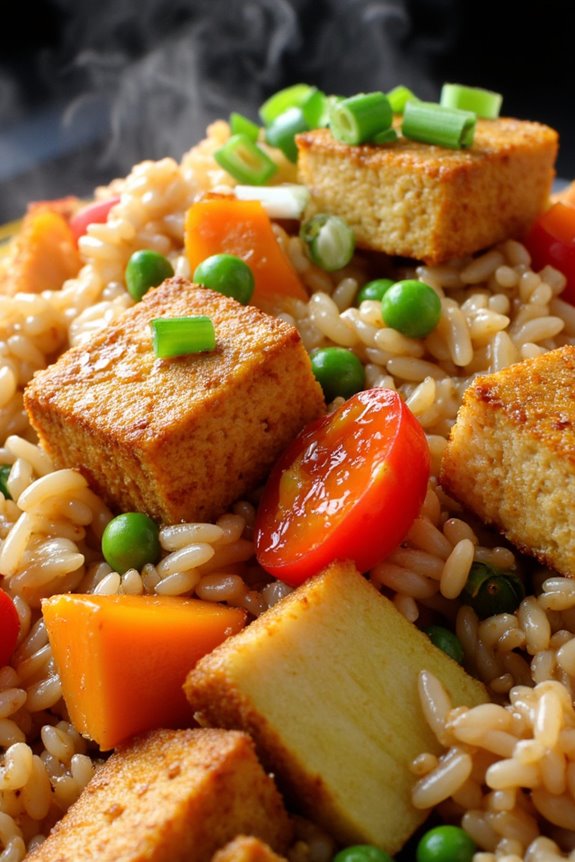
Sinangag, or garlic fried rice, is a beloved staple in Filipino cuisine, often served as a hearty breakfast or a side dish to complement various main courses. This version of sinangag is enhanced with the addition of tofu and a colorful array of vegetables, making it not only nourishing but also a flavorful and satisfying meal.
The crispy garlic aroma combined with the savory taste of fried rice pairs beautifully with the soft texture of the tofu and the crunch of the vegetables. Preparing sinangag with tofu and veggies is an excellent way to incorporate plant-based protein into your diet while enjoying a traditional Filipino dish.
This recipe is versatile, allowing you to customize the vegetables based on what you have on hand or your personal preferences. The combination of soy sauce and sesame oil adds depth to the overall flavor, elevating this simple dish into a delightful culinary experience.
Ingredients (Serves 4-6)
- 4 cups cooked jasmine rice (preferably day-old)
- 1 block (14 oz) firm tofu, drained and cubed
- 4 tablespoons vegetable oil (divided)
- 6 cloves garlic, minced
- 1 cup carrots, diced
- 1 cup bell peppers, diced (red, green, or yellow)
- 1 cup peas (fresh or frozen)
- 3 tablespoons soy sauce
- 1 tablespoon sesame oil
- Salt and pepper to taste
- Chopped green onions for garnish (optional)
Cooking Instructions
- Prepare the Tofu: Start by pressing the tofu to remove excess moisture. Wrap it in a clean kitchen towel and place a heavy object on top for about 15-20 minutes. Once drained, cut the tofu into small cubes.
- Fry the Tofu: In a large skillet or wok, heat 2 tablespoons of vegetable oil over medium-high heat. Add the cubed tofu and sauté until golden brown and crispy on all sides, about 8-10 minutes. Remove the tofu from the skillet and set aside.
- Sauté the Garlic: In the same skillet, add the remaining 2 tablespoons of vegetable oil. Lower the heat to medium and add the minced garlic. Sauté for about 1-2 minutes until the garlic is golden and fragrant, being careful not to burn it.
- Add the Vegetables: Stir in the diced carrots, bell peppers, and peas, cooking for about 3-5 minutes until the vegetables are tender yet still crisp.
- Incorporate the Rice: Add the day-old jasmine rice to the skillet, breaking up any clumps. Stir-fry the rice with the vegetables for about 5 minutes, allowing it to heat through and absorb the flavors.
- Season the Rice: Pour in the soy sauce and sesame oil, mixing everything thoroughly. Taste and adjust seasoning with salt and pepper as needed. Finally, fold in the crispy tofu, combining everything gently.
- Serve: Once everything is well mixed and heated through, remove the skillet from heat. Transfer the sinangag to a serving platter and garnish with chopped green onions if desired.
Extra Tips
For the best flavor, use day-old rice as it’s drier and will fry better without becoming mushy. If you don’t have day-old rice, spread freshly cooked rice on a baking sheet to cool and dry out for about 30 minutes before using.
Feel free to experiment with different vegetables such as corn, zucchini, or broccoli, and adjust the soy sauce to your taste preference. Enjoy your sinangag as a standalone dish or paired with your favorite protein!
Sinangag With Kimchi

Sinangag, or Filipino garlic fried rice, is a staple in many Filipino households, often served as a breakfast or side dish alongside meats and eggs. This flavorful dish becomes even more exciting when paired with kimchi, the Korean fermented vegetable side dish that brings a spicy and tangy flavor profile.
Combining these two beloved cuisines creates a fusion that isn’t only delicious but also a great way to elevate your rice dish to something extraordinary.
To make Sinangag with Kimchi, you’ll need cooked rice, preferably day-old rice, as it holds its shape better when fried. The addition of garlic, soy sauce, and green onions creates a savory base, while the kimchi adds a delightful crunch and zing. This dish is perfect for breakfast, lunch, or dinner and can be customized with your favorite proteins or additional vegetables.
Let’s explore the ingredients and cooking instructions to create this flavorful dish for 4-6 people.
Ingredients:
- 4 cups cooked rice (preferably day-old)
- 1 cup kimchi, chopped
- 4 cloves garlic, minced
- 3 tablespoons vegetable oil
- 2 tablespoons soy sauce
- 2 green onions, sliced (white and green parts separated)
- Salt and pepper to taste
- Optional: 2 large eggs, beaten (for a richer dish)
- Optional: Cooked proteins like chicken, shrimp, or tofu
Cooking Instructions:
- Prepare the Rice: Confirm that your cooked rice is day-old and has been refrigerated. This helps to dry out the rice grains, making them less sticky and perfect for frying. If using freshly cooked rice, spread it out on a tray to cool and dry for at least 30 minutes.
- Heat the Oil: In a large skillet or wok, heat the vegetable oil over medium heat. The oil should be hot enough that a small piece of garlic sizzles when added. This will prevent the garlic from burning and infuse the oil with flavor.
- Sauté the Garlic: Add the minced garlic to the hot oil and sauté for about 1-2 minutes until it becomes fragrant and lightly golden. Be careful not to let it burn, as burnt garlic can impart a bitter taste to the dish.
- Add the Rice: Increase the heat to medium-high and add the day-old rice, breaking up any clumps with a spatula. Stir-fry the rice for about 5-7 minutes, making sure it gets coated with the garlicky oil and heated through.
- Incorporate the Kimchi: Add the chopped kimchi to the rice and stir well to combine. Cook for an additional 3-4 minutes, allowing the kimchi to heat up and impart its flavors into the rice.
- Season the Rice: Drizzle the soy sauce over the rice and mix thoroughly. Taste and adjust with salt and pepper as needed. If you’re including beaten eggs, create a well in the center of the rice, pour the eggs in, and scramble them until cooked through, then mix into the rice.
- Finish with Green Onions: Add the sliced green onions (white parts) and give everything a final stir. Cook for another minute to guarantee everything is heated through.
- Serve: Transfer the Sinangag with Kimchi to a serving platter and garnish with the remaining green onion tops. Enjoy hot as a side dish or main meal.
Extra Tips:
When making Sinangag with Kimchi, feel free to customize the dish by adding your favorite proteins like chicken, shrimp, or tofu for extra flavor and nutrition.
If you prefer a spicier kick, consider adding some chili flakes or a drizzle of sriracha. Additionally, using well-fermented kimchi will enhance the flavor, so opt for a brand or homemade version that you enjoy.
Finally, this dish is versatile, so don’t hesitate to experiment with other vegetables or seasonings to make it your own!
Bicol Express Fried Rice
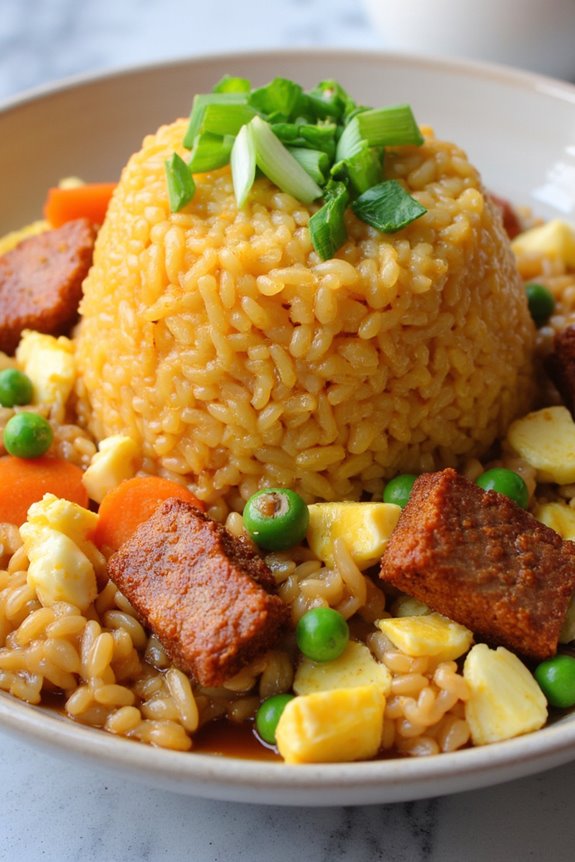
Bicol Express Fried Rice is a delightful fusion of the traditional Filipino spicy dish, Bicol Express, and the beloved comfort food, fried rice. Originating from the Bicol region of the Philippines, Bicol Express typically features pork cooked in coconut milk, shrimp paste, and chili, creating a rich and spicy flavor profile. This version of fried rice takes the essence of this classic dish and transforms it into a savory rice dish that’s perfect for any meal.
It’s an excellent way to use leftover rice while indulging in the delicious flavors of Bicol Express.
The beauty of this dish lies in its simplicity and versatility. You can adjust the spiciness according to your preference, and it can be served on its own or as a side dish to complement grilled meats or seafood. This recipe serves 4-6 people, making it ideal for sharing with family and friends. Prepare to tantalize your taste buds with this unique and flavorful take on fried rice!
Ingredients:
- 4 cups cooked jasmine rice (preferably day-old)
- 1 lb pork belly, diced
- 1 cup coconut milk
- 2 tablespoons shrimp paste (bagoong)
- 2-3 green Thai chili peppers, sliced (adjust for spice level)
- 1 medium onion, chopped
- 4 cloves garlic, minced
- 2 tablespoons vegetable oil
- Salt and pepper to taste
- 2 green onions, chopped (for garnish)
Cooking Instructions:
- Cook the Pork: In a large skillet or wok, heat the vegetable oil over medium heat. Add the diced pork belly and cook until browned and crispy, about 5-7 minutes. This step guarantees that the pork renders its fat, which will enhance the flavor of the dish.
- Sauté Aromatics: Once the pork is cooked, add the chopped onion and minced garlic to the skillet. Sauté for another 2-3 minutes, or until the onion becomes translucent and fragrant. This helps build a flavorful base for the fried rice.
- Incorporate Coconut Milk and Shrimp Paste: Pour in the coconut milk and add the shrimp paste. Stir well to combine all the ingredients. Allow the mixture to simmer for 5 minutes on low heat, letting the flavors meld together and the sauce thicken slightly.
- Add the Rice: Add the cooked jasmine rice to the skillet, breaking up any clumps. Toss everything together until the rice is well coated with the sauce, guaranteeing an even distribution of flavors. This step is essential as it allows the rice to absorb the coconut and shrimp paste flavors.
- Season and Add Heat: Stir in the sliced Thai chili peppers and season with salt and pepper to taste. Cook for an additional 3-5 minutes, stirring occasionally, until everything is heated through. Adjust the spice level by adding more chili if desired.
- Garnish and Serve: Once done, remove the skillet from the heat. Transfer the Bicol Express Fried Rice to a serving platter and garnish with chopped green onions. Serve hot and enjoy with your favorite side dishes or on its own.
Extra Tips: When making Bicol Express Fried Rice, using day-old rice is highly recommended as it has dried out slightly, preventing the dish from becoming mushy. If you don’t have leftover rice, spread freshly cooked rice on a baking sheet to cool and dry out for about 30 minutes before using.
Adjust the amount of chili peppers according to your spice tolerance, and feel free to add other vegetables like bell peppers or peas for more color and nutrition!
Sinangag With Fried Fish
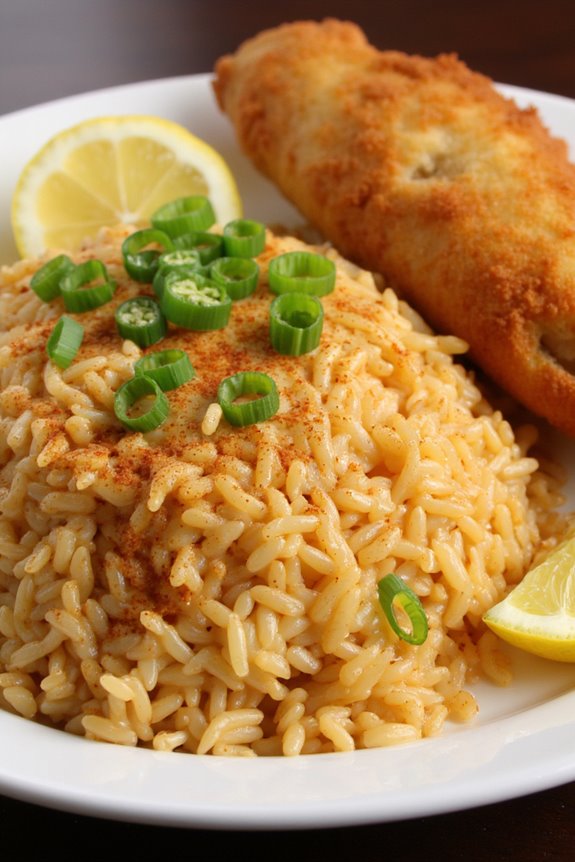
Sinangag, or Filipino garlic fried rice, is a beloved staple that transforms leftover rice into a fragrant and savory dish, often served for breakfast or as a side during mealtime. Its simplicity and rich flavor make it an ideal accompaniment to various proteins, particularly fried fish. The combination of crispy, flavorful fish with garlic-infused rice creates a satisfying meal that’s both comforting and delicious.
This dish isn’t only easy to prepare but also versatile. You can customize the fried fish with different seasonings or marinades to suit your taste. Using day-old rice guarantees that your sinangag has the ideal texture, preventing it from becoming mushy. Whether you’re serving it for a family breakfast or a casual dinner, Sinangag with Fried Fish is a delightful way to enjoy Filipino cuisine.
Ingredients (Serves 4-6)
- 4 cups cooked jasmine rice (preferably day-old)
- 4 tablespoons vegetable oil
- 6 cloves garlic, minced
- 1 teaspoon salt
- 1/2 teaspoon black pepper
- 1/4 cup chopped green onions (optional, for garnish)
- 4 pieces fish fillets (such as tilapia or bangus)
- 1 cup flour (for dredging)
- 1 teaspoon paprika (for seasoning the fish)
- 1/2 teaspoon salt (for seasoning the fish)
- 1/2 teaspoon black pepper (for seasoning the fish)
- 1 lemon or calamansi, sliced (for serving)
Cooking Instructions
- Prepare the Fried Fish: Start by seasoning the fish fillets with paprika, salt, and black pepper. Make sure to coat them evenly. Set the seasoned fish aside to allow the flavors to penetrate while you prepare the sinangag.
- Dredge the Fish: Place the flour on a plate. Lightly coat each fish fillet with flour, shaking off any excess. This will create a crispy exterior when fried.
- Fry the Fish: In a large frying pan, heat about 2 tablespoons of vegetable oil over medium heat. Once the oil is hot, carefully place the floured fish fillets into the pan. Fry for about 4-5 minutes on each side or until they’re golden brown and crispy. Once cooked, transfer the fish to a plate lined with paper towels to drain excess oil.
- Make the Sinangag: Using the same pan, add the remaining 2 tablespoons of vegetable oil. Heat the oil over medium heat. Add the minced garlic and sauté for about 1-2 minutes, or until fragrant and lightly golden. Be careful not to burn the garlic.
- Add the Rice: Increase the heat to high, and add the cooked rice to the pan. Break apart any clumps and stir-fry the rice with the garlic for about 3-5 minutes, guaranteeing the rice is heated through and evenly coated with the garlic oil.
- Season the Rice: Sprinkle the salt and black pepper over the rice. Mix well to guarantee the seasonings are evenly distributed. Taste and adjust the seasoning if needed.
- Serve: Transfer the garlic fried rice to a serving platter. Place the fried fish on top or alongside the rice. Garnish with chopped green onions if desired. Serve with lemon or calamansi slices on the side for a zesty finish.
Extra Tips
For best results, use rice that has been cooked a day prior and stored in the refrigerator, as it will be drier and fry better. If you want to add more flavor to the sinangag, consider incorporating some soy sauce or a dash of fish sauce while frying the rice. Additionally, feel free to experiment with different types of fish or other proteins, such as shrimp or chicken, to create your own variations of this classic dish.
Sinangag With Grilled Pork Belly
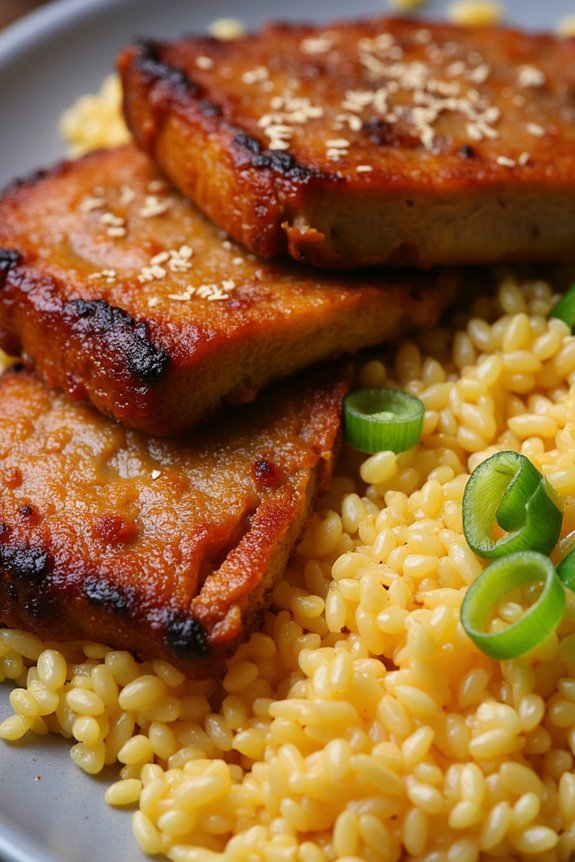
Sinangag, or Filipino garlic fried rice, is a beloved staple in Filipino households, often enjoyed as a breakfast dish or served alongside main courses. This dish is characterized by its fragrant garlic flavor, which is enhanced by the addition of leftover rice, making it a perfect way to utilize yesterday’s rice.
When paired with grilled pork belly, or “liempo,” the combination becomes a hearty and satisfying meal that can be enjoyed any time of the day. Grilled pork belly is marinated in a combination of soy sauce, calamansi juice, and spices, which imparts a savory and tangy flavor to the meat. The pork is then grilled to perfection, resulting in a crispy exterior and tender, juicy interior.
When served alongside the aromatic sinangag, this dish isn’t only a feast for the palate but also a delight for the senses. Let’s plunge into creating this delicious Filipino comfort food!
Ingredients (Serves 4-6 people):
- 4 cups cooked jasmine rice (preferably day-old)
- 5 cloves garlic, minced
- 2 tablespoons vegetable oil
- 1 tablespoon salt
- 1/2 teaspoon ground black pepper
- 3-4 green onions, chopped (optional for garnish)
For Grilled Pork Belly:
- 1 1/2 pounds pork belly, sliced into 1-inch thick pieces
- 1/4 cup soy sauce
- 1/4 cup calamansi juice (or lime juice)
- 2 tablespoons brown sugar
- 1 teaspoon ground black pepper
- 3 cloves garlic, minced
- 1 tablespoon vegetable oil
Cooking Instructions:
- Marinate the Pork Belly: In a bowl, combine soy sauce, calamansi juice, brown sugar, ground black pepper, minced garlic, and vegetable oil. Mix well until the sugar dissolves. Add the pork belly slices, ensuring they’re evenly coated with the marinade. Cover and refrigerate for at least 30 minutes; for best results, marinate for a few hours or overnight.
- Prepare the Sinangag: Heat 2 tablespoons of vegetable oil in a large skillet or wok over medium heat. Add the minced garlic and sauté until fragrant and lightly golden, about 1-2 minutes. Be careful not to let it burn, as burnt garlic can impart a bitter taste.
- Add the Rice: Once the garlic is golden, add the cooked jasmine rice to the skillet. Break up any clumps with a spatula and stir-fry the mixture, allowing the rice to absorb the garlic flavor. Cook for about 5-7 minutes, stirring occasionally.
- Season the Rice: Sprinkle the salt and ground black pepper over the rice, adjusting to taste. Continue to stir-fry for an additional 2-3 minutes until the rice is heated through and well combined with the garlic.
- Grill the Pork Belly: Preheat a grill or grill pan over medium-high heat. Remove the marinated pork belly from the fridge and place it on the grill. Cook for about 5-7 minutes on each side, or until the pork is nicely charred and cooked through. The internal temperature should reach at least 145°F (63°C).
- Serve: Once the pork belly is cooked, remove it from the grill and let it rest for a few minutes before slicing. Serve the sinangag on plates, topped with sliced grilled pork belly. Garnish with chopped green onions if desired.
Extra Tips:
For an added layer of flavor in your sinangag, consider incorporating vegetables such as peas, carrots, or bell peppers while stir-frying the rice.
Additionally, if you want a stronger garlic flavor, feel free to add more minced garlic to the sinangag. For those who enjoy a bit of heat, a sprinkle of chili flakes can also enhance the dish.
Finally, using day-old rice is key for achieving the perfect texture in your sinangag, as it allows the grains to dry out slightly, making them less sticky during cooking. Enjoy your Filipino feast!
Sinangag With Cheese and Green Onions
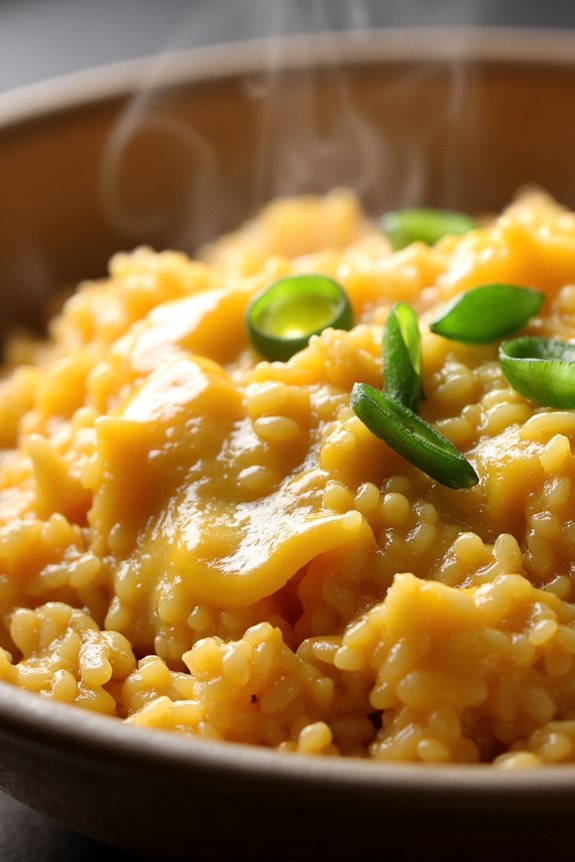
Sinangag, or Filipino garlic fried rice, is a staple dish often served at breakfast alongside eggs, meats, and vegetables. This particular recipe elevates the traditional garlic fried rice by incorporating cheese and green onions, adding a delightful creaminess and a fresh, savory crunch. Perfect for a hearty breakfast or a side dish with your favorite Filipino meals, this Sinangag With Cheese and Green Onions is guaranteed to please everyone at the table.
Cooking Sinangag is relatively simple and can be done in under 30 minutes, making it an ideal choice for busy mornings or quick dinners. The key to achieving that perfect flavor lies in using day-old rice, which helps absorb the garlic aroma and prevents the dish from becoming mushy. The addition of cheese not only enhances the flavor but also creates a rich texture that pairs beautifully with the fragrant garlic and fresh green onions.
Ingredients (Serving Size: 4-6 people)
- 4 cups cooked and cooled jasmine rice (preferably day-old)
- 4 tablespoons vegetable oil
- 6 cloves garlic, minced
- 1 cup shredded cheese (cheddar or your choice)
- 1/2 cup green onions, chopped
- Salt to taste
- Pepper to taste
Cooking Instructions
- Heat the Oil: In a large skillet or wok, heat the vegetable oil over medium heat. Confirm the oil is hot but not smoking to avoid burning the garlic in the next step.
- Sauté the Garlic: Add the minced garlic to the hot oil and sauté for about 1-2 minutes, stirring constantly. You want the garlic to become golden brown and fragrant but not burnt, as burnt garlic can impart a bitter taste to the dish.
- Add the Rice: Once the garlic is ready, add the cooked and cooled rice to the skillet. Use a spatula to break apart any clumps and mix the rice with the garlic and oil evenly. Stir-fry the rice for about 5-7 minutes, allowing it to heat through and absorb the garlic flavor.
- Incorporate Cheese and Green Onions: Sprinkle the shredded cheese over the rice and gently fold it in until it melts and combines with the rice. Then add the chopped green onions, mixing them in until they’re evenly distributed throughout the rice.
- Season and Serve: Season the fried rice with salt and pepper to taste. Stir everything together for another minute to confirm all ingredients are well combined. Once done, remove from heat and serve hot.
Extra Tips
For an added twist, you can mix in cooked, chopped meats such as chicken, pork, or shrimp to make this dish more substantial. Additionally, feel free to experiment with different types of cheese or herbs to suit your taste.