

As someone who truly savors the vibrant flavors of Japanese cuisine, I’ve often encountered the challenge of enjoying these dishes without gluten. Thankfully, there’s a treasure trove of gluten-free options that maintain both taste and authenticity. From savory miso ramen to refreshing sushi rolls, each recipe offers a delightful twist on beloved classics. Curious about how to create these delicious meals? Let’s explore 15 bright gluten-free Japanese recipes together.
Gluten-Free Ramen With Miso Broth
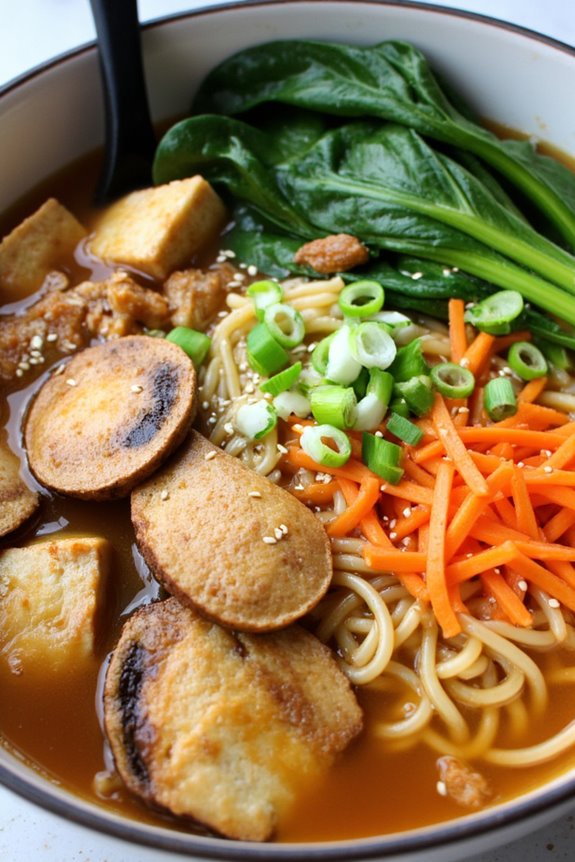
Ramen is a comforting and versatile dish that can be adapted to fit various dietary needs, including gluten-free diets. This Gluten-Free Ramen with Miso Broth uses gluten-free ramen noodles, which are often made from rice or other gluten-free grains, ensuring that you can enjoy a delicious bowl of ramen without any gluten concerns.
The miso broth is rich and savory, offering a deep umami flavor that’s both satisfying and nourishing. Packed with fresh vegetables and protein, this dish is perfect for a family meal or a cozy night in.
In this recipe, we’ll guide you through creating a flavorful miso broth from scratch and how to assemble your ramen bowl with toppings of your choice. Whether you prefer tofu, chicken, or a medley of vegetables, the possibilities are endless. This recipe serves 4-6 people, making it ideal for gatherings or meal prep for the week ahead.
Ingredients:
- 4 cups vegetable broth
- 1/4 cup white miso paste
- 2 tablespoons soy sauce (gluten-free)
- 1 tablespoon sesame oil
- 2 teaspoons rice vinegar
- 2 packs gluten-free ramen noodles
- 1 cup sliced shiitake mushrooms
- 1 cup baby spinach
- 1 cup sliced bok choy
- 1 cup shredded carrots
- 1 block (14 oz) firm tofu, cubed (or chicken, if preferred)
- 2 green onions, thinly sliced
- 1 tablespoon sesame seeds (for garnish)
- Sea salt and black pepper to taste
Instructions:
- Prepare the Broth: In a large pot, heat the sesame oil over medium heat. Add the sliced shiitake mushrooms and sauté for about 3-4 minutes until they begin to soften. This step helps to release the flavors of the mushrooms into the broth.
- Combine Ingredients: Pour in the vegetable broth and bring it to a gentle simmer. Whisk in the white miso paste, soy sauce, and rice vinegar until fully dissolved. Let the broth simmer for about 10-15 minutes to allow the flavors to meld together.
- Cook the Noodles: While the broth is simmering, cook the gluten-free ramen noodles according to the package instructions. Typically, this will take around 3-5 minutes. Once cooked, drain and rinse under cold water to stop the cooking process and set aside.
- Add Vegetables and Protein: Add the bok choy, shredded carrots, and baby spinach to the simmering broth. If using tofu, gently add the cubed tofu at this point. Let everything simmer for an additional 5 minutes until the vegetables are tender but still crisp.
- Assemble the Ramen Bowls: Divide the cooked ramen noodles among bowls. Ladle the hot miso broth with vegetables and tofu over the noodles. Garnish with sliced green onions and sesame seeds.
- Serve: Enjoy your Gluten-Free Ramen with Miso Broth hot, and feel free to add any additional toppings such as seaweed, chili oil, or soft-boiled eggs for extra flavor.
Extra Tips: When preparing this Gluten-Free Ramen with Miso Broth, feel free to customize the recipe by incorporating different vegetables or proteins based on your preferences.
For a spicier kick, add a splash of chili oil or some red pepper flakes. Always taste the broth before serving to adjust the seasoning as needed; miso can vary in saltiness, so you may want to add a pinch of sea salt or a splash of additional soy sauce to perfect the flavor. Enjoy your delicious and wholesome bowl of ramen!
Zucchini Noodle Sushi Rolls
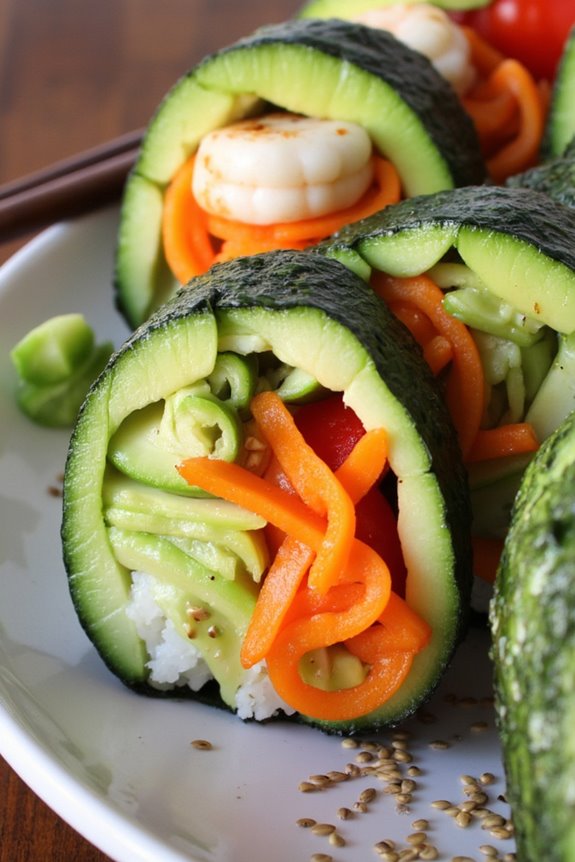
Zucchini Noodle Sushi Rolls are a revitalizing and healthy twist on traditional sushi, perfect for those who are gluten intolerant or looking for a lighter meal option. By replacing rice with spiralized zucchini noodles, these sushi rolls not only cut down on carbs but also add a burst of color and flavor. The crunch of fresh vegetables combined with the savory taste of sushi fillings makes for a delightful dish that’s both satisfying and nutritious.
This recipe is easy to customize with your favorite fillings and toppings, making it a versatile option for lunch, dinner, or even as an impressive appetizer for gatherings. Whether you’re a sushi novice or a seasoned pro, these Zucchini Noodle Sushi Rolls are sure to impress with their vibrant presentation and delicious taste.
Ingredients (Serves 4-6)
- 2 large zucchinis
- 1 medium carrot, julienned
- 1 red bell pepper, thinly sliced
- 1 cucumber, thinly sliced
- 1 avocado, sliced
- 1 cup cooked shrimp or tofu (optional for protein)
- 1/4 cup rice vinegar
- 2 tablespoons gluten-free soy sauce or tamari
- 1 tablespoon sesame oil
- 1 tablespoon honey or agave syrup
- Nori sheets (seaweed)
- Sesame seeds for garnish
- Wasabi and pickled ginger (for serving)
Cooking Instructions
1. Prepare Zucchini Noodles: Begin by washing the zucchinis thoroughly. Using a spiralizer, create zucchini noodles (zoodles) from the zucchinis. If you don’t have a spiralizer, you can use a vegetable peeler to create thin ribbons.
Once done, place the zoodles in a colander, sprinkle with a little salt, and allow them to drain for about 15-20 minutes to remove excess moisture.
2. Prepare the Sauce: In a small bowl, whisk together the rice vinegar, gluten-free soy sauce (or tamari), sesame oil, and honey (or agave syrup) until well combined. This sauce will enhance the flavors of your sushi rolls.
3. Lay Out the Nori: Place a sheet of nori on a bamboo sushi mat or a clean cutting board, shiny side facing down. Make sure you have a small bowl of water nearby for moistening your hands to prevent sticking.
4. Assemble the Sushi Rolls: Start by spreading a thin layer of the zucchini noodles across the nori, leaving about an inch of space at the top. Layer the julienned carrot, red bell pepper, cucumber, avocado, and cooked shrimp or tofu (if using) on top of the zoodles.
Drizzle a little bit of the sauce over the fillings.
5. Roll the Sushi: Using the sushi mat, carefully lift the edge of the mat closest to you and begin rolling it away from you, keeping the fillings snug. Roll tightly but not too tightly to avoid squeezing out the fillings.
When you reach the exposed edge of the nori, use a little water to seal the roll.
6. Slice and Serve: With a sharp knife, slice the sushi roll into bite-sized pieces. Wipe the knife with a damp cloth between cuts to guarantee clean edges.
Arrange the rolls on a platter, sprinkle with sesame seeds, and serve with wasabi and pickled ginger on the side.
Extra Tips
When making Zucchini Noodle Sushi Rolls, feel free to experiment with different vegetables and proteins to suit your taste. You can also marinate the zucchini noodles in the sauce for a more flavorful base.
If you find the zoodles too watery, you can briefly sauté them in a pan to remove excess moisture before assembling your rolls. Finally, for added flavor, consider garnishing with chopped green onions or fresh herbs. Enjoy your healthy sushi creation!
Teriyaki Chicken Skewers

Teriyaki Chicken Skewers are a delightful and easy dish that captures the essence of Japanese flavors while being gluten-free. The sweet and savory teriyaki sauce, made from tamari or gluten-free soy sauce, pairs perfectly with juicy, grilled chicken pieces. This dish not only makes for a great appetizer but also serves as a fantastic main course, especially when served alongside rice or a fresh salad. Perfect for gatherings, these skewers are sure to impress your family and friends with their delicious taste and vibrant presentation.
While preparing these Teriyaki Chicken Skewers, you can customize them to your liking by adding vegetables like bell peppers, onions, or zucchini to the skewers for added flavor and nutrition. The marinade is quick to make and can also be used for other proteins or even vegetables, making it a versatile addition to your gluten-free cooking repertoire. With just a few simple steps, you can enjoy this popular Japanese dish right at home.
Ingredients (serving size: 4-6 people):
- 1.5 pounds boneless, skinless chicken thighs or breasts
- 1/4 cup tamari or gluten-free soy sauce
- 1/4 cup honey or maple syrup
- 2 tablespoons rice vinegar
- 2 tablespoons sesame oil
- 2 cloves garlic, minced
- 1 teaspoon fresh ginger, grated
- 1 tablespoon cornstarch (optional, for thickening)
- 8-10 wooden skewers (soaked in water for 30 minutes if using wooden skewers)
- Sesame seeds (for garnish)
- Chopped green onions (for garnish)
Cooking Instructions:
- Prepare the Marinade: In a mixing bowl, combine the tamari or gluten-free soy sauce, honey or maple syrup, rice vinegar, sesame oil, minced garlic, and grated ginger. Whisk everything together until well combined. If you prefer a thicker glaze for the chicken, stir in the cornstarch until fully dissolved.
- Marinate the Chicken: Cut the chicken into bite-sized pieces and place them in a resealable plastic bag or a shallow dish. Pour the marinade over the chicken, making sure all pieces are well-coated. Seal the bag or cover the dish, and refrigerate for at least 30 minutes, or up to 2 hours for more intense flavor.
- Preheat the Grill: About 10-15 minutes before grilling, preheat your grill to medium-high heat. If using a grill pan on the stove, heat it over medium-high heat and lightly oil the surface.
- Assemble the Skewers: Remove the chicken from the marinade, shaking off any excess. Thread the chicken pieces onto the soaked skewers, leaving a little space between each piece to guarantee even cooking. If desired, alternate with pieces of your favorite vegetables.
- Grill the Skewers: Place the skewers on the preheated grill. Cook for about 6-8 minutes per side, brushing with additional marinade occasionally, until the chicken reaches an internal temperature of 165°F and is nicely charred.
- Serve: Once cooked, remove the skewers from the grill and let them rest for a few minutes. Garnish with sesame seeds and chopped green onions before serving. Enjoy your Teriyaki Chicken Skewers warm, with extra marinade on the side if desired.
Extra Tips:
When making Teriyaki Chicken Skewers, it’s important to allow the chicken to marinate for sufficient time to absorb all the flavors. If you’re short on time, even a quick 30-minute soak will enhance the taste.
Additionally, feel free to experiment with different vegetables or add some pineapple for a sweet twist. Cooking the skewers on a well-preheated grill will help achieve that beautiful char and smoky flavor, making your dish even more authentic!
Cauliflower Rice Donburi
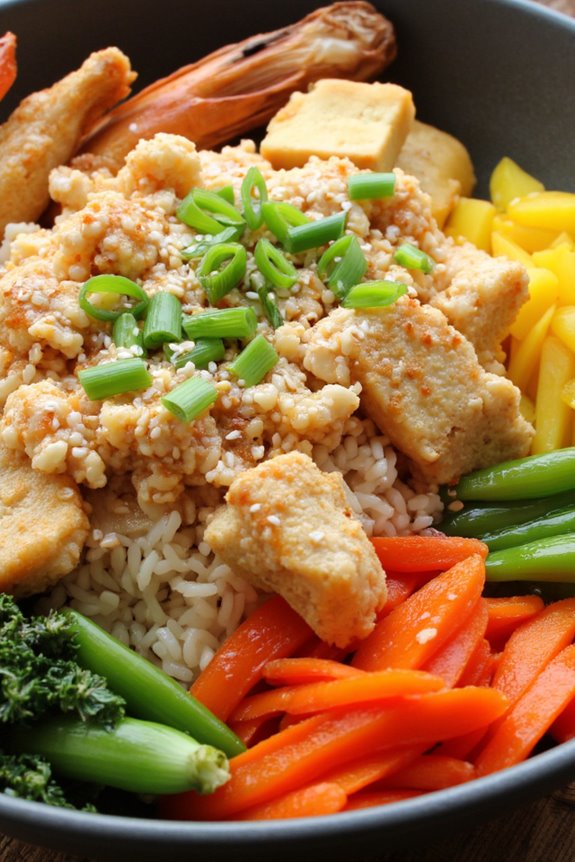
Cauliflower Rice Donburi is a delicious and nutritious twist on the traditional Japanese rice bowl, perfect for those following a gluten-free diet. This dish utilizes cauliflower rice, which is made by finely chopping or grating cauliflower, making it not only low in carbohydrates but also rich in vitamins and minerals.
The versatility of donburi allows you to customize your toppings, making it a perfect meal for any occasion. In this recipe, we’ll create a flavorful and colorful donburi topped with a variety of vegetables, protein options, and a gluten-free sauce that enhances the overall taste.
Whether you’re hosting a dinner party or just looking for a quick weeknight meal, Cauliflower Rice Donburi is sure to impress your family and friends while satisfying your cravings for Japanese cuisine.
Ingredients (Serves 4-6):
- 1 large head of cauliflower (to make cauliflower rice)
- 2 tablespoons olive oil
- 1 medium onion, diced
- 3 cloves garlic, minced
- 1 cup carrots, julienned
- 1 cup bell peppers, sliced (any color)
- 1 cup snap peas, trimmed
- 2 cups cooked protein of choice (chicken, tofu, shrimp, etc.)
- 1/4 cup gluten-free soy sauce or tamari
- 2 tablespoons rice vinegar
- 1 tablespoon sesame oil
- 1 tablespoon honey or maple syrup
- 2 green onions, sliced (for garnish)
- Sesame seeds (for garnish)
Cooking Instructions:
1. Prepare the Cauliflower Rice: Remove the leaves and stem from the cauliflower and cut it into florets. Using a food processor, pulse the florets until they resemble rice grains, or grate them using a box grater. Set aside.
2. Cook the Vegetables: In a large skillet or wok, heat the olive oil over medium heat. Add the diced onion and sauté for about 3-4 minutes until soft and translucent.
Then, add the minced garlic and sauté for another minute until fragrant.
3. Add the Carrots and Peppers: Stir in the julienned carrots and sliced bell peppers. Cook for about 5 minutes until they begin to soften. Add the snap peas and cook for an additional 2-3 minutes, stirring occasionally.
4. Cook the Cauliflower Rice: Push the vegetables to one side of the skillet and add the cauliflower rice to the empty side. Sauté for about 5-7 minutes, stirring occasionally, until the cauliflower is tender but not mushy.
5. Combine with Protein and Sauce: Add your choice of cooked protein to the skillet. In a small bowl, whisk together the gluten-free soy sauce (or tamari), rice vinegar, sesame oil, and honey (or maple syrup).
Pour the sauce over the mixture and stir everything together until well combined. Cook for an additional 2-3 minutes to heat through.
6. Serve: Divide the cauliflower rice donburi into individual bowls. Garnish with sliced green onions and a sprinkle of sesame seeds. Serve warm and enjoy!
Extra Tips:
To elevate your Cauliflower Rice Donburi, consider marinating your protein beforehand for added flavor. You can also experiment with different toppings such as sliced avocado, pickled vegetables, or even a soft-boiled egg.
For those who enjoy a bit of spice, a drizzle of sriracha or chili oil can add a nice kick. Finally, feel free to adjust the vegetables based on seasonal availability or personal preference to make the dish your own!
Eggplant Nasu Dengaku
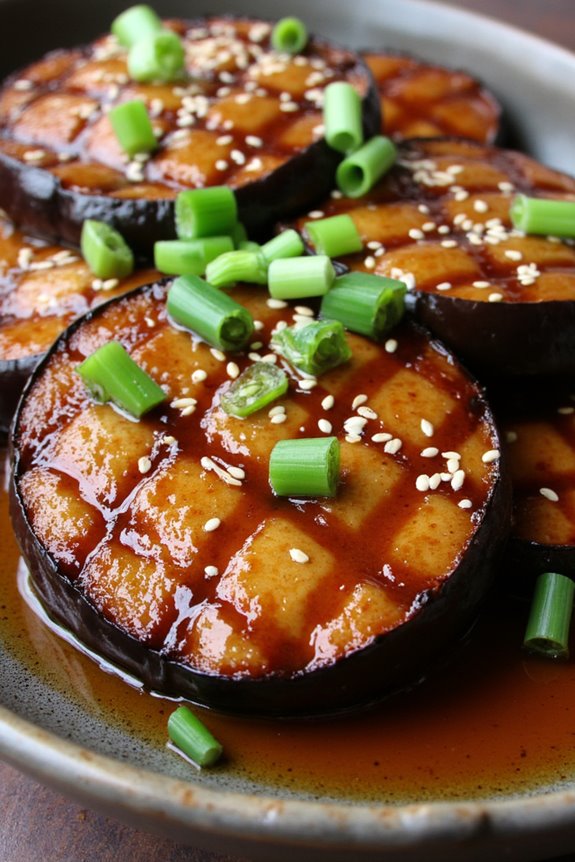
Eggplant Nasu Dengaku is a delicious and traditional Japanese dish that features grilled or broiled eggplant topped with a sweet and savory miso glaze. This dish not only highlights the natural sweetness of eggplant but also introduces a depth of flavor from the miso, creating a perfect balance that’s both satisfying and healthy.
Traditionally served as an appetizer or side dish, Nasu Dengaku can easily become a centerpiece on any table, especially when you want to impress your guests with a gluten-free option that doesn’t compromise on taste.
This recipe for Eggplant Nasu Dengaku is simple to follow and requires only a handful of ingredients. By grilling or broiling the eggplant, you can achieve a lovely smoky flavor that complements the rich miso glaze beautifully.
Whether you’re planning a special dinner or just want to enjoy a comforting meal at home, this eggplant dish is bound to impress. Perfect for 4-6 servings, it’s an ideal choice for any gathering or a cozy family meal.
Ingredients (Serves 4-6):
- 2 large eggplants
- 1/4 cup white miso paste
- 2 tablespoons mirin
- 1 tablespoon sugar
- 1 tablespoon sake (or water)
- 1 tablespoon sesame oil
- 1 green onion, finely chopped (for garnish)
- Sesame seeds (for garnish)
Cooking Instructions:
- Prepare the Eggplants: Start by washing the eggplants thoroughly. Cut each eggplant in half lengthwise, and make shallow diagonal cuts in the flesh, being careful not to cut through the skin. This will allow the glaze to penetrate and flavor the eggplants better.
- Salt the Eggplants: Sprinkle a generous amount of salt over the cut sides of the eggplants and let them sit for about 15-20 minutes. This process helps draw out excess moisture and bitterness from the eggplants, ensuring a better texture and flavor.
- Make the Miso Glaze: In a small saucepan, combine the white miso paste, mirin, sugar, sake (or water), and sesame oil. Heat over low heat, stirring continuously until the mixture is smooth and well combined. Once smooth, remove it from the heat and set it aside.
- Grill the Eggplants: Rinse the salted eggplants under cold water to remove the excess salt and pat them dry with a paper towel. Preheat your grill or broiler. Place the eggplants cut side up on the grill or under the broiler. Cook for about 4-5 minutes or until the flesh is tender and slightly charred.
- Apply the Miso Glaze: Once the eggplants are cooked, carefully remove them from the grill or broiler. Generously spread the miso glaze over the cut sides of each eggplant, ensuring an even coating.
- Finish Cooking: Return the glazed eggplants to the grill or broiler for an additional 2-3 minutes to allow the glaze to caramelize slightly. Keep a close eye on them to prevent burning.
- Serve: Remove the eggplants from the heat and let them cool for a minute. Transfer to a serving platter and garnish with finely chopped green onions and a sprinkle of sesame seeds before serving.
Extra Tips:
When making Eggplant Nasu Dengaku, it’s important to choose firm, glossy eggplants for the best texture and flavor.
If you don’t have mirin or sake, you can substitute with a bit of rice vinegar mixed with sugar to mimic the sweetness. Feel free to adjust the sweetness of the glaze to your preference by adding more or less sugar.
Additionally, you can experiment with different types of miso for unique flavor profiles; for example, red miso will yield a deeper flavor while remaining gluten-free. Enjoy your cooking!
Gluten-Free Tempura Vegetables

Tempura is a classic Japanese dish that features a variety of vegetables, lightly battered and deep-fried to a crispy perfection. The traditional method of making tempura involves using wheat flour, but this gluten-free version substitutes with a gluten-free flour blend, allowing those with gluten sensitivities to enjoy this delicious treat without worry. The result is a crispy, golden coating that enhances the natural flavors of the vegetables while providing a satisfying crunch.
Making gluten-free tempura is an excellent way to enjoy a variety of seasonal vegetables. You can choose your favorites or whatever you have on hand, such as sweet potatoes, zucchini, bell peppers, and broccoli. This dish isn’t only a great appetizer but can also be served as a side dish or a main meal when paired with rice and a dipping sauce. The technique of frying the vegetables at the right temperature is essential for achieving that light and airy texture that’s characteristic of tempura.
Ingredients (Serves 4-6):
- 1 cup gluten-free all-purpose flour
- 1/2 cup cornstarch
- 1 teaspoon baking powder
- 1 cup ice-cold water
- 1 medium sweet potato, sliced into thin rounds
- 1 zucchini, sliced into thin rounds
- 1 red bell pepper, sliced into strips
- 1 cup broccoli florets
- Vegetable oil (for frying)
- Sea salt (for seasoning)
Cooking Instructions:
- Prepare the Vegetables: Wash and slice the vegetables into uniform pieces. This guarantees even cooking. For best results, keep the slices thin, about 1/4 inch thick, so they cook quickly and become crispy.
- Make the Batter: In a mixing bowl, combine the gluten-free all-purpose flour, cornstarch, and baking powder. Slowly pour in the ice-cold water while gently mixing with chopsticks or a fork. Be careful not to overmix; the batter should be lumpy for the best texture.
- Heat the Oil: In a deep frying pan or a wok, pour enough vegetable oil to reach a depth of about 2 inches. Heat the oil to 350°F (175°C). You can test if the oil is hot enough by dropping a small amount of batter into it; if it sizzles and rises to the surface, it’s ready.
- Fry the Vegetables: Dip the prepared vegetable slices into the batter, allowing excess to drip off. Carefully lower them into the hot oil, frying in small batches to avoid overcrowding. Fry for about 2-3 minutes, turning occasionally until they’re golden brown and crispy.
- Drain and Season: Once the vegetables are cooked, use a slotted spoon to remove them from the oil and place them on a plate lined with paper towels to absorb excess oil. While still hot, sprinkle with sea salt to taste.
- Serve: Arrange the tempura vegetables on a serving platter and serve immediately with a soy sauce or tempura dipping sauce on the side for a delightful flavor contrast.
Extra Tips:
For the best results, confirm that your batter is cold, as this helps create a light and crispy texture. Also, keep an eye on the oil temperature; if it’s too hot, the tempura will burn, and if it’s too cool, it will absorb more oil and become greasy.
You can also experiment with different vegetables, such as eggplant or green beans, to find your favorite combinations. For an extra touch, serve with grated daikon radish or a sprinkle of sesame seeds!
Miso Soup With Tofu and Seaweed
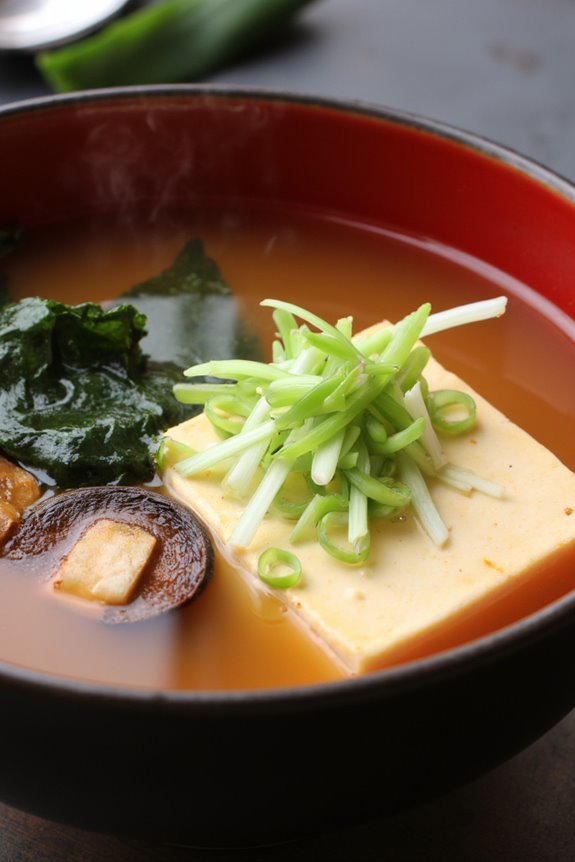
Miso soup is a traditional Japanese dish that isn’t only delicious but also incredibly nourishing. It’s a comforting and versatile soup that can be made with various ingredients, but when it comes to gluten-free options, tofu and seaweed are the stars. This soup is rich in umami flavor, thanks to the miso paste, which is fermented and packed with probiotics. Perfect for a light meal or as a starter, Miso Soup With Tofu and Seaweed is simple to prepare and can be customized with your favorite vegetables or additional proteins.
This gluten-free miso soup serves as an excellent introduction to Japanese cuisine for those who are new to it. The combination of soft tofu and the delicate texture of seaweed creates a harmonious blend, while the miso paste brings depth and warmth to the dish. Whether enjoyed on a chilly evening or as a revitalizing dish during warmer months, this soup is sure to become a favorite in your home kitchen.
Ingredients (Serves 4-6):
- 4 cups water
- 1/2 cup miso paste (ensure it’s gluten-free)
- 1 block firm tofu, cubed
- 1 cup dried seaweed (wakame or kombu, preferably wakame)
- 2 green onions, sliced
- 1 cup mushrooms, sliced (shiitake or your choice)
- 1 tablespoon soy sauce (gluten-free)
- Optional: additional vegetables (such as carrots or spinach)
Cooking Instructions:
- Prepare the Seaweed: Start by soaking the dried seaweed in a bowl of warm water for about 10-15 minutes. This will rehydrate the seaweed and allow it to expand. Once softened, drain and chop it into bite-sized pieces if necessary.
- Heat the Water: In a large pot, pour in the 4 cups of water and bring it to a gentle boil over medium heat. This will be the base of your soup.
- Add the Mushrooms: Once the water is boiling, add the sliced mushrooms to the pot. Cook for about 3-5 minutes until the mushrooms soften and release their flavor into the broth.
- Mix in the Miso Paste: Reduce the heat to low. In a separate bowl, take a small amount of the hot broth and mix it with the miso paste until smooth. This helps to dissolve the miso evenly. Once smooth, stir the mixture back into the pot. Be careful not to boil the soup after adding the miso, as high heat can kill the beneficial probiotics.
- Incorporate Tofu and Seaweed: Gently add the cubed tofu and rehydrated seaweed to the soup. Allow them to heat through for about 3-4 minutes, ensuring that the tofu warms up without breaking apart.
- Season the Soup: Finally, stir in the gluten-free soy sauce for added flavor. Taste the soup and adjust the seasoning if necessary. If you want to add any other vegetables, you can do so at this point, letting them simmer just until tender.
- Garnish and Serve: Remove the pot from the heat. Ladle the soup into bowls and garnish with the sliced green onions. Serve immediately and enjoy!
Extra Tips:
When preparing your Miso Soup With Tofu and Seaweed, feel free to experiment with different types of miso paste, as they vary in flavor and saltiness. White miso is milder and sweeter, while red miso is stronger and saltier. Adjust the quantity based on your preference.
Additionally, you can store leftover soup in the refrigerator, but it’s best enjoyed fresh. If reheating, do so gently to avoid boiling the miso again.
Japanese Beef Curry With Rice
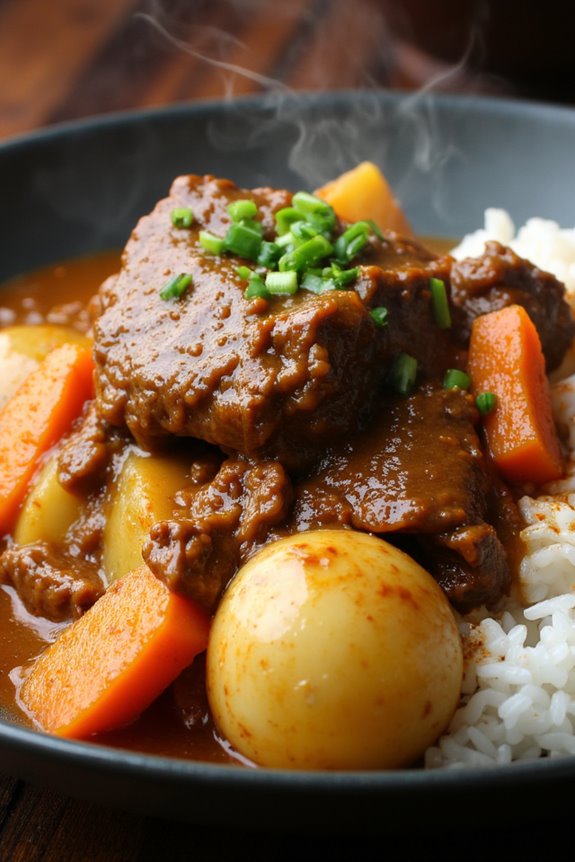
Japanese Beef Curry is a comforting and hearty dish that perfectly embodies the umami flavors of Japanese cuisine. This dish combines tender beef, aromatic vegetables, and a rich curry sauce, all served over fluffy rice. Unlike some other curries, Japanese curry has a slightly sweet and mild flavor profile, making it enjoyable for all palates, including children. The dish is usually thickened with a roux, which contributes to its silky texture and allows the flavors to meld beautifully.
Cooking Japanese Beef Curry at home is an enjoyable experience, and it can be made gluten-free with the right ingredients. Using gluten-free soy sauce and curry roux will guarantee that everyone can indulge in this delightful meal. As you prepare this dish, the kitchen will fill with enticing aromas, promising a satisfying and delicious dinner for family or friends.
Ingredients (Serves 4-6)
- 1 lb (450g) beef chuck, cut into bite-sized pieces
- 2 tablespoons gluten-free soy sauce
- 2 tablespoons vegetable oil
- 1 large onion, sliced
- 2 medium carrots, chopped
- 2 medium potatoes, peeled and cubed
- 3 cups beef broth (guarantee gluten-free)
- 1 package gluten-free curry roux (such as S&B Golden Curry)
- 2 cups cooked rice (white or brown)
- Salt and pepper to taste
- Optional: green onions or pickled vegetables for garnish
Cooking Instructions
- Marinate the Beef: In a mixing bowl, combine the beef pieces with gluten-free soy sauce. Allow it to marinate for about 15-20 minutes. This step helps to tenderize the meat and infuse it with flavor.
- Sauté the Vegetables: In a large pot or Dutch oven, heat the vegetable oil over medium heat. Add the sliced onions and sauté until they become translucent and fragrant, about 5 minutes. This will create a flavorful base for the curry.
- Brown the Beef: Add the marinated beef to the pot, cooking until it’s browned on all sides, approximately 5-7 minutes. Browning the meat enhances its flavor and gives the curry a richer taste.
- Add Vegetables and Broth: Stir in the chopped carrots and cubed potatoes. Pour in the beef broth, making sure all ingredients are submerged. Bring the mixture to a gentle boil, then reduce the heat and let it simmer for about 30 minutes, or until the beef and vegetables are tender.
- Incorporate the Curry Roux: Break the gluten-free curry roux into pieces and stir it into the pot. Allow it to dissolve completely while stirring, which will thicken the curry and provide that characteristic flavor. Simmer for an additional 10-15 minutes, stirring occasionally.
- Season and Serve: Taste the curry and adjust the seasoning with salt and pepper as desired. Serve the hot beef curry over a bed of cooked rice. Garnish with chopped green onions or pickled vegetables if desired.
Extra Tips
When making Japanese Beef Curry, feel free to customize it by adding other vegetables such as bell peppers or mushrooms, depending on your preference. For a spicier kick, you can add a small amount of chili powder or use a spicier curry roux.
This dish is also perfect for meal prep as the flavors deepen and improve the next day, making it an excellent choice for leftovers. Always check labels to guarantee all ingredients are gluten-free, especially the curry roux and broth. Enjoy your homemade Japanese Beef Curry!
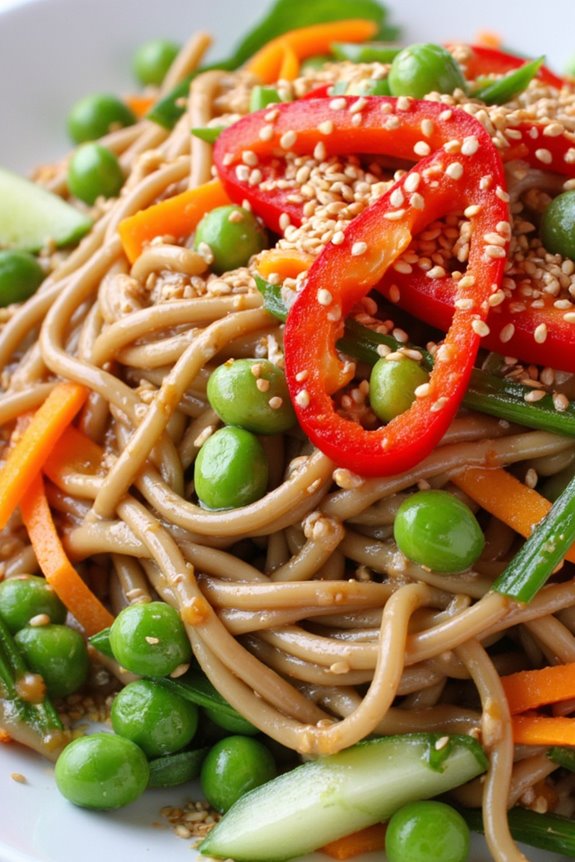
Soba Noodles With Peanut Sauce
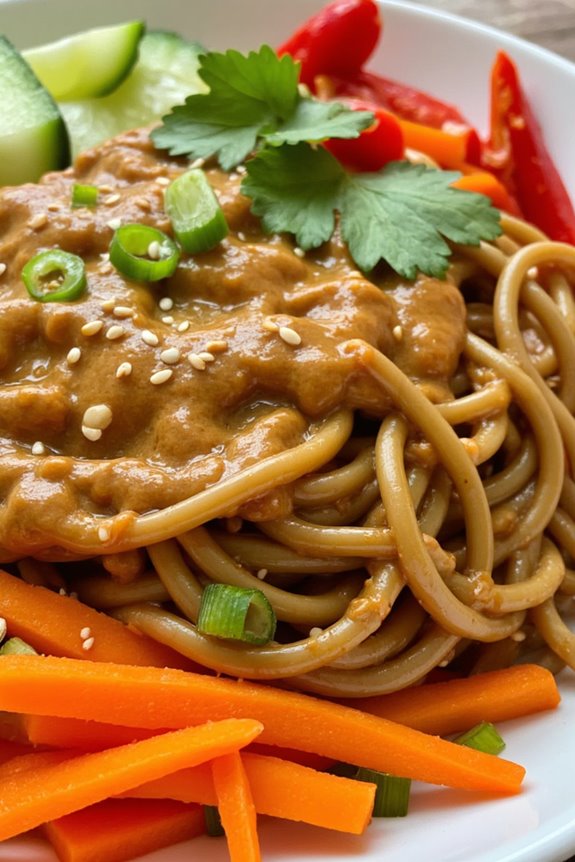
Soba Noodles with Peanut Sauce is a delightful dish that combines the nutty flavor of buckwheat noodles with a rich and creamy peanut sauce. This dish isn’t only gluten-free, thanks to the use of 100% buckwheat soba noodles, but it also brings a burst of flavor and nutrition to your table.
The fresh vegetables and herbs add a nice crunch and vibrant color, making it a feast for the eyes as well as the palate. This recipe is perfect for a quick weeknight dinner or a healthy lunch option. The peanut sauce is simple to make and can be adjusted to fit your taste preferences, whether you like it spicier or sweeter.
Served chilled or at room temperature, Soba Noodles with Peanut Sauce can be enjoyed by the whole family, and it’s a great way to introduce gluten-free ingredients into your meals without sacrificing taste.
Ingredients (Serves 4-6):
- 8 ounces gluten-free soba noodles (100% buckwheat)
- 1 cup peanut butter (creamy or crunchy)
- 1/4 cup soy sauce (or tamari for gluten-free)
- 2 tablespoons rice vinegar
- 2 tablespoons honey or maple syrup
- 2 cloves garlic, minced
- 1 tablespoon sesame oil
- 1 teaspoon grated fresh ginger
- 1/4 teaspoon red pepper flakes (optional, for heat)
- 1 cup shredded carrots
- 1 cup sliced bell peppers (any color)
- 1 cup cucumber, julienned
- 1/4 cup chopped green onions
- 1/4 cup chopped fresh cilantro (for garnish)
- Sesame seeds (for garnish)
Cooking Instructions:
1. Cook the Soba Noodles: Bring a large pot of water to a boil. Add the gluten-free soba noodles and cook according to package instructions, usually around 4-6 minutes. Stir gently to prevent sticking.
Once cooked, drain the noodles and rinse under cold water to stop the cooking process and cool them down. Set aside.
2. Prepare the Peanut Sauce: In a medium bowl, combine the peanut butter, soy sauce, rice vinegar, honey (or maple syrup), minced garlic, sesame oil, grated ginger, and red pepper flakes (if using). Whisk together until smooth and well combined.
If the sauce is too thick, you can add a little warm water to reach your desired consistency.
3. Combine Noodles and Sauce: In a large mixing bowl, add the cooled soba noodles. Pour the peanut sauce over the noodles and toss gently to coat them evenly.
Make sure all the noodles are well covered with the sauce.
4. Add Vegetables: Once the noodles are coated, add the shredded carrots, sliced bell peppers, and julienned cucumber. Toss everything together gently to incorporate the vegetables without breaking the noodles.
5. Garnish and Serve: Transfer the soba noodles to a serving platter or individual bowls. Garnish with chopped green onions, fresh cilantro, and a sprinkle of sesame seeds. Serve chilled or at room temperature.
Extra Tips:
When making Soba Noodles with Peanut Sauce, feel free to customize the vegetable mix according to what you have on hand or your personal preferences.
You can also add protein such as grilled chicken, shrimp, or tofu for a heartier meal. Additionally, the peanut sauce can be prepared in advance and stored in the refrigerator for up to a week, making meal prep easier.
Just remember to give it a good stir before using, as it may thicken upon chilling. Enjoy your delicious and nutritious gluten-free meal!
Grilled Salmon With Soy Sauce Glaze
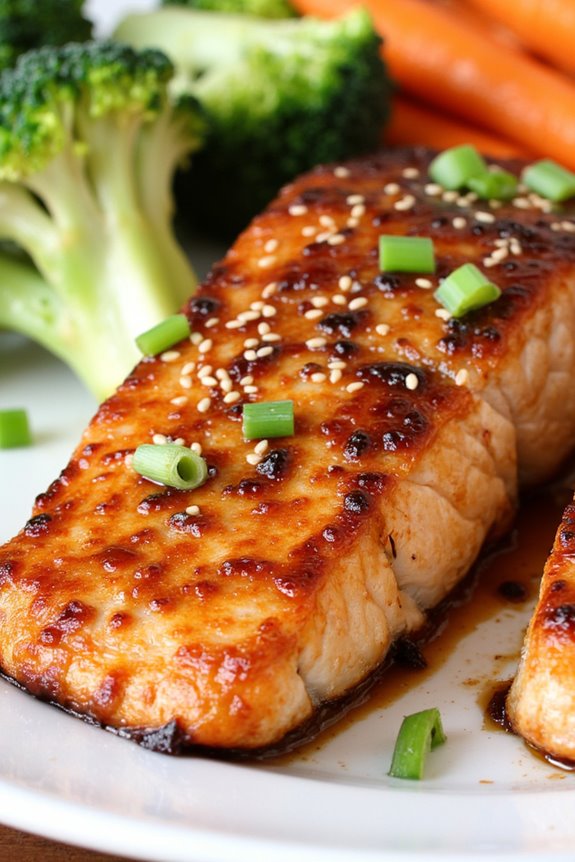
Grilled Salmon with Soy Sauce Glaze is a delightful dish that showcases the rich, buttery flavor of salmon paired with a sweet and savory glaze. This recipe is perfect for those following a gluten-free diet, as it utilizes gluten-free soy sauce, allowing everyone to enjoy this delicious dish without worry. The combination of the umami flavor from the soy sauce, the freshness of the ginger, and the sweetness of the honey creates a mouthwatering glaze that enhances the natural flavors of the salmon.
This dish isn’t only easy to prepare, but it’s also quick to cook, making it an ideal choice for weeknight dinners or special occasions alike. The salmon fillets are marinated in a flavorful mixture that infuses them with taste before they hit the grill. The result is perfectly cooked salmon with a beautiful char and a glossy, sticky glaze that’s sure to impress family and friends. Serve it alongside steamed rice and seasonal vegetables for a complete meal.
Ingredients (Serves 4-6):
- 4-6 salmon fillets (about 6 ounces each)
- 1/4 cup gluten-free soy sauce
- 2 tablespoons honey
- 1 tablespoon rice vinegar
- 1 teaspoon grated fresh ginger
- 2 cloves garlic, minced
- 1 tablespoon sesame oil
- 1 tablespoon sesame seeds (optional, for garnish)
- 2 green onions, chopped (for garnish)
Cooking Instructions:
- Prepare the Marinade: In a medium bowl, whisk together the gluten-free soy sauce, honey, rice vinegar, grated ginger, minced garlic, and sesame oil. This mixture will serve as both a marinade and a glaze for the salmon.
- Marinate the Salmon: Place the salmon fillets in a shallow dish or a resealable plastic bag. Pour the marinade over the salmon, ensuring each piece is well coated. Cover the dish or seal the bag and refrigerate for at least 30 minutes, allowing the salmon to absorb the wonderful flavors.
- Preheat the Grill: While the salmon is marinating, preheat your grill to medium-high heat. If using a grill pan, heat it over medium-high heat on the stovetop. Lightly oil the grill grates to prevent sticking.
- Grill the Salmon: Remove the salmon fillets from the marinade, allowing any excess to drip off. Place the salmon fillets skin-side down on the grill. Cook for about 4-5 minutes per side, depending on the thickness of the fillets. The salmon is done when it flakes easily with a fork and has a nice char.
- Glaze the Salmon: During the final minute of grilling, brush the reserved marinade over the salmon to create a glossy glaze. Be sure to cook for an additional minute after glazing.
- Serve: Once cooked, remove the salmon from the grill and transfer to a serving platter. Garnish with sesame seeds and chopped green onions for added flavor and presentation.
Extra Tips:
When grilling salmon, consider using skin-on fillets, as the skin helps to hold the fish together and prevents it from drying out. Additionally, if you prefer a smokier flavor, you can add wood chips to your grill or use a cedar plank. Just remember to soak the plank in water for at least 30 minutes before grilling to prevent it from catching fire.
Finally, feel free to customize the marinade by adding your choice of herbs or spices to suit your taste!
Gluten-Free Onigiri (Rice Balls)

Onigiri, also known as Japanese rice balls, are a beloved traditional dish that’s both versatile and easy to prepare. These delightful rice snacks can be filled with a variety of ingredients and wrapped in nori (seaweed), making them perfect for lunch boxes, picnics, or a quick snack. The best part is that they can easily be made gluten-free by verifying that all ingredients used are gluten-free certified.
Using short-grain rice, which is sticky and holds its shape well, results in perfectly shaped onigiri that are both delicious and satisfying.
To make gluten-free onigiri, you’ll first need to prepare the rice properly. Rinsing the rice multiple times before cooking guarantees that excess starch is removed, resulting in a fluffier texture. Once the rice is cooked, you can customize your onigiri with various fillings such as pickled plum (umeboshi), tuna, or vegetables. The beautiful thing about onigiri is that it isn’t only delicious but also a great way to incorporate your favorite flavors into a traditional Japanese dish.
Ingredients (Serves 4-6)
- 2 cups short-grain sushi rice (gluten-free)
- 2 1/4 cups water
- 1/2 teaspoon salt
- 1 tablespoon rice vinegar
- 1 teaspoon sugar
- 1/2 teaspoon gluten-free soy sauce (optional)
- Fillings of your choice (e.g., pickled plum, cooked salmon, tuna mixed with mayonnaise, or avocado)
- Nori sheets, cut into strips (optional)
Cooking Instructions
- Rinse the Rice: Place the sushi rice in a fine-mesh sieve or bowl and rinse under cold water. Gently rub the grains together with your fingers to remove excess starch. Repeat until the water runs clear. This step is essential for achieving the right texture.
- Cook the Rice: In a medium saucepan, combine the rinsed rice and water. Bring it to a boil over medium heat, then reduce the heat to low, cover, and simmer for about 15 minutes, or until the water is absorbed. Remove from heat and let it sit, covered, for an additional 10 minutes to allow the rice to steam.
- Season the Rice: In a small bowl, mix the salt, rice vinegar, and sugar until dissolved. Once the rice is done steaming, transfer it to a large bowl. Pour the vinegar mixture over the rice and gently fold it in using a spatula or wooden spoon, being careful not to mash the rice.
- Shape the Onigiri: Wet your hands with water to prevent sticking. Take a portion of rice (about 1/4 cup) and flatten it slightly in your palm. Place a small amount of your desired filling in the center, then mold the rice around the filling to form a triangle or ball shape. Press gently but firmly to hold the shape.
- Wrap with Nori (Optional): If desired, take a strip of nori and wrap it around the base of the onigiri. This adds flavor and makes it easier to hold.
- Serve: Place the onigiri on a plate and serve immediately, or store them in an airtight container if you plan to eat them later. Enjoy your gluten-free onigiri as a snack or as part of a meal!
Extra Tips
When preparing gluten-free onigiri, make sure to check all your ingredients for gluten-free certification, especially the soy sauce. You can also experiment with various fillings and flavor combinations to suit your taste preferences.
Onigiri can be enjoyed fresh or can be stored in the refrigerator for a couple of days, but if you choose to store them, it’s best to wrap them in plastic wrap to retain their moisture. If you find that the rice is too sticky to mold, wet your hands with water to make the shaping process easier.
Sweet Potato Gyoza

Sweet Potato Gyoza is a delightful and creative twist on traditional Japanese dumplings, making them a perfect gluten-free alternative. These dumplings are filled with a luscious mixture of mashed sweet potatoes, vegetables, and seasonings, offering a deliciously sweet and savory flavor profile. Wrapped in gluten-free gyoza skins, they aren’t only visually appealing but also a wholesome dish that can be enjoyed as an appetizer or main course.
The beauty of Sweet Potato Gyoza lies in their versatility. You can customize the filling to suit your taste preferences by adding various vegetables or proteins. These dumplings can be steamed, boiled, or pan-fried to achieve a crispy texture. Served with a soy or dipping sauce, they make for a delightful dish that’s sure to impress family and friends while accommodating those with gluten sensitivities.
Ingredients (serving size: 4-6 people)
- 2 medium sweet potatoes, peeled and cubed
- 1 cup finely chopped cabbage
- 1/2 cup grated carrots
- 1/4 cup chopped green onions
- 2 tablespoons soy sauce (gluten-free)
- 1 tablespoon sesame oil
- 1 teaspoon grated ginger
- 1 teaspoon minced garlic
- Salt and pepper, to taste
- 20-24 gluten-free gyoza wrappers
- Cooking oil for frying
- Dipping sauce (optional)
Cooking Instructions
- Prepare the Sweet Potatoes: In a large pot, bring water to a boil and add the peeled and cubed sweet potatoes. Cook them for about 15-20 minutes, or until they’re tender when pierced with a fork. Drain and let them cool slightly before mashing them in a mixing bowl.
- Make the Filling: To the mashed sweet potatoes, add the finely chopped cabbage, grated carrots, green onions, soy sauce, sesame oil, grated ginger, minced garlic, and a pinch of salt and pepper. Mix everything well until all the ingredients are evenly combined. Taste the filling and adjust the seasoning if necessary.
- Assemble the Gyoza: Take a gluten-free gyoza wrapper and place about a tablespoon of the sweet potato filling in the center. Moisten the edges of the wrapper with water using your finger. Fold the wrapper in half to create a half-moon shape and pinch the edges to seal, creating pleats if desired. Repeat this process until all the filling is used.
- Cook the Gyoza: Heat a tablespoon of cooking oil in a non-stick skillet over medium heat. Arrange the gyoza in the skillet, making sure they aren’t overcrowded. Cook for about 2-3 minutes until the bottoms are golden brown. Then, carefully add about 1/4 cup of water to the skillet, cover it with a lid, and steam for an additional 5-7 minutes until the gyoza are cooked through and the water has evaporated.
- Serve: Once cooked, remove the gyoza from the skillet and serve them hot with your choice of dipping sauce, such as gluten-free soy sauce or a tangy vinegar-based sauce.
Extra Tips
For an extra layer of flavor, consider adding chopped mushrooms or minced tofu to the filling mix. You can also experiment with different dipping sauces, such as a spicy chili sauce or a sweet soy glaze, to enhance your Sweet Potato Gyoza experience.
When cooking, verify that the gyoza aren’t overcrowded in the skillet to allow for even cooking and browning. If you’d like to prepare them in advance, you can freeze the assembled gyoza and cook them straight from the freezer, adding a few extra minutes to the cooking time. Enjoy!
Chilled Soba Salad With Sesame Dressing
Chilled Soba Salad with Sesame Dressing is a revitalizing and nutritious dish that showcases the delicate flavors of buckwheat noodles, crisp vegetables, and a rich sesame dressing. This dish is particularly popular in Japan during the warmer months, as it’s both light and satisfying. The soba noodles are gluten-free, making this salad a great option for those with gluten sensitivities or anyone looking to enjoy a healthy meal.
This salad not only pleases the palate but also offers a colorful presentation, making it perfect for gatherings or family dinners. To elevate the flavors of this dish, it’s crucial to use high-quality ingredients, especially for the sesame oil and soy sauce. The combination of fresh vegetables, such as cucumbers and carrots, adds a delightful crunch, while the dressing ties everything together with its nutty and savory notes.
Whether served as a main dish or a side, this Chilled Soba Salad will surely impress with its vibrant flavors and textures.
Ingredients (Serves 4-6):
- 8 oz soba noodles
- 1 large cucumber, julienned
- 1 large carrot, julienned
- 1 red bell pepper, thinly sliced
- 4 green onions, chopped
- 1 cup edamame (shelled)
- 1/4 cup sesame seeds, toasted
- 1/4 cup gluten-free soy sauce
- 2 tablespoons rice vinegar
- 2 tablespoons sesame oil
- 1 tablespoon honey or maple syrup (for a vegan option)
- 1 teaspoon grated ginger
- Salt and pepper to taste
Cooking Instructions:
1. Cook the Soba Noodles: Begin by boiling a large pot of water. Once it reaches a rolling boil, add the soba noodles and cook according to package instructions, typically about 4-5 minutes. Stir occasionally to prevent sticking.
Once cooked, drain the noodles and rinse them under cold water to stop the cooking process and cool them down.
2. Prepare the Vegetables: While the noodles are cooling, wash and julienne the cucumber and carrot. Thinly slice the red bell pepper and chop the green onions. Combine all the vegetables in a large mixing bowl, adding the edamame for an extra protein boost.
3. Make the Sesame Dressing: In a small bowl, whisk together the gluten-free soy sauce, rice vinegar, sesame oil, honey (or maple syrup), and grated ginger. Adjust the seasoning with salt and pepper to taste, guaranteeing a balanced flavor profile.
4. Combine Noodles and Vegetables: Once the soba noodles are completely cool, add them to the bowl with the vegetables. Pour the sesame dressing over the mixture and toss gently to make sure everything is evenly coated.
5. Garnish and Serve: Transfer the chilled soba salad to a serving platter or bowl. Sprinkle the toasted sesame seeds on top for garnish. Chill in the refrigerator for about 15-20 minutes before serving to allow the flavors to meld together.
Extra Tips:
When preparing the Chilled Soba Salad with Sesame Dressing, consider adding other ingredients such as avocado or radishes for additional flavor and texture.
You can also adjust the level of sweetness in the dressing by varying the amount of honey or maple syrup according to your preference. For a more substantial meal, grilled chicken or tofu can be added for protein. Finally, serve the salad immediately after chilling to retain the freshness of the vegetables.
Coconut Mochi With Mango

Coconut Mochi with Mango is a delightful dessert that combines the unique chewy texture of mochi with the tropical flavors of coconut and fresh mango. This gluten-free treat is perfect for those who love Asian sweets but want to avoid gluten in their diet. The mochi is made from glutinous rice flour, which gives it that signature chewiness, while the coconut milk adds a rich creaminess that pairs perfectly with the sweet, ripe mango.
Making Coconut Mochi with Mango isn’t only easy but also allows you to customize the sweetness and flavor to your liking. This dish can be served as a revitalizing snack or dessert, and it’s sure to impress your family and friends. Whether you’re hosting a gathering or simply craving something sweet, this recipe is a must-try.
Ingredients (Serves 4-6):
- 1 cup glutinous rice flour (mochi flour)
- 1/2 cup coconut milk
- 1/2 cup water
- 1/4 cup sugar
- 1/2 teaspoon salt
- 1 ripe mango, peeled and diced
- 1/4 cup shredded coconut (for coating, optional)
- Cornstarch (for dusting)
Cooking Instructions:
- Prepare the Steamer: Fill a steamer pot with water and bring it to a simmer over medium heat. Make sure you have a steamer basket or a heatproof dish that fits securely within the pot without touching the water.
- Mix the Mochi Batter: In a mixing bowl, combine the glutinous rice flour, sugar, and salt. Gradually add the coconut milk and water, stirring until the mixture is smooth and free of lumps. The batter should be thick but pourable.
- Prepare the Steaming Dish: Lightly dust the bottom of your heatproof dish or steamer basket with cornstarch to prevent the mochi from sticking. Pour the mochi batter into the dish, spreading it evenly.
- Steam the Mochi: Carefully place the dish in the steamer basket. Cover with a lid and steam for about 20-25 minutes, or until the mochi is firm and slightly translucent. You can check for doneness by inserting a toothpick; it should come out clean.
- Cool the Mochi: Once cooked, carefully remove the dish from the steamer and let it cool for about 10-15 minutes. Once cool enough to handle, dust your hands with cornstarch and gently remove the mochi from the dish.
- Shape the Mochi: Cut the cooled mochi into bite-sized squares or rounds. If desired, you can roll each piece in shredded coconut for added texture and flavor.
- Serve with Mango: Place a piece of diced mango on top of each mochi piece or serve them together on a platter. Enjoy your Coconut Mochi with Mango as a delightful dessert!
Extra Tips:
For the best flavor and texture, make sure to use ripe mangoes that are sweet and juicy. You can also experiment with other fruits such as strawberries or kiwi for a twist on this recipe.
Additionally, be cautious when handling the mochi, as it can be sticky; dust your hands and surfaces generously with cornstarch to make shaping easier.
Store any leftover mochi in an airtight container at room temperature for up to two days, or refrigerate for longer shelf life. Enjoy your gluten-free treat!
Matcha Rice Pudding
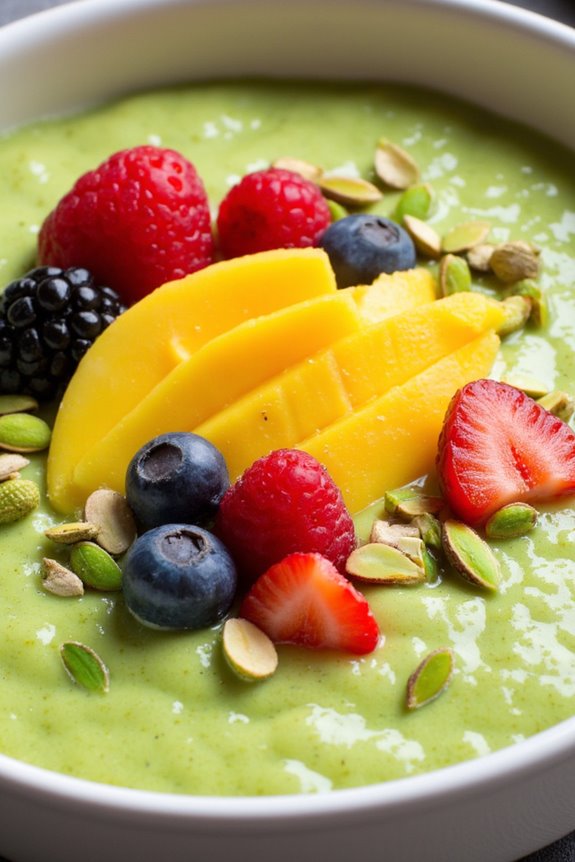
Matcha Rice Pudding is a delightful twist on traditional rice pudding, infusing the rich, earthy flavors of matcha green tea into a creamy and comforting dessert. This gluten-free dish is perfect for those who are looking for a unique dessert that’s both satisfying and nutritious.
The vibrant green color not only makes it visually appealing but also adds a host of health benefits associated with matcha, such as antioxidants and a boost of energy. Enjoy it warm or chilled, topped with fresh fruits or nuts for an extra layer of flavor and texture.
This recipe uses simple ingredients and can be prepared in under an hour, making it an ideal option for gatherings or a cozy night in. Whether you’re new to cooking with matcha or are a seasoned pro, this Matcha Rice Pudding will impress and delight your family and friends.
Its creamy texture combined with the slight bitterness of matcha creates a harmonious balance that’s sure to become a favorite in your dessert repertoire.
Ingredients (Serves 4-6):
- 1 cup Arborio rice
- 4 cups almond milk (or any plant-based milk)
- 1/2 cup granulated sugar
- 1/4 teaspoon salt
- 2 teaspoons matcha green tea powder
- 1 teaspoon vanilla extract
- 1/4 cup coconut cream (optional, for added creaminess)
- Fresh fruits (like berries or mango slices) for topping
- Chopped nuts (like pistachios or almonds) for garnish
Cooking Instructions:
1. Rinse the Rice: Begin by rinsing the Arborio rice under cold water until the water runs clear. This removes excess starch and prevents the pudding from becoming too gummy. Drain well and set aside.
2. Combine Ingredients: In a large saucepan, combine the rinsed Arborio rice, almond milk, granulated sugar, and salt. Stir to combine all the ingredients so the rice is evenly distributed.
3. Cook the Rice: Place the saucepan over medium heat and bring the mixture to a gentle simmer. Stir frequently to prevent the rice from sticking to the bottom of the pan. Continue to cook for about 25-30 minutes, or until the rice is tender and the mixture has thickened to a creamy consistency.
4. Incorporate Matcha: Once the rice is cooked, remove the saucepan from the heat. In a small bowl, mix the matcha green tea powder with a few tablespoons of hot water to create a smooth paste. Gradually add this paste into the rice pudding mixture, stirring well to ascertain the matcha is evenly distributed.
Add vanilla extract and coconut cream at this stage, if using, and stir until fully incorporated.
5. Serve: Allow the Matcha Rice Pudding to cool slightly before serving. It can be enjoyed warm or chilled. Portion into bowls and top with fresh fruits and chopped nuts for added flavor and texture.
Extra Tips:
When making Matcha Rice Pudding, be careful not to overcook the rice; it should be tender but still hold its shape.
Adjust the sweetness to your preference by adding more or less sugar, or try using natural sweeteners like honey or maple syrup. If you want a richer flavor, consider using full-fat coconut milk instead of almond milk.
Experiment with different toppings to personalize your dessert, such as a drizzle of honey, a sprinkle of sesame seeds, or a dollop of whipped cream. Enjoy your cooking adventure!