

There’s something magical about the aroma of kakanin that fills the house during family gatherings. Each bite of puto or kutsinta is like a little piece of home. These classic Filipino rice treats are more than just food; they are traditions wrapped in love. Have you ever wanted to recreate these nostalgic flavors? Let’s explore some cherished recipes that will warm your heart.
Puto: Steamed Rice Cakes
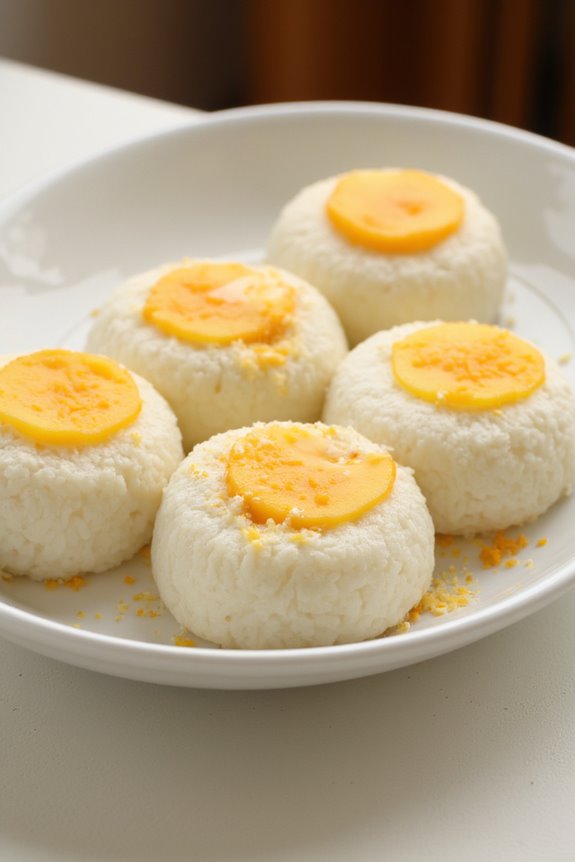
Puto is a beloved Filipino delicacy that has won the hearts of many with its light, fluffy texture and subtly sweet flavor. These steamed rice cakes are often enjoyed as a snack or dessert and are commonly served during special occasions. Traditionally made from rice flour, the variations of puto include different flavors and toppings such as cheese or salted eggs, making it a versatile treat for any palate. Its appealing texture and delightful taste make it a staple in Filipino cuisine.
The preparation of puto is both simple and rewarding, requiring only a few basic ingredients. While it may seem intimidating at first, the process becomes enjoyable as you steam the batter and watch the cakes rise beautifully. The key to perfecting puto lies in the steaming technique, which guarantees that the cakes remain moist and fluffy. Once you master this recipe, you can explore additional flavors and toppings to create your very own signature puto!
Ingredients (serving size: 4-6 people):
- 2 cups rice flour
- 1 cup sugar
- 1 tablespoon baking powder
- 1 cup coconut milk
- 1 cup water
- 1 teaspoon vanilla extract
- 1/4 cup grated cheese (optional, for topping)
- 1/4 cup salted egg slices (optional, for topping)
Cooking Instructions:
- Prepare the Steamer: Begin by setting up your steamer. Fill the steamer pot with water and bring it to a gentle boil. Make sure to check that the water level is sufficient to avoid running dry during steaming.
- Mix the Dry Ingredients: In a large mixing bowl, combine the rice flour, sugar, and baking powder. Whisk these dry ingredients together until they’re well blended and free of lumps. This step is essential to confirm that the baking powder is evenly distributed throughout the mixture.
- Combine Wet Ingredients: In another bowl, mix the coconut milk, water, and vanilla extract. Stir the wet ingredients until they’re well combined. This mixture will provide moisture and flavor to the puto.
- Combine Wet and Dry Mixtures: Gradually pour the wet mixture into the dry ingredients, stirring continuously. Mix until a smooth batter forms. Avoid over-mixing, as this can affect the texture of the puto.
- Prepare the Molds: Lightly grease your puto molds or small ramekins with oil or cooking spray. This will prevent the puto from sticking and make it easier to remove after steaming.
- Fill the Molds: Pour the batter into the prepared molds, filling them about 3/4 full to allow room for the puto to rise while steaming. If you’re using cheese or salted egg slices as toppings, place them on top of the batter in each mold.
- Steam the Puto: Carefully place the filled molds in the steamer basket. Cover the steamer with a lid and steam for about 20-25 minutes, or until a toothpick inserted into the center of a puto comes out clean. Make sure to check the water level during steaming and refill if necessary.
- Cool and Serve: Once cooked, carefully remove the molds from the steamer and allow the puto to cool for a few minutes before gently removing them from the molds. Serve warm as a snack or dessert.
Extra Tips:
When making puto, consider experimenting with flavors by adding ingredients like pandan extract for a fragrant twist or cocoa powder for a chocolate variant.
Make sure to steam the puto on medium heat to avoid overcooking or drying them out. If you prefer a richer texture, you can substitute half of the coconut milk with evaporated milk.
Always keep an eye on the steaming process, as timing can vary depending on the size of your molds and the efficiency of your steamer. Enjoy your homemade puto with a hot cup of coffee or tea for a delightful treat!
Bibingka: Rice Cake With Coconut and Cheese
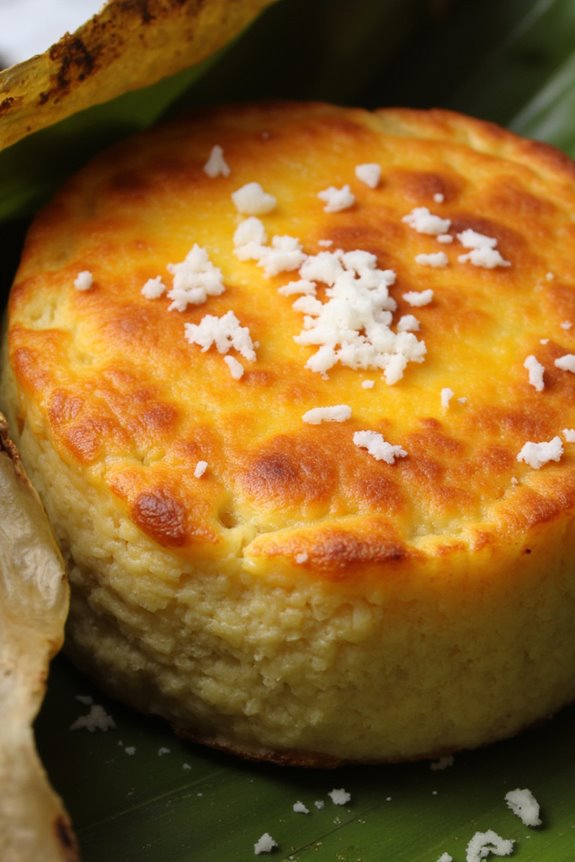
Bibingka is a beloved Filipino delicacy that showcases the rich flavors of rice and coconut, often enjoyed during the Christmas season or special occasions. This traditional rice cake is characterized by its soft, fluffy texture and deliciously sweet taste, complemented by the savory addition of cheese on top. Baked in banana leaves, bibingka isn’t only delicious but also a feast for the eyes, embodying the spirit of Filipino culinary traditions.
To prepare bibingka, the use of glutinous rice flour is crucial, imparting a unique chewy texture that sets this dish apart from other rice cakes. The combination of coconut milk and sugar creates a perfect balance of sweetness, while the cheese adds a savory twist that makes each bite irresistible. With its simple preparation and delightful flavor, bibingka is sure to become a favorite in any household.
Ingredients (Serves 4-6):
- 2 cups glutinous rice flour
- 1 cup coconut milk
- 1 cup water
- 1 cup sugar
- 1 teaspoon baking powder
- 1/4 teaspoon salt
- 1/2 cup grated fresh coconut (optional)
- 1/2 cup grated cheese (e.g., cheddar or queso de bola)
- 2-3 pieces banana leaves, cut into circles and softened
- Butter or margarine for greasing
Cooking Instructions:
- Preheat the Oven: Begin by preheating your oven to 375°F (190°C). This guarantees that the bibingka will bake evenly and develop a nice golden color.
- Prepare the Banana Leaves: If using banana leaves, pass them over an open flame or dip them in boiling water to soften them. This will make them pliable and easier to work with. Line a baking dish or molds with the softened banana leaves, allowing the edges to hang over the sides.
- Mix Dry Ingredients: In a large mixing bowl, combine the glutinous rice flour, sugar, baking powder, and salt. Whisk together until well blended to confirm an even distribution of ingredients.
- Combine Wet Ingredients: In another bowl, mix together the coconut milk and water. Gradually add this liquid mixture to the dry ingredients, stirring continuously until the batter is smooth and well combined.
- Incorporate Grated Coconut: If you’re using grated fresh coconut, fold it gently into the batter. This step is optional but adds a delightful texture and flavor to the bibingka.
- Pour the Batter: Pour the batter into the prepared banana leaf-lined baking dish or molds, filling them about 3/4 full to allow for rising during baking.
- Add Cheese: Sprinkle the grated cheese evenly over the top of the batter. This will create a deliciously gooey cheese layer once baked.
- Bake the Bibingka: Place the baking dish in the preheated oven and bake for approximately 25-30 minutes or until the bibingka is set and a toothpick inserted into the center comes out clean.
- Check for Doneness: If the top isn’t golden brown after 30 minutes, you may broil it for an additional 2-3 minutes to achieve that lovely color, but be sure to watch it closely to prevent burning.
- Cool and Serve: Once baked, remove the bibingka from the oven and let it cool slightly. Carefully lift the bibingka from the dish using the banana leaves, and slice into wedges for serving. Serve warm with additional butter, if desired.
Extra Tips:
When making bibingka, feel free to experiment with toppings such as sliced salted eggs or additional coconut for extra flavor. Make sure to use fresh coconut milk for the best taste; if you can’t find fresh, canned coconut milk will work just fine.
For added richness, consider mixing a bit of powdered milk into the batter. Finally, enjoy this delightful treat fresh out of the oven for the best experience!
Kutsinta: Sticky Brown Rice Cakes

Kutsinta is a traditional Filipino delicacy that’s loved for its unique flavor and chewy texture. Often enjoyed as a snack or dessert, these sticky brown rice cakes are made from rice flour, brown sugar, and lye water, which gives them their distinct color and texture. Kutsinta is typically steamed and served with grated coconut on top, making it a delightful treat for both young and old.
Its sweet and slightly salty taste pairs perfectly with a cup of tea or coffee, making it an ideal accompaniment for any time of day.
Making kutsinta at home may seem intimidating, but with the right ingredients and a few simple steps, you can whip up a batch that will impress your family and friends. The combination of flavors and textures in this dish is sure to transport you back to the streets of the Philippines where these treats are sold.
Whether you’re celebrating a special occasion or just craving a sweet snack, kutsinta is a fantastic choice that showcases the rich culinary heritage of Filipino cuisine.
Ingredients (serving size: 4-6 people)
- 1 cup rice flour
- 1 cup brown sugar
- 1 cup water
- 1 teaspoon lye water (sodium hydroxide solution)
- 1/2 teaspoon vanilla extract (optional)
- Grated coconut (for topping)
Cooking Instructions
- Prepare the batter: In a mixing bowl, combine the rice flour and brown sugar. Gradually add water while stirring continuously to avoid lumps. Mix until you achieve a smooth batter. If desired, add vanilla extract for additional flavor.
- Add lye water: Carefully stir in the lye water into the batter. This ingredient is essential as it helps give kutsinta its signature chewy texture and rich brown color. Make sure to mix thoroughly to guarantee even distribution.
- Prepare the steaming setup: Fill a steamer pot with water and bring it to a boil. While waiting for the water to boil, prepare small molds or cups (like llanera or silicone molds) by greasing them lightly with oil to prevent sticking.
- Pour the batter into molds: Once the water is boiling, pour the kutsinta batter into the prepared molds, filling them about three-quarters full to allow for expansion while cooking.
- Steam the kutsinta: Carefully place the molds in the steamer. Cover the steamer with a lid and steam the kutsinta for approximately 30-35 minutes or until a toothpick inserted in the center comes out clean. Keep the steam consistent by avoiding the opening of the steamer lid during cooking.
- Cool and serve: Once cooked, remove the molds from the steamer and let them cool for a few minutes. Gently remove the kutsinta from the molds and place them on a serving plate. Top with grated coconut before serving.
Extra Tips
When making kutsinta, make sure that you measure your ingredients accurately for the best results. If you want to experiment with flavors, consider adding a pinch of pandan extract or coconut milk to the batter for an aromatic twist.
Additionally, be cautious with the lye water; a little goes a long way, and it’s essential to mix it well into the batter. Finally, for a more visually appealing presentation, you can layer different colors of kutsinta by steaming them in separate layers, creating an eye-catching treat that’s as delightful to look at as it’s to eat!
Suman: Sticky Rice Wrapped in Leaves

Suman is a beloved Filipino delicacy made primarily from glutinous rice, which is often sweetened and sometimes flavored with coconut milk. This traditional treat is widely enjoyed during festivals and family gatherings, as well as during everyday occasions.
The process of preparing suman involves wrapping the sticky rice mixture in banana leaves, which not only adds flavor but also provides a unique presentation. The result is a delicious, chewy dessert that’s served warm or at room temperature, often accompanied by a drizzle of sugar or coconut sauce.
To make suman, you’ll need a few simple ingredients and some patience, as the wrapping and steaming process can be a bit labor-intensive but is definitely worth it. Once you master the technique, you can easily create variations by adding different flavorings or toppings. The combination of the sweet rice and the aromatic banana leaves makes suman a delightful treat that showcases the rich culinary culture of the Philippines.
Ingredients (Serves 4-6)
- 2 cups glutinous rice
- 1 cup coconut milk
- 1/2 cup sugar
- 1/2 teaspoon salt
- 10-12 pieces banana leaves (cut into rectangles)
- Water for steaming
Cooking Instructions
- Soak the Rice: Begin by rinsing the glutinous rice under cold water until the water runs clear. Soak the rice in water for at least 4 hours or overnight. This helps soften the grains and guarantees even cooking.
- Prepare the Banana Leaves: While the rice is soaking, prepare the banana leaves. Briefly pass them over an open flame or dip them in boiling water to make them pliable. This will prevent the leaves from tearing when you wrap the rice.
- Mix the Ingredients: After soaking, drain the rice and transfer it to a mixing bowl. Add the coconut milk, sugar, and salt to the rice. Mix well until all the ingredients are evenly combined.
- Wrap the Suman: Take a piece of the prepared banana leaf and place about 1/4 cup of the rice mixture in the center. Fold the sides of the leaf over the rice, then roll it tightly from the bottom to the top. Secure the ends by folding them inward. Repeat this process until all the rice mixture is wrapped.
- Steam the Suman: Arrange the wrapped suman in a steamer basket. Make sure they aren’t too tightly packed to allow steam to circulate. Pour water into the steamer and bring it to a boil. Once boiling, reduce the heat and steam the suman for about 45 minutes to 1 hour, or until the rice is fully cooked and sticky.
- Cool and Serve: Once cooked, remove the suman from the steamer and let them cool slightly. Carefully unwrap them from the banana leaves. Serve warm, drizzled with extra coconut milk or sugar if desired.
Extra Tips
When preparing suman, it’s important to ascertain that the rice is well-soaked for the best texture. The banana leaves should be adequately softened to prevent tearing, which can make wrapping difficult.
You can also experiment with different toppings, such as grated coconut or a sprinkle of brown sugar, to enhance the flavor. If you prefer a sweeter suman, feel free to adjust the sugar amount according to your taste. Enjoy your delicious homemade suman!
Leche Flan: Filipino Caramel Custard

Leche Flan is a classic Filipino dessert that’s loved for its creamy texture and rich caramel flavor. This indulgent dish is typically served during special occasions and celebrations, making it a staple in Filipino households. Made primarily from eggs, condensed milk, evaporated milk, and sugar, Leche Flan is a delightful treat that can be enjoyed by the whole family. Its smooth consistency and sweet, rich taste make it a perfect ending to any meal.
The process of making Leche Flan might seem intimidating at first, but with a little practice, anyone can master this traditional recipe. The key to achieving the perfect flan lies in the preparation of the caramel and the careful cooking of the custard mixture. Flan is often served chilled and can be garnished with fresh fruits or a sprinkle of grated cheese for added flavor. This recipe serves 4-6 people, making it a great choice for gatherings and family feasts.
Ingredients:
- 1 cup granulated sugar (for caramel)
- 6 large eggs
- 1 can (14 oz) sweetened condensed milk
- 1 can (12 oz) evaporated milk
- 1 tsp vanilla extract
- Pinch of salt
Cooking Instructions:
- Prepare the Caramel: In a medium saucepan, over medium heat, add the granulated sugar. Allow it to melt without stirring, swirling the pan occasionally to guarantee even melting. Once the sugar is completely melted and turns a golden amber color, carefully pour it into a round, lidded baking dish or individual flan molds. Quickly tilt the dish to coat the bottom evenly with the caramel. Set aside to cool and harden.
- Mix the Custard: In a large mixing bowl, crack the eggs and whisk them gently. Add the sweetened condensed milk, evaporated milk, vanilla extract, and a pinch of salt. Whisk the mixture until everything is well combined and smooth. Be careful not to overbeat, as this may introduce excess air bubbles into the custard.
- Strain the Mixture: To guarantee a silky texture, strain the custard mixture through a fine-mesh sieve into the caramel-coated dish. This will remove any chalazae (the white strands from the egg) and create a smoother custard.
- Steam the Flan: Prepare a steamer or a large pot with a steaming rack. Fill the pot with water, making sure the water level is below the flan dish. Bring the water to a simmer. Carefully place the flan dish in the steamer or on the rack, cover with a lid, and steam for about 30-40 minutes, or until the custard is set (a toothpick inserted in the center should come out clean).
- Cool and Chill: Once done, remove the flan from the steamer and let it cool at room temperature. Once cooled, cover with plastic wrap and refrigerate for at least 4 hours or overnight to allow the flavors to meld and the texture to firm up.
- Serve: To serve, run a knife around the edges of the flan to loosen it. Invert the flan onto a serving platter. The caramel sauce will flow over the top, creating a beautiful presentation. Slice and enjoy!
Extra Tips:
When making Leche Flan, it’s important to keep a close eye on the caramel as it can burn quickly. If you prefer a lighter caramel flavor, you can reduce the cooking time slightly.
Additionally, using room temperature eggs and letting the flan chill overnight in the refrigerator will enhance its texture and flavor. If desired, you can experiment with adding flavors like citrus zest or coconut milk to create a unique twist on the classic recipe.
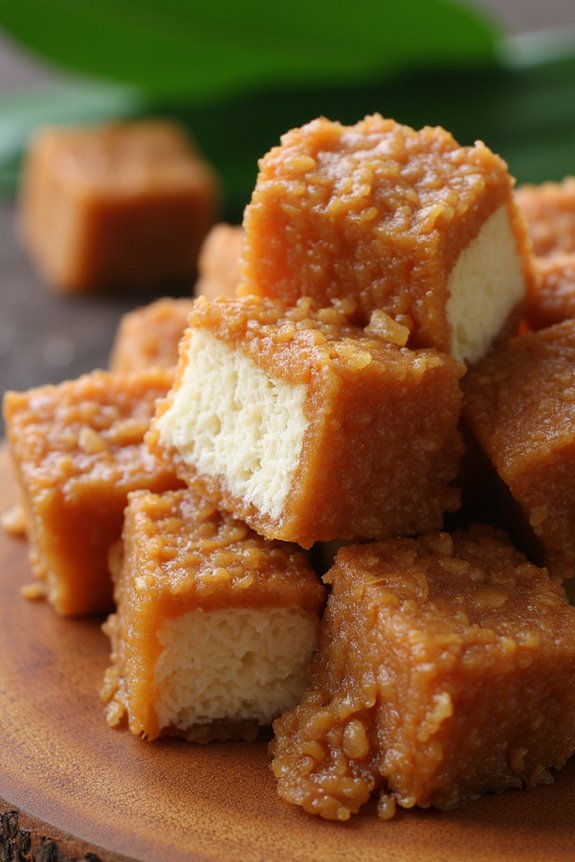
Biko: Sweet Sticky Rice With Coconut Milk
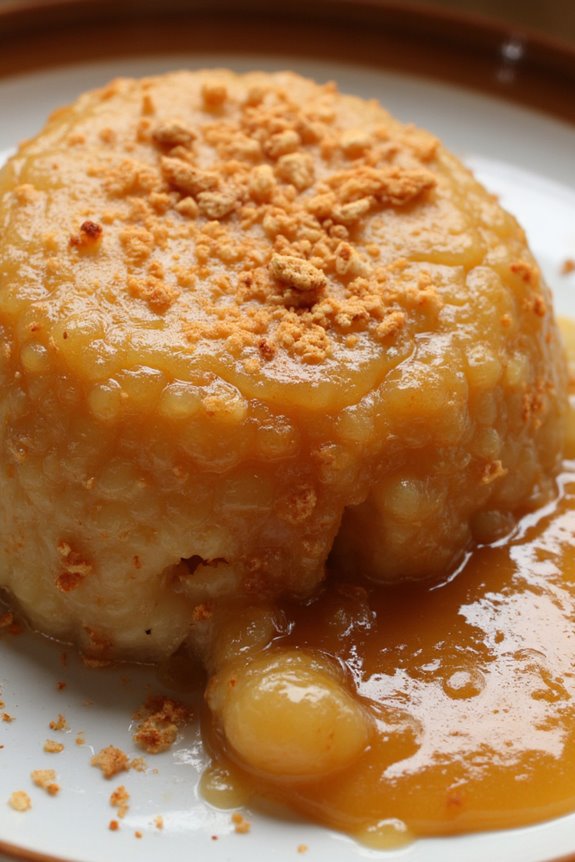
Biko is a traditional Filipino delicacy made from glutinous rice, coconut milk, and brown sugar. This deliciously sweet dish is often enjoyed during special occasions, festivals, or simply as a delightful dessert. Its rich, sticky texture and caramelized flavor make it a favorite among many, and it’s an excellent way to showcase the flavors of the Philippines.
The combination of coconut milk and brown sugar gives Biko its signature taste that’s both comforting and indulgent. Preparing Biko may seem intimidating, but it’s quite simple once you follow the steps outlined below. The dish is typically served warm or at room temperature, and it can be enjoyed as a snack or a dessert. With the right ingredients and a little patience, you can recreate this delightful Kakanin right in your own kitchen.
Ingredients (Serves 4-6):
- 2 cups glutinous rice
- 1 cup coconut milk
- 1 cup brown sugar
- 1/2 teaspoon salt
- 1 cup water
- 1 tablespoon butter or margarine (for greasing)
- Optional: toasted grated coconut for topping
Cooking Instructions:
- Rinse the Rice: Start by rinsing the glutinous rice under cold water until the water runs clear. This step helps to remove excess starch and guarantees that the rice cooks evenly and doesn’t become too gummy.
- Soak the Rice: After rinsing, soak the glutinous rice in water for at least 30 minutes. This soaking process allows the rice to absorb water, which helps it cook more evenly and achieve that sticky texture.
- Cook the Rice: Drain the soaked rice and transfer it to a pot. Add 1 cup of water and cook on medium heat. Bring it to a boil, then reduce to low heat and cover. Cook for about 20 minutes or until the rice is fully cooked and water is absorbed. Stir occasionally to prevent sticking.
- Prepare the Coconut Mixture: While the rice is cooking, combine the coconut milk, brown sugar, and salt in a separate saucepan. Stir the mixture over medium heat until the sugar is fully dissolved. Don’t let it boil; you just want to heat it enough to combine the ingredients.
- Combine the Rice and Coconut Mixture: Once the rice is cooked, add it to the coconut mixture. Stir well to confirm that all the rice is evenly coated with the sweet coconut mixture. Cook this combined mixture over low heat for about 10-15 minutes, stirring constantly until it thickens and pulls away from the sides of the pan.
- Transfer to a Dish: Grease a baking dish with butter or margarine. Pour the Biko mixture into the dish and flatten it with a spatula to create an even surface. You can optionally sprinkle toasted grated coconut on top for added texture and flavor.
- Cool and Serve: Allow the Biko to cool for a few minutes before slicing it into squares or rectangles. Serve warm or at room temperature, and enjoy this delightful dessert with friends and family!
Extra Tips:
When cooking Biko, it’s important to stir the mixture continuously during the thickening process to prevent it from sticking to the bottom of the pan and burning.
You can also experiment with different sweeteners, such as coconut sugar or palm sugar, for a unique flavor profile. If you prefer a creamier texture, feel free to adjust the coconut milk to your liking, but remember that the consistency should still be thick enough to hold its shape once cooled.
Palitaw: Sweet Rice Cake Coated With Coconut
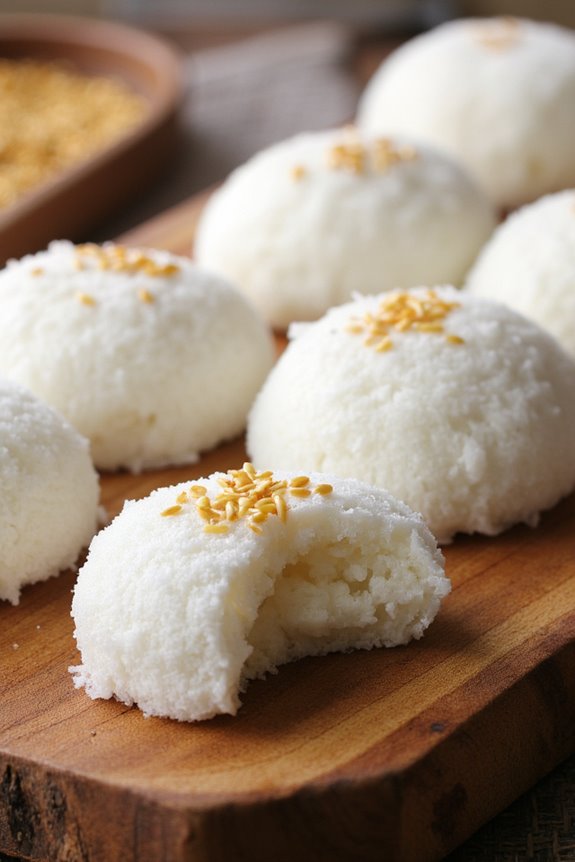
Palitaw is a beloved Filipino delicacy, often enjoyed as a snack or dessert. This delightful treat is made from rice flour, which is mixed with water to form a dough that’s shaped into small flat cakes. The name “palitaw” comes from the Tagalog word “litaw,” which means to float, as the cakes float to the surface of boiling water when they’re ready.
Traditionally, they’re coated in grated coconut, sugar, and sesame seeds, creating a deliciously sweet and chewy experience. Making palitaw is a simple yet rewarding process. With just a few ingredients and straightforward steps, you can enjoy this traditional dish right in your own kitchen.
Whether you’re celebrating a special occasion or simply craving something sweet, palitaw is sure to satisfy your taste buds and bring a taste of the Philippines to your home.
Ingredients (Serves 4-6):
- 1 cup rice flour
- 1/4 cup water (add more if needed)
- 1/4 cup grated coconut (fresh or desiccated)
- 1/4 cup sugar
- 1 tablespoon sesame seeds (optional)
- A pinch of salt
Cooking Instructions:
- Prepare the Dough: In a mixing bowl, combine the rice flour and a pinch of salt. Gradually add water to the mixture while stirring until a smooth and pliable dough forms. The dough shouldn’t be too sticky; adjust the water or flour as necessary to achieve the right consistency.
- Shape the Cakes: Once the dough is ready, divide it into small portions—about the size of a golf ball. Roll each portion into a ball and then flatten it slightly to form a disc shape, about 1/4 inch thick. You can use your fingers or the palm of your hand to shape them.
- Boil Water: Fill a large pot with water and bring it to a boil over medium heat. Make sure there’s enough water to allow the palitaw to float freely.
- Cook the Palitaw: Carefully drop the flattened rice cakes into the boiling water. Cook them for about 2-3 minutes, or until they float to the top. This indicates they’re cooked through. Use a slotted spoon to remove them from the water and let them drain on a plate.
- Coat with Coconut and Sugar: In a shallow dish, mix the grated coconut and sugar together. Roll each cooked palitaw in the coconut mixture until they’re evenly coated. If desired, sprinkle sesame seeds over the top for added flavor and crunch.
- Serve: Arrange the coated palitaw on a serving plate. They can be enjoyed warm or at room temperature. Serve them with a drizzle of extra coconut or a side of sweetened condensed milk for an added touch.
Extra Tips:
For the best results, make sure to use glutinous rice flour rather than regular rice flour, as it gives palitaw its characteristic chewy texture. If you prefer a sweeter treat, feel free to adjust the amount of sugar in the coating.
Additionally, fresh grated coconut adds a lovely flavor, but desiccated coconut works well if fresh isn’t available. Enjoy your homemade palitaw with family and friends for a delightful Filipino experience!
Sapin-Sapin: Layered Rice Cake

Sapin-Sapin is a traditional Filipino delicacy that’s both visually appealing and delicious. This layered rice cake is made from glutinous rice flour and coconut milk, giving it a rich and creamy texture. It’s typically steamed in colorful layers, with each layer often flavored with different ingredients such as ube (purple yam), jackfruit, or sweetened coconut. This festive treat is often served during special occasions and celebrations, making it a beloved favorite among Filipinos.
Making Sapin-Sapin at home isn’t only a fun activity, but it also allows you to customize the flavors and colors to your liking. With its vibrant layers, this dessert is sure to impress your family and friends. Whether you’re looking to enjoy it as a sweet snack or a dessert after a hearty meal, Sapin-Sapin is the perfect choice for satisfying your sweet cravings.
Ingredients (Serves 4-6 people):
- 2 cups glutinous rice flour
- 1 cup coconut milk
- 1 cup water
- 1 cup sugar
- 1 teaspoon salt
- 1 teaspoon pandan extract (optional)
- 1 cup ube halaya (purple yam puree)
- 1 cup sweetened grated coconut
- 1/2 cup ripe jackfruit, sliced (optional)
- Food coloring (purple and yellow for layering)
Cooking Instructions:
- Prepare the Steamer: Fill a large pot with water and bring it to a boil. Place a steaming rack inside, making sure the water doesn’t touch the bottom of the rack. Line a 9-inch round cake pan with banana leaves or parchment paper for easy removal later.
- Mix the Base Ingredients: In a large mixing bowl, combine the glutinous rice flour, coconut milk, water, sugar, and salt. Stir until the mixture is smooth and free of lumps. This mixture will serve as the base for all layers.
- Divide the Mixture: Split the base mixture into three equal portions. In one portion, add the ube halaya and a few drops of purple food coloring until you achieve your desired shade. In the second portion, mix in the sweetened grated coconut. Leave the final portion plain or add pandan extract for flavor.
- Layer the Mixtures: Pour the ube mixture into the prepared cake pan and spread it evenly. Cover with a lid or aluminum foil and steam for about 15 minutes, or until the layer is firm. After steaming, remove the cover and let it cool slightly.
- Add the Second Layer: Once the ube layer has cooled, pour the coconut mixture over it, spreading it evenly. Cover and steam for another 15 minutes until set. Allow it to cool slightly again.
- Add the Last Layer: Repeat the process with the plain or pandan-flavored layer. After steaming, you can optionally top it with slices of ripe jackfruit for added flavor and texture. Steam for a final 15 minutes.
- Cool and Serve: Once all layers are cooked and firm, remove the cake from the steamer and let it cool completely. Carefully remove it from the mold, cut into wedges, and serve.
Extra Tips:
For a more colorful presentation, consider using food coloring to dye each layer in different shades. You can also experiment with flavors by adding different ingredients such as mango puree or even chocolate.
Make sure to steam the layers properly to achieve a firm texture; undercooked layers may not hold together well. Finally, serve Sapin-Sapin chilled for a revitalizing treat, and feel free to garnish it with additional sweetened coconut or fruit slices for an extra touch.
Maja Blanca: Coconut Milk Pudding
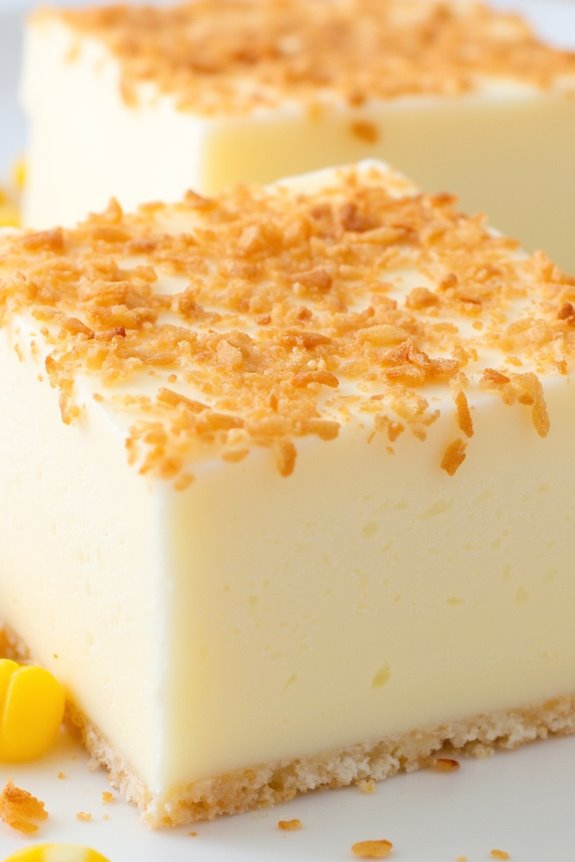
Maja Blanca is a delightful Filipino dessert made primarily from coconut milk, cornstarch, and sugar, giving it a rich and creamy texture that’s simply irresistible. This traditional kakanin is often enjoyed during special occasions such as fiestas and family gatherings, as well as a popular sweet treat to cap off any meal.
Its subtle sweetness and smooth consistency make it a comforting dessert that appeals to both adults and children alike. The pudding is typically topped with toasted grated coconut or sweet corn for added flavor and texture, making it not just delicious but also visually appealing.
The preparation is straightforward, and with just a few key ingredients, you can whip up a batch of Maja Blanca that’s bound to impress your family and friends. Whether you’re celebrating a holiday or simply craving something sweet, this coconut milk pudding is a perfect choice.
Ingredients (Serves 4-6)
- 2 cups coconut milk
- 1 cup water
- 1 cup cornstarch
- 3/4 cup sugar
- 1/2 cup sweet corn kernels (fresh or canned)
- 1/4 teaspoon salt
- 1/2 teaspoon vanilla extract (optional)
- Toasted grated coconut (for topping)
Cooking Instructions
- Combine the Ingredients: In a mixing bowl, combine the coconut milk, water, sugar, and salt. Stir until the sugar is fully dissolved. This mixture forms the base of your pudding and infuses it with the rich flavor of coconut.
- Mix the Cornstarch: In a separate small bowl, dissolve the cornstarch in a little bit of the coconut milk mixture (about 1/4 cup) until smooth. This step guarantees that the cornstarch doesn’t clump when added to the larger mixture.
- Heat the Mixture: Pour the coconut milk mixture into a saucepan and bring it to a gentle boil over medium heat. Stir continuously to prevent it from burning and to guarantee an even distribution of heat.
- Add the Cornstarch Mixture: Once the coconut milk mixture is boiling, gradually add the dissolved cornstarch to the saucepan while continuously stirring. This will help thicken the pudding. Keep stirring until the mixture thickens to a smooth, creamy consistency.
- Incorporate Sweet Corn: Stir in the sweet corn kernels and vanilla extract (if using) into the thickened mixture. This adds a delightful sweetness and texture to your Maja Blanca.
- Pour into Mold: Remove the saucepan from heat and pour the pudding mixture into a greased mold or a square baking dish. Spread it evenly, smoothing the top with a spatula.
- Cool and Set: Allow the Maja Blanca to cool at room temperature before transferring it to the refrigerator. Chill for at least 2-3 hours or until fully set.
- Serve: Once set, gently remove the pudding from the mold and slice it into squares. Top with toasted grated coconut before serving for an added crunch and flavor.
Extra Tips
When preparing Maja Blanca, guarantee that you continuously stir the mixture while it’s cooking to avoid lumps and to achieve a silky-smooth texture.
You can also experiment with toppings; aside from toasted coconut, you can use a drizzle of condensed milk or even sprinkle some chopped nuts for added flavor. Be patient during the cooling process, as this is essential for the pudding to set properly.
Enjoy your Maja Blanca chilled for the best experience!
Kakanin: Assorted Rice Cakes
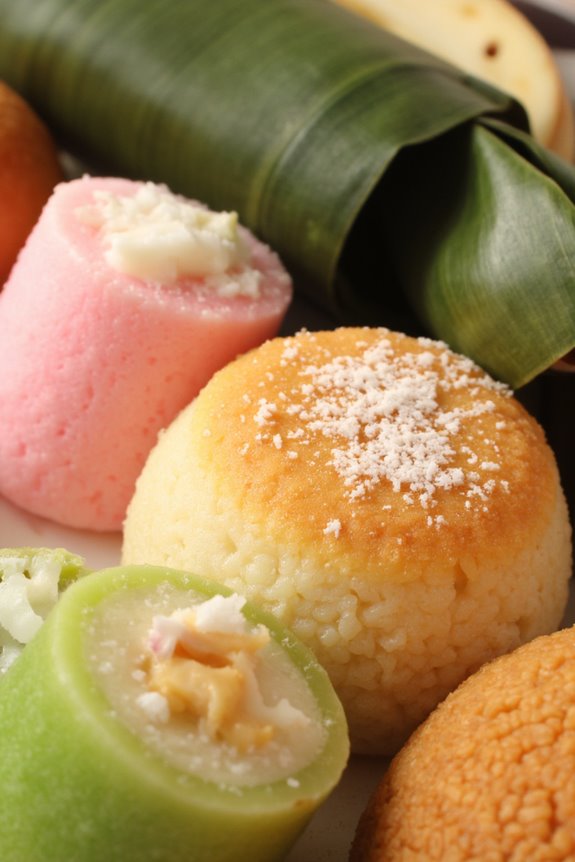
Kakanin refers to a variety of traditional Filipino rice cakes that are made from glutinous rice and are often served during special occasions and celebrations. These delightful treats come in various shapes, colors, and flavors, showcasing the rich culinary heritage of the Philippines.
The combination of sweet and savory fillings, along with the use of coconut milk, creates a diverse range of textures and tastes that appeal to many palates. This recipe for assorted rice cakes will guide you through making a selection of popular kakanin, such as puto (steamed rice cakes), bibingka (rice cake baked with banana leaves), and suman (sticky rice wrapped in leaves).
To make these assorted rice cakes, you’ll need a few basic ingredients that are commonly found in Filipino households. The preparation involves mixing various types of rice flour with coconut milk, sugar, and other flavorings to create a batter, which is then cooked using steaming or baking methods.
Each type of kakanin has its own unique preparation method, but they all share the same love and tradition that comes with Filipino food. Gather your ingredients and get ready to indulge in a delicious array of kakanin that will surely impress your family and friends.
Ingredients (Serves 4-6)
- 2 cups glutinous rice flour
- 1 cup coconut milk
- 1 cup water
- 1 cup sugar
- 1 teaspoon baking powder
- 1/2 teaspoon salt
- 1/2 cup grated coconut (for topping)
- Banana leaves (if using for bibingka)
- Food coloring (optional, for coloring the puto)
Cooking Instructions
1. Prepare the Steamer and Banana Leaves:
If you’re making bibingka, start by soaking the banana leaves in hot water for about 10 minutes to make them pliable. Once softened, cut them to fit the baking dish or steamer and line the dish with the leaves.
For puto, simply prepare the steamer by boiling water.
2. Mix the Batter:
In a mixing bowl, combine the glutinous rice flour, sugar, baking powder, and salt. Mix well. Gradually add the coconut milk and water while stirring until you achieve a smooth batter.
If you want colored puto, divide the batter and mix in a few drops of food coloring to your desired shades.
3. Steam the Puto:
Pour the batter into the lined puto molds or small cups, filling each about 3/4 full. Place the molds in the steamer and cover with a lid.
Steam over medium heat for approximately 15-20 minutes or until a toothpick inserted in the center comes out clean. Remove from steamer and set aside.
4. Prepare the Bibingka Batter:
For bibingka, use a similar batter but add more coconut milk (about 1.5 cups) for a richer flavor. Pour the batter into the prepared baking dish lined with banana leaves.
5. Bake the Bibingka:
Preheat the oven to 375°F (190°C). Bake the bibingka for about 30-35 minutes or until the top is golden brown.
Occasionally, you can brush the top with melted butter and sprinkle grated coconut for added flavor.
6. Make the Suman:
For suman, soak glutinous rice in water overnight, then drain. Mix the rice with coconut milk and sugar.
Spoon the mixture onto banana leaves, fold them into a log shape, and tie with string. Steam for 30-40 minutes until cooked through.
7. Serve and Enjoy:
Once all the rice cakes are cooked, allow them to cool slightly. Serve the assorted kakanin on a platter, garnished with grated coconut and enjoy them warm or at room temperature.
Extra Tips
When preparing assorted kakanin, it’s essential to guarantee that your steamer has enough water to prevent it from running dry during the cooking process.
If you’re using food coloring, be cautious with the amount to avoid overpowering the natural flavors of the rice. You can also experiment with different toppings, such as cheese on puto or salted eggs on bibingka, for added texture and taste.
Finally, allow your kakanin to cool slightly before serving, as this will help them firm up and make them easier to slice and enjoy.
Sinukmani: Glutinous Rice With Coconut

Sinukmani, a traditional Filipino delicacy, is a delightful dessert made from glutinous rice, coconut milk, and sugar. This sweet treat is often enjoyed during festive occasions and family gatherings, offering a comforting taste reminiscent of home. The combination of sticky rice and creamy coconut creates a rich and satisfying texture, making it a favorite among both children and adults alike.
Its simplicity in ingredients highlights the natural flavors, while its presentation can be enhanced with toppings like latik (coconut curds) or sweetened coconut flakes.
Preparing Sinukmani isn’t only about cooking but also about enjoying the process. The method involves soaking the rice, blending it with coconut milk, and steaming it to perfection. The result is a luscious dish that can be served warm or at room temperature, perfect for any occasion.
Follow the recipe below to create this delightful Kakanin for a serving size of 4-6 people.
Ingredients:
- 2 cups glutinous rice
- 1 cup coconut milk
- 1 cup water
- 3/4 cup sugar
- 1/2 teaspoon salt
- 1/4 cup grated coconut (optional, for topping)
- 1/4 cup latik (coconut curds, optional, for topping)
Cooking Instructions:
- Soak the Glutinous Rice: Begin by washing the glutinous rice thoroughly under cold water until the water runs clear. This helps remove excess starch. After washing, soak the rice in water for at least 4 hours or overnight. Soaking allows the rice to absorb moisture, guaranteeing even cooking and a sticky texture.
- Prepare the Coconut Mixture: In a mixing bowl, combine the coconut milk, sugar, and salt. Stir the mixture until the sugar is fully dissolved. This sweet coconut mixture will be the key flavor component of your Sinukmani, enhancing the rice’s natural sweetness.
- Mix the Ingredients: Once the rice has soaked, drain it and add it to the coconut mixture. Stir well to confirm all the rice grains are coated with the coconut milk mixture. This step is vital as it guarantees that each grain absorbs the flavor during cooking.
- Steam the Mixture: Line a steamer basket with a clean cloth or banana leaves to prevent sticking. Pour the rice and coconut mixture into the steamer and spread it evenly. Cover with a lid and steam over medium heat for about 30-40 minutes. Check occasionally to confirm that there’s enough water in the steamer. The rice should be cooked through and have a sticky consistency.
- Check for Doneness: After about 30 minutes, check the Sinukmani for doneness by tasting a small scoop. If the rice is tender and has absorbed the coconut flavor, it’s ready. If not, steam for an additional 5-10 minutes.
- Serve: Once cooked, remove the Sinukmani from the steamer and allow it to cool slightly. Cut into squares or rectangles for serving. You can top it with grated coconut or latik for added flavor and presentation.
Extra Tips:
For a more flavorful Sinukmani, consider using fresh coconut milk instead of canned, as it has a richer taste. Additionally, you can experiment with different toppings like toasted sesame seeds or sweetened jackfruit for a unique twist.
Guarantee the rice is well-soaked to achieve that perfect sticky texture, and remember to keep an eye on the steaming process to avoid overcooking. Enjoy your homemade Sinukmani as a delicious treat that brings a taste of the Philippines to your table!
Bukayo: Sweet Coconut Candy
Bukayo is a delightful Filipino treat made primarily from grated coconut and sugar, often flavored with a hint of vanilla or a touch of orange zest. This sweet candy is typically enjoyed as a snack or dessert and is popular during festive occasions and celebrations. The rich, chewy texture combined with the natural sweetness of coconut makes it a favorite among both children and adults alike.
Making bukayo is a straightforward process that allows you to enjoy the comforting flavors of the Philippines in your own kitchen. To create this delightful candy, fresh grated coconut is cooked with sugar until it reaches a sticky consistency. Once cooled, it can be shaped into small bars or bites, making it easy to share with family and friends.
Bukayo can also be wrapped in colorful cellophane or banana leaves, adding a traditional touch that enhances its appeal. Whether you’re looking to indulge your sweet tooth or impress your guests with a unique treat, bukayo is a perfect choice.
Ingredients (serving size: 4-6 people):
- 2 cups freshly grated coconut
- 1 cup brown sugar
- 1/2 cup water
- 1/4 teaspoon vanilla extract (optional)
- 1/4 teaspoon orange zest (optional)
- 1 tablespoon butter (for greasing)
Cooking Instructions:
- Prepare the Grated Coconut: Begin by obtaining fresh grated coconut. If using a whole coconut, carefully crack it open, remove the meat, and grate it using a box grater or food processor. Measure out 2 cups of the grated coconut and set it aside.
- Combine Ingredients: In a medium-sized saucepan, combine the grated coconut, brown sugar, and water. If you’re using vanilla extract and/or orange zest, add them to the mixture at this stage. Stir the ingredients well to guarantee that the sugar is evenly distributed throughout the coconut.
- Cook the Mixture: Place the saucepan over medium heat and cook the mixture, stirring continuously to prevent it from sticking to the bottom of the pan. Continue cooking until the sugar dissolves completely and the mixture thickens. This should take about 10-15 minutes. You’ll know it’s ready when it pulls away from the sides of the pan and forms a sticky mass.
- Cool and Shape: Once the mixture has reached the desired consistency, remove the saucepan from heat. Grease a flat surface or a baking dish with butter. Pour the coconut mixture onto the greased surface and spread it out evenly using a spatula. Allow it to cool for about 15-20 minutes until it’s manageable to handle.
- Cut into Pieces: After the bukayo has cooled sufficiently, use a knife to cut it into small squares or rectangles. You can also shape them into small balls if preferred.
- Serve or Store: Allow the bukayo to cool completely before serving. You can store any leftovers in an airtight container at room temperature for up to a week.
Extra Tips: When preparing bukayo, fresh coconut yields the best flavor and texture, but if it’s not available, you can use desiccated coconut as a substitute. Just make sure to adjust the sugar content, as desiccated coconut can be sweeter.
Be patient while cooking; the key to achieving the right chewy consistency is to confirm that the mixture is cooked properly without burning. Additionally, feel free to experiment with flavors by adding other extracts or spices to personalize your bukayo!
Puto Bumbong: Purple Rice Cake Steamed in Bamboo
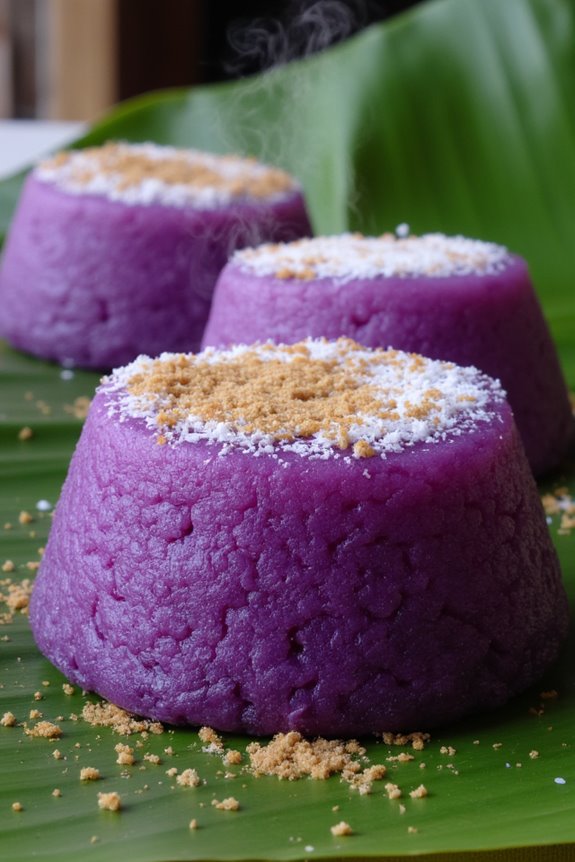
Puto Bumbong is a beloved Filipino delicacy traditionally enjoyed during the Christmas season but is delightful any time of the year. This steamed rice cake is made from glutinous rice flour mixed with ube (purple yam) and is often served with grated coconut and brown sugar, creating a harmonious blend of sweet and savory flavors.
The unique cooking technique involves steaming the mixture in bamboo tubes, which gives the rice cake its distinct shape and enhances its aroma.
Making Puto Bumbong may seem intimidating, but with the right ingredients and a little patience, you can create this festive treat in your own kitchen. Perfect for sharing with family and friends, Puto Bumbong isn’t just a dish; it’s a celebration of Filipino culture and culinary heritage.
So, roll up your sleeves and prepare to indulge in this delicious and vibrant rice cake!
Ingredients (Serves 4-6)
- 2 cups glutinous rice flour
- 1 cup water
- 1 cup ube (purple yam) puree
- 1/2 cup sugar
- 1/4 teaspoon salt
- Grated coconut (for topping)
- Brown sugar (for topping)
- Banana leaves (for lining the bamboo tubes)
Cooking Instructions
- Prepare the Equipment: Start by soaking the bamboo tubes in water for about 30 minutes to make sure they’re clean and ready for steaming. If you’re using banana leaves, cut them into rectangular pieces large enough to line the bamboo tubes.
- Mix the Batter: In a mixing bowl, combine the glutinous rice flour, ube puree, sugar, salt, and water. Stir the mixture until you achieve a smooth batter. The consistency should be thick but pourable. If it seems too thick, add a little more water.
- Line the Bamboo Tubes: Take a piece of banana leaf and line the inside of each bamboo tube. This will prevent the batter from sticking and add an extra layer of flavor. Make sure that the banana leaf is fully covering the inside of the tube.
- Fill the Bamboo Tubes: Pour the prepared batter into the lined bamboo tubes, filling them about three-quarters full. Make sure to leave some space for the batter to expand while steaming.
- Set Up the Steamer: Fill a large pot or steamer with water and bring it to a boil. Place the bamboo tubes upright in the steamer basket or directly in the pot, ensuring they’re stable and won’t tip over. Cover the pot with a lid.
- Steam the Puto Bumbong: Steam the filled bamboo tubes for about 20-25 minutes. You’ll know they’re done when the batter has set and is firm to the touch. You can check by inserting a toothpick; it should come out clean.
- Serve and Enjoy: Once cooked, carefully remove the bamboo tubes from the steamer and let them cool slightly. To serve, gently push the Puto Bumbong out of the tubes, slice them into smaller pieces, and top with grated coconut and brown sugar.
Extra Tips
To enhance the flavor of your Puto Bumbong, consider using fresh ube instead of store-bought puree for a richer taste.
If you don’t have bamboo tubes, small heatproof containers or muffin tins can be used as alternatives. Additionally, you can add a dash of pandan extract for a unique aromatic twist.
Make sure to adjust the steaming time based on your equipment to achieve the perfect texture. Enjoy your Puto Bumbong warm for the best experience!