

When I think about sushi, my mind fills with the vibrant colors and artful presentations that brighten any table. Each roll has its own story, from the creamy California roll to the intricate Dragon roll. It’s truly amazing how simple ingredients can come together to create something visually stunning and delicious. If you’re interested in crafting these masterpieces at home, these recipes might just be your next culinary adventure. Get ready to explore a world of flavors and creativity in your kitchen.
Classic California Roll
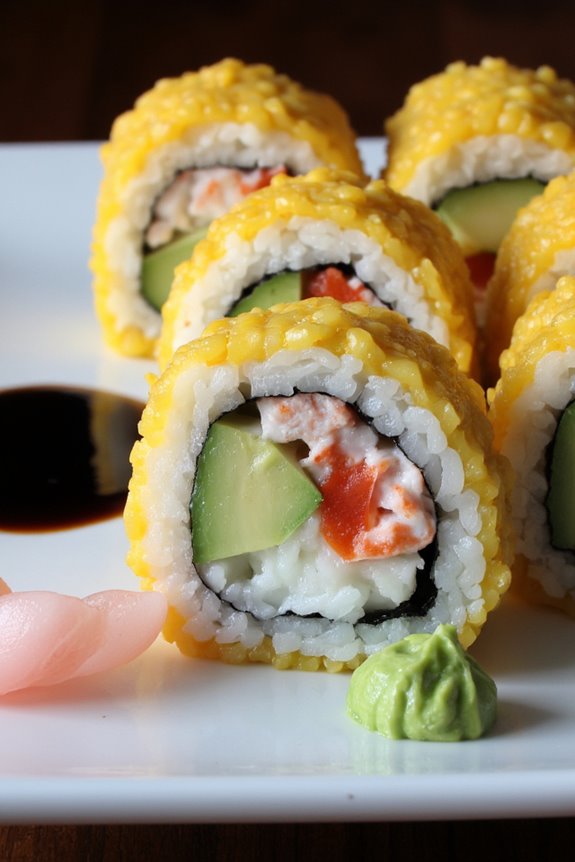
The Classic California Roll is a beloved sushi roll that has become a staple in sushi restaurants across the globe. Combining the sweet and delicate flavors of crab (or imitation crab), creamy avocado, and crisp cucumber, this sushi roll isn’t only delicious but also quite simple to make at home.
The California Roll is often served with soy sauce, wasabi, and pickled ginger, making it a delightful appetizer or main dish that can cater to a variety of palates, especially for those new to sushi.
Making your own California Roll allows for customization according to your taste preferences. Whether you prefer to use real crab meat or the more common imitation crab, this recipe will guide you through creating a fresh and delicious roll that will impress your family and friends.
With a few ingredients and some practice, you’ll be rolling sushi like a pro in no time!
Ingredients (serves 4-6 people):
- 2 cups sushi rice
- 2 1/2 cups water
- 1/4 cup rice vinegar
- 2 tablespoons sugar
- 1 teaspoon salt
- 4 sheets nori (seaweed)
- 1 cup imitation crab meat (or real crab meat)
- 1 ripe avocado, sliced
- 1 medium cucumber, julienned
- Soy sauce, for serving
- Wasabi, for serving
- Pickled ginger, for serving
Cooking Instructions:
1. Prepare the Sushi Rice****: Rinse the sushi rice under cold water until the water runs clear to remove excess starch. In a medium saucepan, combine the rinsed rice and water, bringing it to a boil over high heat.
Once boiling, reduce the heat to low, cover, and simmer for about 20 minutes or until the rice absorbs all the water. Remove from heat and let it sit covered for an additional 10 minutes.
2. Season the Rice: In a small bowl, mix the rice vinegar, sugar, and salt until dissolved. Once the rice is done resting, transfer it to a large bowl and gently fold in the vinegar mixture using a wooden spatula or rice paddle.
Be careful not to mash the rice; you want to keep it fluffy. Allow the rice to cool to room temperature.
3. Prepare the Fillings: While the rice cools, prepare your fillings. Shred the imitation crab meat and set it aside. Slice the avocado into thin strips and julienne the cucumber into long, thin pieces.
4. Assemble the Roll: Place a bamboo sushi mat on a flat surface and lay a sheet of nori on top, shiny side down. With wet hands, spread a thin layer of sushi rice evenly over the nori, leaving about 1 inch of space at the top.
Press the rice down gently to adhere it to the nori.
5. Add the Fillings: In the center of the rice-covered nori, place a line of imitation crab meat, a few strips of avocado, and some julienned cucumber.
6. Roll it Up: Starting from the edge closest to you, lift the bamboo mat and begin to roll away from you, tucking the filling in as you go.
Roll tightly but not too tight, ensuring the fillings stay in place. Once you reach the bare edge of the nori, wet it slightly with water to help seal the roll.
7. Slice the Roll: Using a sharp knife, Slice the Roll into 6-8 pieces. Clean the knife with a damp cloth between cuts to ensure clean edges.
8. Serve: Arrange the sliced rolls on a plate and Serve with soy sauce, wasabi, and pickled ginger on the side for dipping.
Extra Tips:
To enhance the flavor of your California Roll, consider adding a sprinkle of sesame seeds on top before serving or incorporating a slice of fresh mango for a tropical twist.
Make sure to keep your hands wet while handling the sushi rice to prevent it from sticking. Practice makes perfect, so don’t be discouraged if your first rolls aren’t flawless! Enjoy the process and have fun experimenting with different fillings.
Spicy Tuna Roll
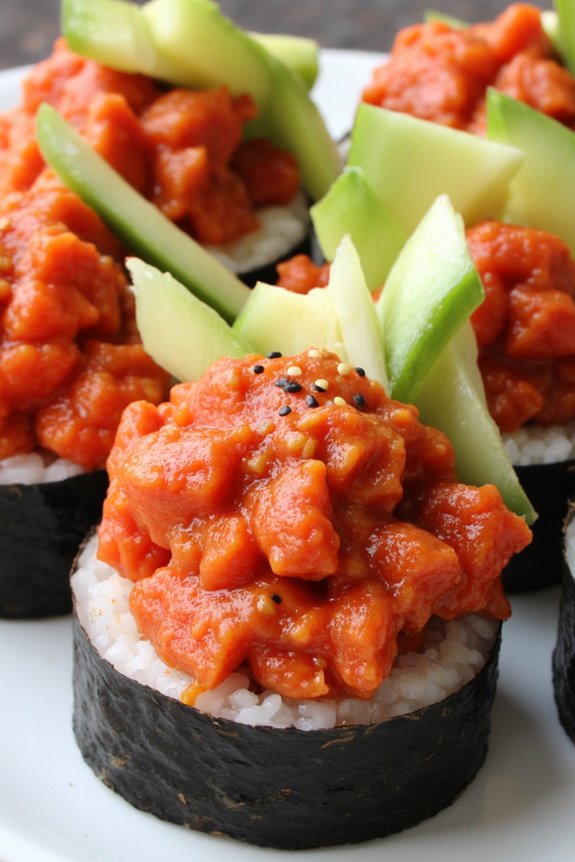
The Spicy Tuna Roll is a popular sushi dish that blends the traditional flavors of Japanese cuisine with a modern twist. This delectable roll features fresh tuna mixed with a spicy mayo sauce, all wrapped in sushi rice and nori, making it a favorite among sushi enthusiasts. The combination of creamy and spicy elements in the filling perfectly complements the chewy texture of the rice and the crispiness of the seaweed, creating a delightful culinary experience.
Making Spicy Tuna Rolls at home can be an enjoyable and rewarding endeavor, allowing you to customize the spice level and ingredients to your liking. With the right techniques and a bit of practice, you can impress your family and friends with this flavorful sushi dish. Let’s explore the recipe!
Ingredients (Serves 4-6 people)
- 2 cups sushi rice
- 2 ½ cups water
- ¼ cup rice vinegar
- 2 tablespoons sugar
- 1 teaspoon salt
- 8 sheets of nori (seaweed)
- 8 ounces sushi-grade tuna, diced
- 2 tablespoons mayonnaise
- 1 tablespoon Sriracha (adjust to taste)
- 1 tablespoon sesame oil
- ½ avocado, sliced
- 1 small cucumber, julienned
- Soy sauce, for serving
- Pickled ginger, for serving
- Wasabi, for serving (optional)
- Sesame seeds, for garnish (optional)
Cooking Instructions
1. Prepare the Sushi Rice: Rinse the sushi rice under cold water until the water runs clear. This removes excess starch and prevents the rice from becoming gummy.
Combine the rinsed rice and water in a rice cooker or pot. Cook according to the rice cooker’s instructions or bring to a boil, then reduce to a simmer, cover, and cook for about 20 minutes. Remove from heat and let it sit, covered, for an additional 10 minutes.
2. Season the Rice: While the rice is resting, prepare the vinegar mixture. In a small saucepan, heat the rice vinegar, sugar, and salt over low heat until the sugar dissolves.
Once the rice has rested, transfer it to a large bowl and gently fold in the vinegar mixture using a spatula. Be careful not to mash the rice. Allow it to cool to room temperature.
3. Make the Spicy Tuna Filling****: In a medium bowl, combine the diced tuna, mayonnaise, Sriracha, and sesame oil. Mix well until the tuna is evenly coated.
Taste and adjust the spice level by adding more Sriracha if desired.
4. Assemble the Rolls: Place a bamboo sushi mat on a flat surface and lay one sheet of nori on the mat, shiny side down.
Wet your hands to prevent sticking and grab a handful of sushi rice. Spread the rice evenly over the nori, leaving about 1 inch of space at the top edge. Press the rice down gently but firmly.
5. Add the Filling: In the center of the rice-covered nori, place a line of the spicy tuna mixture, followed by a few slices of avocado and julienned cucumber.
6. Roll the Sushi: Using the bamboo mat, carefully lift the edge closest to you and start rolling it away from you, tucking the filling in as you go.
Roll tightly but not too tight to avoid squeezing out the filling. Moisten the top edge of the nori with a little water to seal the roll.
7. Slice the Rolls: Once rolled, use a sharp knife to slice the sushi into 6-8 pieces.
Wipe the knife with a damp cloth between cuts to guarantee clean slices.
8. Serve: Arrange the sliced rolls on a serving platter. Garnish with sesame seeds if desired, and Serve with soy sauce, pickled ginger, and wasabi on the side.
Extra Tips
When making Spicy Tuna Rolls, freshness is key, especially for the tuna. Always use sushi-grade fish from a reputable source.
Additionally, practice makes perfect when it comes to rolling sushi, so don’t be discouraged if your first attempts aren’t perfect! Experiment with different ingredients and spice levels to find your ideal flavor profile, and enjoy the process of making sushi at home.
Dragon Roll
The Dragon Roll is a popular and visually stunning sushi roll that combines the flavors of shrimp tempura, eel, and fresh vegetables, all wrapped in sushi rice and nori. Named for its resemblance to a dragon, this roll is often topped with thinly sliced avocado and drizzled with eel sauce, creating a delightful combination of textures and flavors.
Making a Dragon Roll at home can be an enjoyable experience, allowing you to customize the ingredients and presentation to your liking.
To create the perfect Dragon Roll, you’ll need to prepare sushi rice, which is seasoned with rice vinegar, sugar, and salt. The key to an impressive Dragon Roll lies not only in the quality of the ingredients but also in the technique of rolling. With a little practice, you can craft this beautiful dish that’s sure to impress your family and friends during your next sushi night.
Ingredients (Serves 4-6)
- 2 cups sushi rice
- 2 ½ cups water
- 1/3 cup rice vinegar
- 2 tablespoons sugar
- 1 teaspoon salt
- 6 sheets nori (seaweed)
- 8 pieces shrimp tempura (store-bought or homemade)
- 1 large cucumber (julienned)
- 1 ripe avocado (thinly sliced)
- ½ pound eel (unagi) (cooked)
- ¼ cup eel sauce (plus extra for drizzling)
- Sesame seeds (for garnish)
- Soy sauce (for serving)
- Pickled ginger (for serving)
Cooking Instructions
1. Prepare the Sushi Rice: Rinse the sushi rice under cold water until the water runs clear. In a rice cooker or pot, combine the rinsed rice and water, then cook according to the rice cooker instructions or bring to a boil, then reduce heat, cover, and simmer for 20 minutes.
Once cooked, let it sit covered for an additional 10 minutes.
2. Season the Rice: In a small saucepan, combine rice vinegar, sugar, and salt. Heat over low heat until dissolved, then remove from heat. Transfer the cooked rice to a large bowl and gently fold in the vinegar mixture while fanning the rice to cool it down. Set aside.
3. Prepare the Fillings**: If using homemade shrimp tempura, prepare it according to your recipe. For the eel, if it’s not pre-cooked, grill or broil it until heated through. Cut the cucumber into thin strips and slice** the avocado.
4. Assemble the Roll: Place a bamboo sushi mat on a flat surface and lay a sheet of nori on top, shiny side down. With wet hands, spread a thin layer of sushi rice evenly over the nori, leaving about 1 inch at the top edge.
Arrange the shrimp tempura, cucumber, and eel along the bottom edge of the rice.
5. Roll the Sushi: Starting from the bottom, carefully lift the bamboo mat and roll the sushi away from you while applying gentle pressure to keep it tight. Continue rolling until you reach the exposed edge of the nori. Use a little water to seal the edge.
6. Slice the Roll: Using a sharp knife, wet the blade to prevent sticking. Cut the roll into 6-8 equal pieces. For the dragon effect, you can place thin slices of avocado on top of the roll and press them gently to adhere.
7. Serve: Drizzle eel sauce over the top of the roll, sprinkle sesame seeds, and Serve with soy sauce and pickled ginger on the side.
Extra Tips
When making Dragon Rolls, it’s crucial to have all your ingredients prepared and within reach before you start rolling.
Working with a clean, damp surface and using wet hands will help prevent the rice from sticking to your fingers and the mat. Feel free to experiment with the fillings by adding ingredients like cream cheese, spicy mayo, or different types of fish.
Practice makes perfect, so don’t be discouraged if your first rolls don’t look exactly like you envisioned; they’ll still taste delicious!
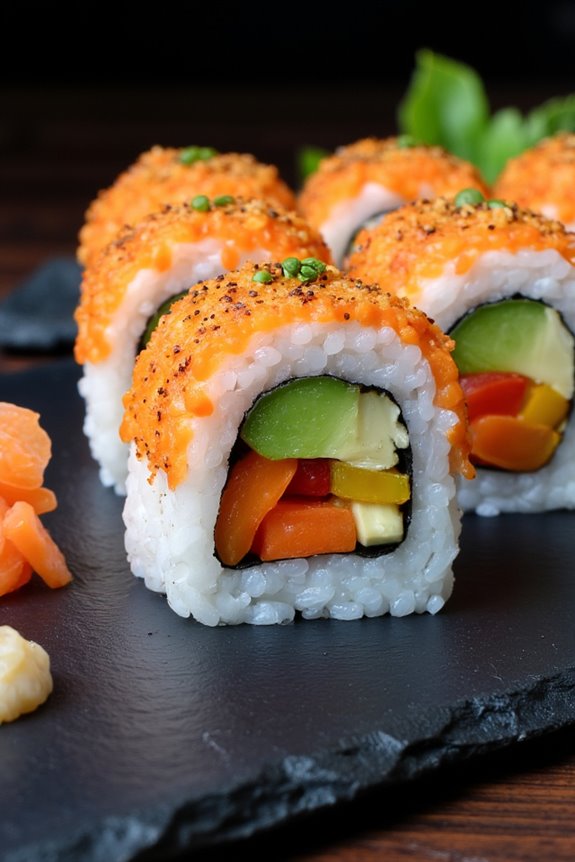
Rainbow Roll

The Rainbow Roll is a vibrant and colorful sushi dish that showcases a delightful assortment of fresh seafood atop a traditional California roll. This sushi creation isn’t only visually appealing but also offers a wonderful combination of flavors and textures, making it a favorite among sushi lovers.
The base of the Rainbow Roll consists of a California roll filled with imitation crab, cucumber, and avocado, which is then adorned with a variety of sashimi, such as salmon, tuna, and yellowtail, creating a “rainbow” effect.
Making a Rainbow Roll at home can be a fun and rewarding experience, allowing you to customize the ingredients to your liking. While it may seem intimidating at first, preparing sushi at home can be a straightforward process with the right tools and techniques.
Gather your ingredients and get ready to impress your family and friends with this delectable sushi roll that’s perfect for any occasion!
Ingredients (Serves 4-6 people):
- 2 cups sushi rice
- 2 ½ cups water
- ¼ cup rice vinegar
- 2 tablespoons sugar
- 1 teaspoon salt
- 4 sheets nori (seaweed)
- 1 ripe avocado, sliced
- ½ cucumber, julienned
- 6 ounces imitation crab meat, shredded
- 4 ounces sashimi-grade salmon, sliced
- 4 ounces sashimi-grade tuna, sliced
- 4 ounces sashimi-grade yellowtail, sliced
- Soy sauce, for serving
- Wasabi and pickled ginger, for garnish (optional)
Cooking Instructions:
- Prepare the Sushi Rice: Rinse the sushi rice under cold water until the water runs clear. This removes excess starch. In a rice cooker, combine the rinsed rice and 2 ½ cups of water. Cook according to the rice cooker’s instructions. Once cooked, let it sit for about 10 minutes.
- Season the Rice: In a small saucepan, combine rice vinegar, sugar, and salt. Heat gently until the sugar and salt dissolve, then remove from heat. Transfer the cooked rice to a large bowl and gently fold in the vinegar mixture with a wooden spatula. Allow the rice to cool to room temperature.
- Prepare the Fillings: While the rice cools, prepare the fillings. Slice the avocado, julienne the cucumber, and shred the imitation crab meat. Arrange these ingredients near your sushi rolling station for easy access.
- Assemble the California Roll: Place a bamboo sushi mat on a flat surface. Lay a sheet of nori, shiny side down, on the mat. Wet your hands to prevent sticking and take a handful of sushi rice. Evenly spread the rice over the nori, leaving about 1 inch at the top edge.
- Add Fillings: Lay a line of imitation crab, cucumber, and avocado at the bottom of the rice-covered nori. Using the bamboo mat, roll the sushi away from you, applying gentle pressure to form a tight roll. Once you reach the exposed edge of the nori, wet it with a little water to seal the roll.
- Slice the Roll: Using a sharp, wet knife, slice the roll into 6-8 pieces. Wipe the knife between cuts to maintain clean edges.
- Top with Sashimi: Place the sliced rolls on a serving platter. Top each piece with a slice of salmon, tuna, and yellowtail, creating a colorful rainbow effect.
- Serve: Serve the Rainbow Roll with soy sauce, wasabi, and pickled ginger on the side. Enjoy your homemade sushi!
Extra Tips:
When making a Rainbow Roll, freshness is key, especially when it comes to the seafood. Visit a reputable fish market to ascertain you’re using high-quality sashimi-grade fish.
Additionally, practice makes perfect; if you find it challenging to roll the sushi tightly, don’t hesitate to try again. Sushi rolling is a skill that improves with experience, so have fun with your creations and don’t be afraid to experiment with different toppings and fillings!
Philadelphia Roll
The Philadelphia Roll is a popular sushi creation that combines the rich flavors of smoked salmon and cream cheese, evoking the essence of both traditional Japanese sushi and Western ingredients. This delightful roll has gained immense popularity among sushi enthusiasts for its creamy texture and savory taste, making it a perfect choice for sushi lovers who appreciate a fusion of flavors.
It’s not only delicious but also quite simple to prepare, allowing you to impress your friends and family with your sushi-making skills.
To create a perfect Philadelphia Roll, you’ll need to gather all the essential ingredients and follow the steps carefully. The balance of flavors is key in this dish, as the cream cheese complements the smoky salmon, while the cucumber adds a revitalizing crunch. Whether you’re hosting a sushi night or simply craving a homemade treat, this recipe will guide you through the process of making a flawless Philadelphia Roll that serves 4-6 people.
Ingredients:
- 2 cups sushi rice
- 2 1/2 cups water
- 1/3 cup rice vinegar
- 2 tablespoons sugar
- 1 teaspoon salt
- 6 sheets of nori (seaweed)
- 8 ounces smoked salmon
- 4 ounces cream cheese, softened
- 1 medium cucumber, julienned
- Soy sauce (for serving)
- Pickled ginger (for serving)
- Wasabi (for serving)
Cooking Instructions:
1. Prepare the Sushi Rice: Rinse the sushi rice under cold water until the water runs clear. This removes excess starch and prevents the rice from becoming gummy.
Combine the rinsed rice and water in a rice cooker or pot. Cook according to the rice cooker instructions or bring to a boil, then reduce heat, cover, and simmer for about 20 minutes until the water is absorbed.
2. Season the Rice: Once cooked, transfer the rice to a large bowl. In a separate bowl, mix the rice vinegar, sugar, and salt until dissolved.
Pour this mixture over the warm rice and gently fold it in with a spatula, being careful not to mash the grains. Allow the rice to cool to room temperature.
3. Prepare the Fillings: While the rice is cooling, slice the smoked salmon into long strips if not already done.
Cut the cucumber into thin matchsticks (julienne) to provide a crunchy texture and freshness in the roll. Make sure the cream cheese is at room temperature for easier spreading.
4. Assemble the Rolls: Place a bamboo sushi mat on a clean surface and lay a sheet of nori, shiny side down.
Wet your hands to prevent sticking, then grab a handful of sushi rice and spread it evenly over the nori, leaving about an inch at the top edge. Press the rice down firmly but gently.
5. Add Fillings: In the center of the rice, create a line of smoked salmon, followed by a line of cream cheese and a few cucumber sticks.
Be careful not to overfill, as this will make rolling difficult.
6. Roll the Sushi: Starting from the edge closest to you, lift the bamboo mat and roll it away from you, tucking the filling in as you go.
Roll tightly but not too tight to avoid squeezing out the fillings. Once you reach the edge of the nori, wet it with a little water to seal the roll.
7. Slice and Serve: Using a sharp knife, slice the roll into 6-8 pieces, wiping the knife with a damp cloth between cuts for clean edges.
Arrange the slices on a plate and serve with soy sauce, pickled ginger, and wasabi on the side.
Extra Tips:
When making a Philadelphia Roll, feel free to customize the ingredients to suit your taste.
For instance, you can substitute the smoked salmon with fresh salmon or add avocado for extra creaminess. Additionally, make sure your rice is at the right consistency—not too sticky and not too dry.
Practice makes perfect, so don’t be discouraged if your first rolls aren’t perfect; the key is to enjoy the process of making sushi at home!
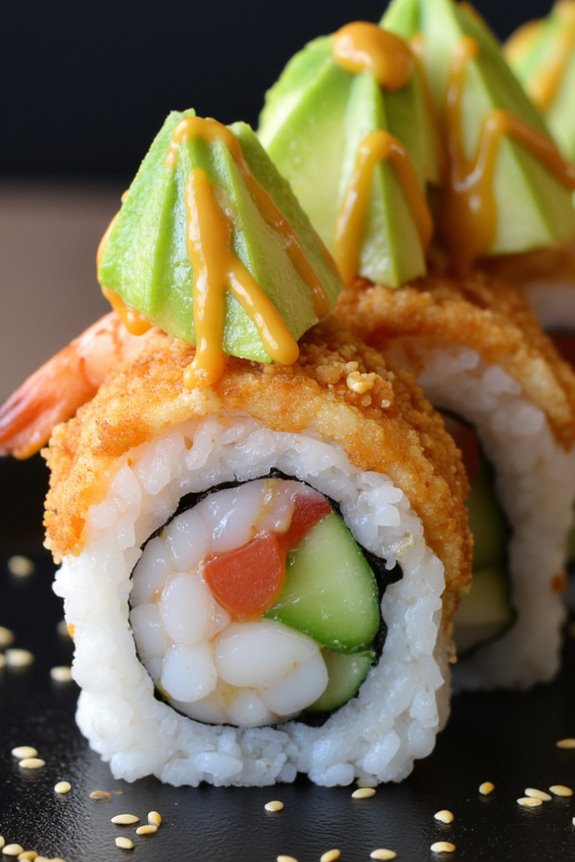
Tempura Roll
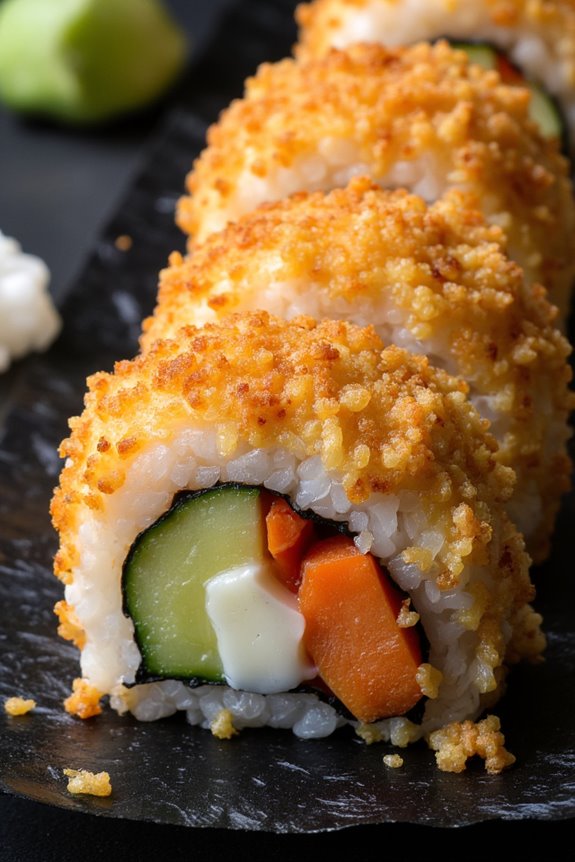
The Tempura Roll is a delightful fusion of traditional sushi and Japanese tempura, offering a unique texture and flavor profile that sushi lovers will adore. This dish combines crispy tempura vegetables or shrimp with fresh sushi rice and seaweed, creating a delightful contrast between crunchy and soft components. It’s perfect for those looking to experiment with sushi-making at home, as it allows you to incorporate various ingredients based on personal preferences or dietary restrictions.
Making a Tempura Roll is an enjoyable process that can be shared with family and friends. The key to a successful roll lies in the freshness of the ingredients, particularly the fish, and the skillful preparation of the tempura batter. This recipe serves 4-6 people, making it ideal for gatherings or a fun family dinner night. Gather your ingredients and get ready to impress with this delicious and visually appealing dish!
Ingredients:
- 2 cups sushi rice
- 2 1/2 cups water
- 1/4 cup rice vinegar
- 1 tablespoon sugar
- 1 teaspoon salt
- 8 sheets nori (seaweed)
- 1 cup tempura flour
- 1 cup cold water
- 10-12 shrimp, peeled and deveined
- 1 medium zucchini, julienned
- 1 medium carrot, julienned
- 1/2 cup sweet potato, julienned
- Vegetable oil (for frying)
- Soy sauce (for serving)
- Wasabi and pickled ginger (optional, for garnish)
Cooking Instructions:
- Prepare the Sushi Rice: Rinse the sushi rice under cold water until the water runs clear. This removes excess starch and prevents the rice from becoming gummy. Combine the rinsed rice and water in a rice cooker or pot. If using a pot, bring it to a boil, then reduce heat to low, cover, and simmer for 18-20 minutes until the water is absorbed. Allow it to rest for an additional 10 minutes off the heat.
- Season the Rice: In a small saucepan, heat the rice vinegar, sugar, and salt over low heat until the sugar dissolves. Once the sushi rice has rested, transfer it to a large bowl and gently fold in the vinegar mixture. Be careful not to mash the rice. Let it cool to room temperature.
- Prepare the Tempura Batter: In a bowl, mix the tempura flour with cold water until just combined; a few lumps are okay. For the best results, keep the batter cold to maintain crispiness during frying.
- Prep the Vegetables and Shrimp: Heat vegetable oil in a deep frying pan or pot to 350°F (175°C). Dip the shrimp and julienned vegetables in the tempura batter, allowing excess batter to drip off. Carefully place them in the hot oil, frying in batches to avoid overcrowding. Fry until golden brown and crispy, about 2-3 minutes for shrimp and 1-2 minutes for vegetables. Drain on paper towels.
- Assemble the Tempura Roll: Place a sheet of nori on a bamboo sushi mat, shiny side down. Wet your hands to prevent sticking and take a handful of sushi rice, spreading it evenly over the nori, leaving a small border at the top. Lay the tempura shrimp and vegetables horizontally across the rice. Using the bamboo mat, roll the sushi tightly from the bottom up, pressing gently to secure the roll. Seal the edge with a little water.
- Slice and Serve: With a sharp knife, slice the roll into 6-8 pieces. Wipe the knife with a damp cloth between cuts to maintain clean edges. Serve the Tempura Rolls with soy sauce, wasabi, and pickled ginger on the side.
Extra Tips:
When preparing Tempura Rolls, feel free to experiment with different fillings based on your taste preferences. You can substitute shrimp with tempura-fried fish or even tofu for a vegetarian option.
Additionally, verify your oil is at the right temperature before frying, as this will greatly impact the crispiness of the tempura. Finally, practice makes perfect, so don’t be discouraged if your first rolls aren’t perfect; have fun and enjoy the process of sushi-making!
Ebi (Shrimp) Nigiri

Ebi Nigiri is a classic Japanese sushi dish that highlights the delicate sweetness of shrimp paired with perfectly seasoned sushi rice. This dish isn’t only a favorite among sushi lovers but also a great introduction to making sushi at home. The tender, marinated shrimp sits atop a small mound of vinegared rice, offering a delightful contrast in textures and flavors.
With just a few ingredients and some simple techniques, you can create this exquisite dish that will impress family and friends alike.
To prepare Ebi Nigiri, it’s crucial to use the freshest shrimp available. The recipe involves boiling the shrimp to guarantee they’re tender and flavorful, then cooling them and slicing them in half for presentation. The sushi rice must be seasoned appropriately to enhance its flavor without overpowering the shrimp.
With a bit of practice, you’ll master the technique of molding the rice and placing the shrimp just right for a beautiful and authentic Ebi Nigiri.
Ingredients (Serves 4-6)
- 1 pound (450g) large shrimp (Ebi)
- 2 cups sushi rice
- 2 1/2 cups water
- 1/4 cup rice vinegar
- 2 tablespoons sugar
- 1 teaspoon salt
- Wasabi (optional, for serving)
- Soy sauce (for serving)
- Nori sheets (optional, for garnish)
Cooking Instructions
- Prepare the Sushi Rice: Rinse the sushi rice under cold water until the water runs clear. This removes excess starch. Combine the rinsed rice and water in a rice cooker. If you don’t have a rice cooker, use a pot with a tight-fitting lid. Bring the water to a boil, then reduce the heat to low and simmer for about 20 minutes until the rice is tender and water is absorbed. Let it sit covered for 10 minutes.
- Season the Rice: In a small saucepan, combine rice vinegar, sugar, and salt. Heat over low heat until the sugar and salt dissolve. Once the rice has rested, transfer it to a large bowl and gradually fold in the vinegar mixture using a wooden spatula. Be gentle to avoid mashing the rice. Allow the rice to cool to room temperature.
- Prepare the Shrimp: Bring a pot of water to a boil. Add the shrimp and cook for about 2-3 minutes until they turn pink and opaque. Don’t overcook. Remove the shrimp and immediately place them in ice water to stop the cooking process. Once cooled, peel and devein the shrimp, leaving the tails intact for presentation.
- Slice the Shrimp: With a sharp knife, slice each shrimp in half lengthwise. This will create a butterfly effect that allows for easier placement on the rice and adds an elegant touch.
- Form the Nigiri: Wet your hands with water to prevent sticking. Take a small amount of sushi rice (about 2 tablespoons) and mold it into an oval shape with your fingers. Press gently but firmly to maintain the shape.
- Assemble the Nigiri: Place a half shrimp on top of each rice mound, making sure it adheres well. Lightly press down to secure the shrimp in place. Optionally, you can add a small amount of wasabi between the rice and the shrimp for an added kick.
- Serve: Arrange the Ebi Nigiri on a serving plate. Serve with soy sauce for dipping and additional wasabi if desired. Nori sheets can be cut into strips for garnish around the plate.
Extra Tips
When preparing Ebi Nigiri, freshness is key, so try to source the best quality shrimp available. If you’re feeling adventurous, consider using other types of seafood like tuna or salmon for variation.
Additionally, practice the technique of molding the rice to achieve the perfect size and shape; it may take a few tries to get it just right. Finally, serving your sushi with pickled ginger can create a revitalizing palate cleanser between bites.
Enjoy your sushi-making experience and the delicious results!
Vegetable Sushi Roll
Vegetable sushi rolls are a delightful and healthy way to enjoy sushi without the seafood. Perfect for vegetarians and anyone looking to incorporate more vegetables into their diet, vegetable sushi rolls are versatile and can be customized based on personal preferences.
These rolls can be filled with a variety of fresh vegetables and served with soy sauce, pickled ginger, and wasabi for an authentic experience. Making sushi at home is a fun activity that can be enjoyed by family and friends, and it allows you to explore different flavor combinations.
To prepare vegetable sushi rolls, you’ll need to gather your ingredients and get ready to roll. Sushi rice is the base of the dish, and it’s crucial to cook it properly to achieve the right texture. The fillings can include a rainbow of vegetables, such as cucumbers, carrots, and avocados, offering a crunchy and invigorating bite.
With a little practice, you’ll master the art of rolling sushi and impress your guests with delicious homemade vegetable sushi rolls.
Ingredients (serving size: 4-6 people)
- 2 cups sushi rice
- 2 ½ cups water
- ¼ cup rice vinegar
- 2 tablespoons sugar
- 1 teaspoon salt
- 4-6 sheets of nori (seaweed)
- 1 medium cucumber, julienned
- 1 medium carrot, julienned
- 1 ripe avocado, sliced
- 1 bell pepper, julienned (any color)
- Soy sauce (for serving)
- Pickled ginger (for serving)
- Wasabi (optional, for serving)
Cooking Instructions
1. Prepare the Sushi Rice: Rinse the sushi rice under cold water until the water runs clear. This removes excess starch and helps achieve the perfect texture.
Combine the rinsed rice and water in a rice cooker or pot, and cook according to the rice cooker instructions or bring to a boil, then cover and simmer on low heat for about 20 minutes until the water is absorbed.
2. Season the Rice: Once the rice is cooked, transfer it to a large bowl. In a small saucepan, heat the rice vinegar, sugar, and salt over low heat until dissolved.
Pour this mixture over the warm rice and gently fold it in with a wooden spoon or spatula. Allow the seasoned rice to cool to room temperature.
3. Prepare the Vegetables: While the rice cools, prepare your vegetables. Wash and peel the cucumber and carrot, then cut them into thin julienne strips.
Slice the avocado carefully, and julienne the bell pepper. Arrange all vegetables on a plate for easy access when rolling.
4. Assemble the Sushi Rolls: Place a bamboo sushi mat on a flat surface and lay a sheet of nori on top, shiny side down. With wet hands, spread a thin layer of seasoned sushi rice (about ¾ cup) evenly over the nori, leaving about 1 inch at the top edge.
Lay a selection of your prepared vegetables horizontally across the rice, about 1 inch from the bottom.
5. Roll the Sushi: Carefully lift the edge of the bamboo mat closest to you and begin to roll it away from you, pressing gently but firmly to keep the roll tight.
Roll it all the way to the top edge of the nori, using a little water to seal the edge. Repeat this process with the remaining nori and fillings.
6. Slice and Serve: Using a sharp knife dipped in water, slice each roll into 6-8 pieces. Wipe the knife with a damp cloth between cuts to confirm clean edges.
Arrange the sushi rolls on a platter with soy sauce, pickled ginger, and wasabi on the side for dipping.
Extra Tips
When making vegetable sushi rolls, feel free to experiment with different vegetables and even add herbs like cilantro or mint for a unique flavor twist.
Always verify your ingredients are fresh, as this greatly impacts the taste of your sushi. If you find it challenging to roll the sushi tightly, practice makes perfect!
Additionally, preparing all your ingredients beforehand can streamline the rolling process and enhance your sushi-making experience.
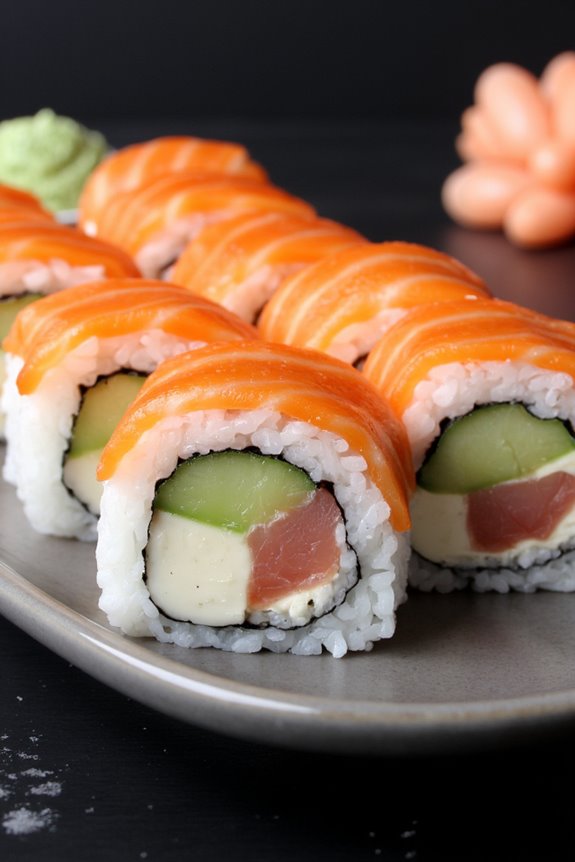
Salmon Avocado Roll
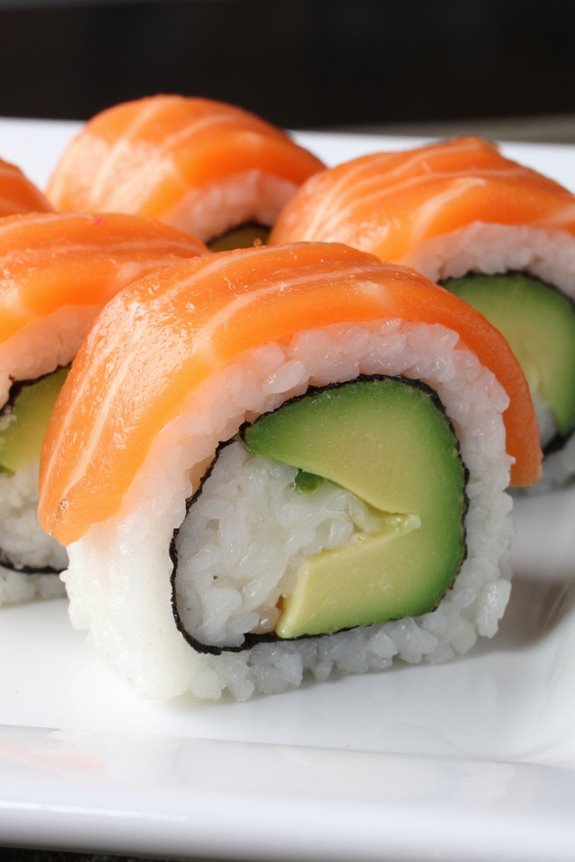
The Salmon Avocado Roll, also known as the “Sake Avocado Maki,” is a delightful sushi creation that beautifully combines fresh salmon with creamy avocado, all wrapped in perfectly seasoned sushi rice and nori (seaweed). This roll isn’t only a favorite among sushi lovers but is also a great introduction to sushi-making for beginners.
With its vibrant colors and rich flavors, the Salmon Avocado Roll is an elegant dish that can be enjoyed at any gathering or special occasion.
Making sushi at home can be a fun and rewarding experience; it allows you to customize the ingredients to your liking while also impressing your friends and family. The key to a successful Salmon Avocado Roll lies in the freshness of the ingredients and mastering the rice preparation.
Once you get the hang of rolling, you’ll find it easy to whip up your favorite sushi rolls, and this Salmon Avocado Roll will surely be one of your go-to recipes.
Ingredients (Serves 4-6 people)
- 2 cups sushi rice
- 2 ½ cups water
- ¼ cup rice vinegar
- 2 tablespoons sugar
- 1 teaspoon salt
- 4 sheets nori (seaweed)
- 1 ripe avocado, sliced
- 8 ounces fresh salmon, skinless and boneless, sliced into strips
- Soy sauce, for serving
- Pickled ginger, for serving (optional)
- Wasabi, for serving (optional)
Cooking Instructions
1. Prepare the sushi rice: Rinse the sushi rice under cold water until the water runs clear. This step removes excess starch and prevents the rice from becoming too sticky.
After rinsing, combine the rice and water in a rice cooker or a pot. If using a rice cooker, simply follow the manufacturer’s instructions. If using a pot, bring the water to a boil, then reduce the heat to low, cover, and simmer for about 20 minutes, or until the rice is tender and all the water is absorbed.
2. Season the rice: While the rice is cooking, prepare the seasoning by combining rice vinegar, sugar, and salt in a small saucepan over low heat until the sugar dissolves.
Once the rice is cooked, transfer it to a large bowl and pour the vinegar mixture over it. Gently fold the rice with a wooden spoon or spatula to combine, being careful not to mash the grains. Allow the rice to cool to room temperature.
3. Prepare the fillings: While the rice is cooling, slice the avocado into thin strips and the salmon into long, thin pieces.
Make sure to use very fresh, sushi-grade salmon for the best flavor and safety.
4. Assemble the roll: Lay a bamboo sushi mat on a clean, flat surface. Place a sheet of nori, shiny side down, on the mat.
With wet hands to prevent sticking, take about a cup of the sushi rice and spread it evenly over the nori, leaving about an inch at the top edge. Press the rice down gently but firmly to create an even layer.
5. Add the fillings: Place a few slices of avocado and salmon in a line across the center of the rice-covered nori.
Be careful not to overfill, as this can make rolling difficult.
6. Roll the sushi: Starting from the edge closest to you, lift the bamboo mat and begin to roll the sushi away from you, pressing gently but firmly.
Roll it over the fillings until you reach the exposed edge of the nori. Moisten the edge of the nori with a little water to seal the roll. Continue to roll until you have a complete roll.
7. Cut the roll: Using a sharp knife, slice the roll into 6-8 pieces, wiping the knife with a damp cloth between cuts to keep the edges clean.
8. Serve: Arrange the sliced rolls on a plate and serve with soy sauce, pickled ginger, and wasabi.
Extra Tips
When making sushi, freshness is key, especially when it comes to seafood. Always purchase sushi-grade fish from a reputable source to guarantee safety.
Additionally, using a sharp knife will help you achieve clean cuts for your sushi rolls, making them visually appealing. If you’re new to sushi-making, practice rolling with a few different fillings and don’t be afraid to experiment!
Enjoy the process and have fun with it!
Tuna Sashimi
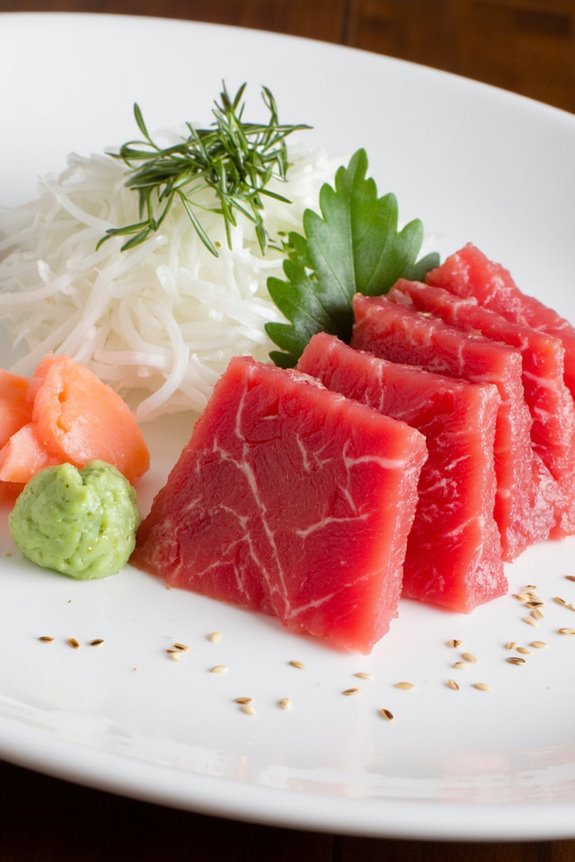
Tuna Sashimi is a classic Japanese dish that highlights the delicate and rich flavors of raw tuna. This elegant preparation is perfect for those who appreciate the simplicity and purity of fresh seafood. Sashimi isn’t just about the fish; it’s about the quality of ingredients and precise technique. A well-prepared sashimi dish can transport you to a traditional Japanese izakaya, where the focus is on freshness and presentation.
To make Tuna Sashimi, it’s vital to start with high-quality tuna, ideally sourced from a reputable fishmonger or market. The fish should be sushi-grade, meaning it’s safe to eat raw. The presentation of sashimi plays an important role in the dining experience, so take your time to slice the fish properly and arrange it beautifully on a plate. Serve it with soy sauce, wasabi, and pickled ginger for a complete experience.
Ingredients (Serves 4-6)
- 1 lb sushi-grade tuna (preferably bluefin or yellowfin)
- 2 tablespoons soy sauce
- 1 tablespoon wasabi paste
- 1 cup daikon radish (finely shredded)
- 1 tablespoon pickled ginger
- 1 teaspoon sesame seeds (optional)
- Fresh shiso leaves or garnishing greens (optional)
- Lemon wedges (for garnish)
Instructions
- Prepare the Tuna: Start by confirming your tuna is fresh and sushi-grade. Rinse it gently under cold water to remove any surface impurities. Pat it dry with paper towels to make sure the fish isn’t wet, which can affect slicing and presentation.
- Chill the Tuna: Place the cleaned tuna in the refrigerator for about 30 minutes to firm it up. This makes it easier to slice into thin, even pieces.
- Slice the Tuna: Once chilled, use a sharp knife to slice the tuna against the grain into thin pieces, about 1/4 inch thick. The angle at which you slice can greatly affect the texture and flavor release of the fish—aim for a 45-degree angle for a more delicate bite.
- Prepare the Plate: On a large serving plate or individual plates, arrange the sliced tuna in an aesthetically pleasing manner. You can create a fan shape or simply lay the slices side by side.
- Garnish: Add finely shredded daikon radish around the tuna for contrast and crunch. Place a small dollop of wasabi and a few slices of pickled ginger on the side. If using, sprinkle sesame seeds over the tuna for added flavor and texture.
- Serve: Serve the Tuna Sashimi immediately with soy sauce in a small dish for dipping. Optionally, include lemon wedges on the side for a invigorating citrus touch.
Extra Tips
When preparing Tuna Sashimi, the quality of the fish is paramount; always choose the freshest, sushi-grade tuna available.
To enhance the dining experience, consider serving the sashimi on chilled plates and keep the tuna cold until serving.
Don’t be afraid to experiment with different garnishes, such as microgreens or edible flowers, to elevate the presentation further.
Finally, it’s important to inform your guests about the wasabi and soy sauce ratio they prefer, as everyone has different tastes when it comes to seasoning their sashimi.
Futomaki (Thick Roll)
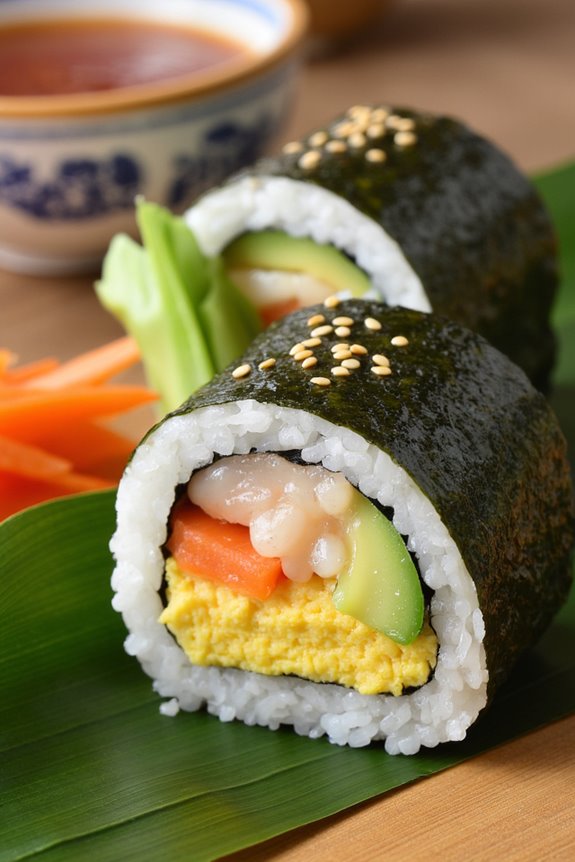
Futomaki, a traditional Japanese sushi, isn’t only a delightful treat but also a visually stunning dish that showcases the artistry of sushi-making. This thick roll is typically filled with a variety of fresh ingredients, offering a harmonious blend of flavors and textures that elevate any meal. The vibrant colors of the ingredients, such as vegetables, fish, and sometimes even egg, make Futomaki a feast for the eyes as well as the palate.
This dish is perfect for gatherings and can be enjoyed by everyone, whether they’re sushi aficionados or beginners.
Making Futomaki at home is an engaging experience, allowing you to customize the fillings according to your preferences. While it may seem intimidating at first, the process becomes easier with practice. The key to a perfect Futomaki lies in the quality of the ingredients and the technique of rolling. With a few essential tools and a little patience, you can create this delicious sushi roll that your family and friends will love.
Ingredients (Serves 4-6):
- 2 cups sushi rice
- 2 ½ cups water
- ¼ cup rice vinegar
- 2 tablespoons sugar
- 1 teaspoon salt
- 4 sheets nori (seaweed)
- 1 cucumber, julienned
- 1 carrot, julienned
- 1 avocado, sliced
- 4-6 strips of cooked shrimp or crab meat (optional)
- 2 eggs, beaten and cooked into a thin omelet
- Sesame seeds (for garnish)
Cooking Instructions:
1. Prepare the Sushi Rice****: Rinse the sushi rice under cold water until the water runs clear to remove excess starch. This step is vital for achieving the perfect texture.
In a rice cooker or a pot, combine the rinsed rice and water, then cook according to the rice cooker’s instructions or bring to a boil on the stovetop, reducing heat and simmering for about 20 minutes. Once cooked, let it sit covered for 10 minutes.
2. Season the Rice: In a small saucepan, warm the rice vinegar, sugar, and salt over low heat until dissolved. Carefully transfer the cooked rice to a large bowl and gently fold in the vinegar mixture using a wooden spatula or rice paddle.
Be cautious not to mash the rice; you want to keep the grains intact. Allow the seasoned rice to cool to room temperature.
3. Prepare the Fillings: While the rice is cooling, prepare your fillings. Julienne the cucumber and carrot, slice the avocado, and if using, prepare the shrimp or crab meat.
For the omelet, heat a non-stick pan, pour in the beaten eggs, and cook until just set. Roll it up and slice into thin strips.
4. Assemble the Futomaki: Place a bamboo sushi mat on a flat surface and lay a sheet of nori, shiny side down, on the mat. With wet hands (to prevent sticking), take a portion of sushi rice (about 1 cup) and spread it evenly over the nori, leaving about 1 inch of space at the top.
Layer your choice of fillings in the center of the rice.
5. Roll the Sushi: Lift the edge of the bamboo mat closest to you and carefully begin to roll the nori away from you, using gentle pressure to maintain a tight roll.
Continue rolling until you reach the exposed edge of the nori. To seal the roll, wet the edge with a little water and press to secure.
6. Slice the Roll: Using a sharp knife, Slice the Roll into 6-8 equal pieces, wiping the knife with a damp cloth between cuts to guarantee clean edges.
Arrange the slices on a plate and sprinkle with sesame seeds for garnish.
Extra Tips:
When making Futomaki, feel free to experiment with the fillings based on your taste preferences—using seasonal vegetables or your favorite seafood can create unique variations.
It’s important to verify all ingredients are fresh, as this greatly impacts the overall flavor. Additionally, practice rolling with less pressure at first to master the technique without squeezing the fillings out.
Finally, serving your Futomaki with soy sauce, wasabi, and pickled ginger will enhance the dining experience. Enjoy the process and have fun creating your own sushi rolls!
Sweet Potato Roll

Sweet Potato Rolls are a delightful twist on traditional sushi, combining the rich, creamy texture of sweet potatoes with the fresh flavors of sushi rice and seaweed. This dish is perfect for sushi enthusiasts looking to explore new tastes or for those who want to introduce their friends and family to the world of sushi in a more approachable way.
The natural sweetness of the potatoes pairs beautifully with the savory elements of the rice and the umami of the nori, making for a delicious and satisfying meal.
Making Sweet Potato Rolls at home isn’t only fun, but it’s also an opportunity to showcase your culinary creativity. You can serve these rolls as an appetizer, a side dish, or even as a main course.
With a few simple ingredients and some basic sushi-making techniques, you’ll be able to impress your guests and enjoy a delicious homemade sushi experience. Let’s plunge into the ingredients and cooking instructions for this delightful dish.
Ingredients (serving size: 4-6 people):
- 2 medium sweet potatoes
- 2 cups sushi rice
- 2 1/2 cups water
- 1/4 cup rice vinegar
- 2 tablespoons sugar
- 1 teaspoon salt
- 6 sheets of nori (seaweed)
- Sesame seeds (optional, for garnish)
- Soy sauce (for serving)
- Pickled ginger (for serving)
Cooking Instructions:
- Prepare the Sweet Potatoes: Begin by peeling the sweet potatoes and cutting them into thin strips (approximately 1/4 inch thick). You can steam or boil the sweet potato strips until they’re tender but not mushy, about 10-15 minutes. Once cooked, set them aside to cool.
- Cook the Sushi Rice: Rinse the sushi rice under cold water until the water runs clear. This step removes excess starch, which can make the rice too sticky. In a medium saucepan, combine the rinsed rice and 2 1/2 cups of water. Bring to a boil, then reduce the heat to low, cover, and let it simmer for about 20 minutes or until all the water is absorbed.
- Season the Rice: In a small bowl, mix the rice vinegar, sugar, and salt until dissolved. Once the rice is cooked, transfer it to a large bowl and gently fold in the vinegar mixture while the rice is still warm. Be careful not to mash the rice; you want it to remain fluffy. Allow the rice to cool to room temperature.
- Prepare to Roll: Place a bamboo sushi mat on a flat surface and lay a sheet of nori, shiny side down, on the mat. Wet your hands with water to prevent sticking, then take about a cup of sushi rice and spread it evenly over the nori, leaving about an inch of space at the top edge.
- Add the Filling: Place a few strips of the cooled sweet potato horizontally across the center of the rice. If desired, sprinkle sesame seeds over the sweet potato for added flavor and texture.
- Roll the Sushi: Start rolling the sushi mat away from you, tucking the edge of the nori over the filling. Roll it tightly but gently, pressing as you go to maintain the shape. Once you reach the exposed edge of the nori, wet it slightly with water to seal the roll.
- Slice the Rolls: Using a sharp, wet knife, slice the roll into 6-8 pieces. Wipe the knife with a damp cloth between cuts to guarantee clean slices. Repeat this process with the remaining ingredients.
- Serve: Arrange the sliced Sweet Potato Rolls on a platter, and serve with soy sauce and pickled ginger on the side.
Extra Tips:
When making Sweet Potato Rolls, feel free to experiment with additional fillings such as avocado, cucumber, or even a drizzle of sriracha for a spicy kick.
It’s also important to verify your sushi rice is properly seasoned, as this greatly enhances the overall flavor of the dish. If you’re new to rolling sushi, practice makes perfect, so don’t be discouraged if your first rolls aren’t perfectly shaped!
Enjoy the process and have fun sharing your creations with friends and family.