

Welcome to a delightful journey through the flavors of the Philippines. Each recipe is a comforting hug that brings a taste of tradition to your table. From the zesty tang of Sinigang Na Baboy to the cozy flavors of Chicken Adobo, these dishes are perfect for quick, satisfying meals. Whether you’re cooking for family or just for yourself, these ten recipes will surely become your go-to favorites. Let’s explore these easy and irresistible Filipino recipes together.
Chicken Adobo: A Classic Filipino Stew
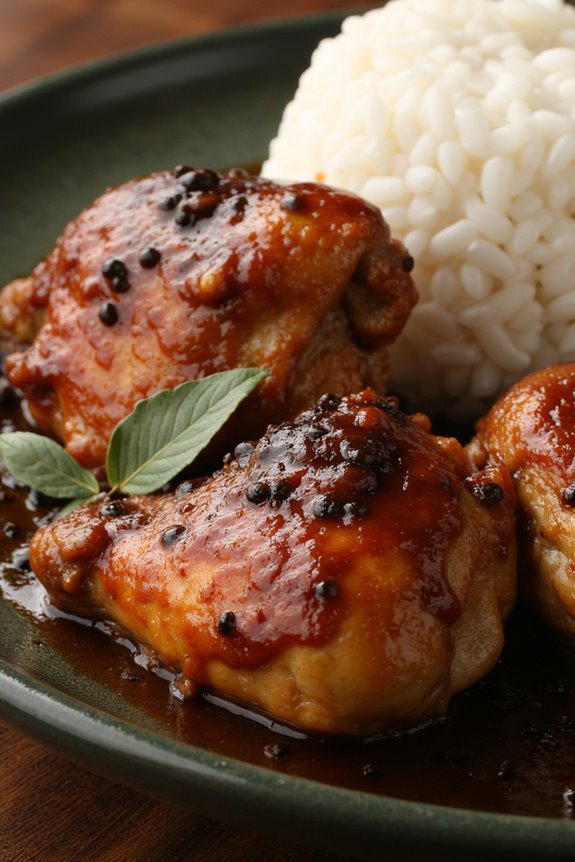
Chicken Adobo is often regarded as the unofficial national dish of the Philippines, celebrated for its rich flavors and simplicity. This classic stew combines chicken with a savory marinade of soy sauce, vinegar, garlic, and bay leaves, resulting in tender meat that’s bursting with flavor.
Each family may have its own version, often passed down through generations, making it a beloved dish that holds a special place in many Filipino hearts.
Preparing Chicken Adobo isn’t only easy but also allows for creativity. You can adjust the ingredients to suit your taste, whether you prefer it slightly sweeter or spicier. Serve it alongside steamed rice, and you’ll have a comforting meal that can be enjoyed any day of the week.
Let’s plunge into making this delicious Filipino stew!
Ingredients (Serves 4-6)
- 2 lbs chicken (cut into pieces, bone-in preferred)
- 1 cup soy sauce
- 1 cup vinegar (preferably cane vinegar or white vinegar)
- 1 head of garlic (minced)
- 1 onion (sliced)
- 2-3 bay leaves
- 1 teaspoon black peppercorns
- 2 tablespoons cooking oil
- 1 cup water
- Salt to taste
- Optional: 1-2 tablespoons of sugar (for a hint of sweetness)
- Optional: Green onions or hard-boiled eggs for garnish
Cooking Instructions
- Marinate the Chicken: In a bowl, combine the chicken pieces with soy sauce, minced garlic, and bay leaves. Allow the chicken to marinate for at least 30 minutes, or preferably overnight in the refrigerator for deeper flavor.
- Sauté Onions: In a large pot or deep skillet, heat the cooking oil over medium heat. Add the sliced onions and sauté until they become translucent, about 3-4 minutes. This will add a sweet aroma to the dish.
- Brown the Chicken: Remove the chicken from the marinade (reserve the marinade for later) and add it to the pot. Brown the chicken pieces on all sides for about 5-7 minutes. This step helps to seal in the juices and adds depth to the flavor.
- Add Marinade and Water: Pour the reserved marinade and water into the pot. Stir well to combine and bring to a boil. Once boiling, reduce the heat to low and add black peppercorns.
- Simmer: Cover the pot and let it simmer for about 30-40 minutes, or until the chicken is tender and cooked through. Stir occasionally to prevent sticking and to guarantee even cooking.
- Taste and Season: After simmering, taste the sauce and adjust the seasoning with salt or sugar if desired. If you prefer a thicker sauce, you can remove the lid and let it simmer for an additional 10 minutes.
- Serve: Once done, remove the pot from heat. Serve the Chicken Adobo hot with steamed rice, garnished with green onions or hard-boiled eggs if desired.
Extra Tips
When cooking Chicken Adobo, feel free to customize the recipe by adding vegetables like potatoes or hard-boiled eggs for added flavor and nutrition.
For a different twist, you can also experiment with adding coconut milk for a creamier sauce. The dish tastes even better the next day, as the flavors continue to meld, so consider making a larger batch to enjoy leftovers!
Sinigang Na Baboy: Pork in Sour Soup
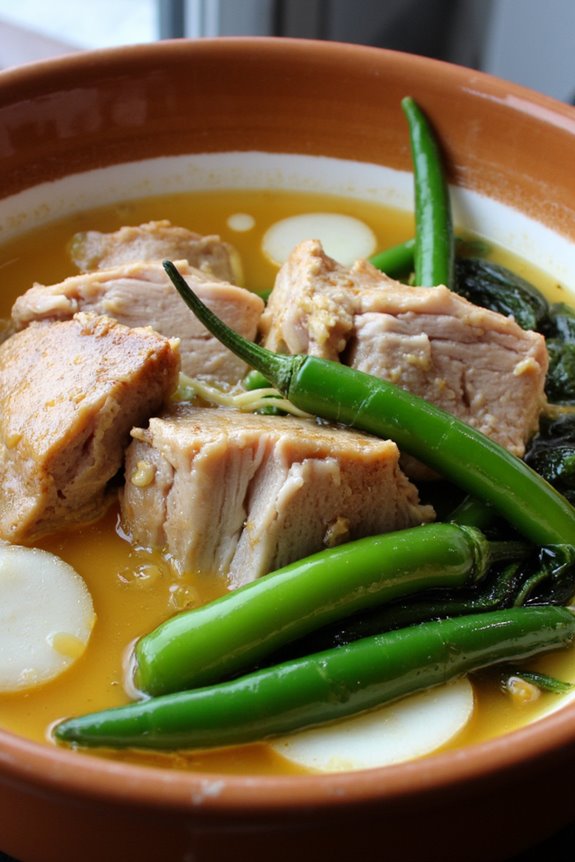
Sinigang Na Baboy is a beloved Filipino dish known for its savory and tangy flavor profile that’s both comforting and invigorating. This traditional soup is often made with pork, which is simmered until tender, and combined with a variety of vegetables and a souring agent, typically tamarind. The harmony of flavors and the vibrant, aromatic broth make Sinigang a staple in many Filipino households.
It’s perfect for family gatherings or cozy dinners, paired with a steaming bowl of rice.
The versatility of Sinigang allows for different variations, depending on regional preferences and available ingredients. While pork is commonly used, you can also find variations made with beef, shrimp, or fish. The key to a great Sinigang is balancing the tartness of the broth with the richness of the meat.
Serve it hot and enjoy the comforting taste of this iconic dish that truly represents the heart of Filipino cuisine.
Ingredients (Serves 4-6)
- 2 lbs pork belly or pork ribs, cut into chunks
- 10 cups water
- 1 medium onion, quartered
- 2 tomatoes, quartered
- 1 radish (labanos), sliced
- 1 cup green beans (sitaw), trimmed
- 1 cup water spinach (kangkong) or spinach
- 2-3 long green chili peppers (siling pangsigang)
- 1 cup tamarind pulp or 1 packet of sinigang mix
- Salt, to taste
- Fish sauce (patis), to taste
Cooking Instructions
- Prepare the Pork: In a large pot, add the pork belly or ribs and cover with 10 cups of water. Bring it to a boil over medium-high heat. This process helps to render the fat and flavor the broth.
- Simmer the Broth: Once boiling, reduce the heat to low and add the quartered onion and tomatoes. Allow the mixture to simmer for about 45 minutes to 1 hour or until the pork is tender. This slow cooking will enhance the flavors of the broth.
- Add the Radish: After the pork is tender, add the sliced radish to the pot. Cook for about 5 minutes until the radish is slightly soft. The radish will contribute a subtle sweetness to the broth.
- Incorporate the Vegetables: Next, add the green beans and the long green chili peppers. Cook for an additional 3-5 minutes. These vegetables will add color and texture to your Sinigang.
- Sour the Soup: Stir in the tamarind pulp or the sinigang mix. Taste the broth and adjust the sourness according to your preference. If you prefer a more tangy flavor, you can add more tamarind or sinigang mix.
- Finish with Water Spinach: Finally, add the water spinach or spinach. Cook for another 2-3 minutes until the greens are wilted. This step not only adds nutritional value but also enhances the dish’s presentation.
- Season to Taste: Season the soup with salt and fish sauce as desired. Allow it to simmer for another minute before removing it from heat.
Extra Tips
For a richer flavor, you can choose to roast the tomatoes and onions before adding them to the broth.
Additionally, feel free to customize the vegetables based on your preferences or what’s in season. Some popular additions include eggplant or bok choy.
To achieve the perfect balance of sourness, start with a smaller amount of tamarind and adjust gradually to suit your taste. Enjoy your Sinigang Na Baboy with a side of steamed rice for a complete meal!
Pancit Canton: Stir-Fried Noodles
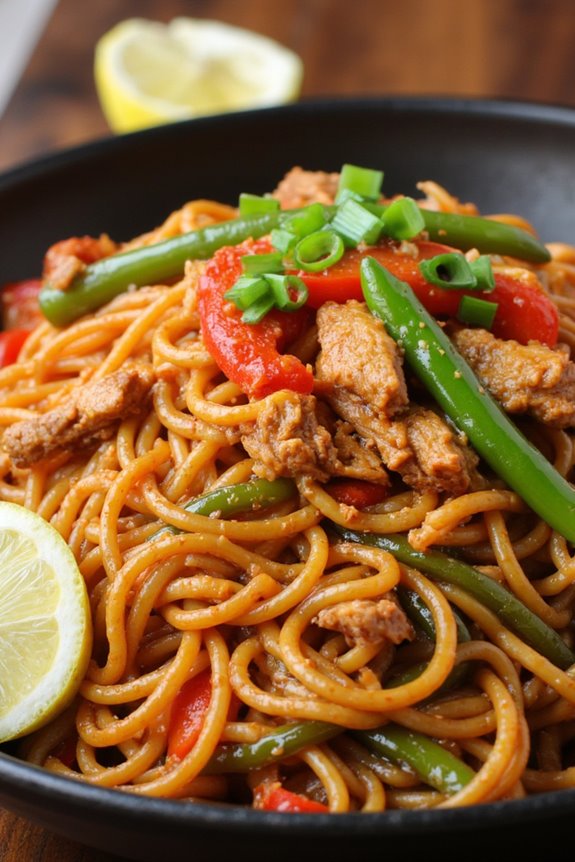
Pancit Canton is a popular Filipino dish that showcases the vibrant flavors of stir-fried noodles combined with a variety of vegetables and proteins. This dish isn’t only a staple in Filipino households but also a favorite during celebrations and gatherings.
The hearty noodles are pan-fried until slightly crisp, then tossed with a colorful medley of vegetables, meat, or seafood, making it a satisfying meal for any occasion. The beauty of Pancit Canton lies in its versatility; you can easily customize the ingredients based on your preferences or what you have on hand.
To prepare Pancit Canton, you’ll want to gather your ingredients and have everything ready before you start cooking. The key to achieving that perfect stir-fried texture is to work quickly and keep the heat high. With the right balance of flavors and a little bit of practice, you’ll be able to whip up this delicious dish that’s sure to impress your family and friends.
Let’s explore the recipe!
Ingredients (Serves 4-6):
- 400g Pancit Canton noodles
- 2 tablespoons vegetable oil
- 2 cloves garlic, minced
- 1 onion, thinly sliced
- 1 carrot, julienned
- 1 bell pepper, sliced
- 100g green beans, cut into 2-inch pieces
- 200g cooked chicken, shredded (or shrimp, pork, or tofu)
- 3 cups chicken or vegetable broth
- 3 tablespoons soy sauce
- 1 tablespoon oyster sauce
- Salt and pepper to taste
- 2 green onions, chopped (for garnish)
- Lemon or calamansi wedges (for serving)
Cooking Instructions:
- Prepare the Noodles: Start by soaking the Pancit Canton noodles in hot water for about 5-7 minutes or until they become soft. Once soft, drain the noodles and set them aside. This softening process helps the noodles absorb the flavors during stir-frying.
- Heat the Oil: In a large skillet or wok, heat the vegetable oil over medium-high heat. Allow the oil to heat until it shimmers, which guarantees that the ingredients will cook quickly and evenly.
- Sauté Garlic and Onion: Add the minced garlic and sliced onion to the hot oil. Stir-fry for about 2 minutes, or until the onion becomes translucent and the garlic is fragrant. This step builds the foundation of flavor for your dish.
- Add Vegetables: Toss in the julienned carrot, sliced bell pepper, and green beans. Stir-fry the vegetables for about 3-4 minutes, or until they’re tender-crisp. You want to maintain some crunch for texture in the final dish.
- Incorporate the Chicken and Broth: Add the cooked chicken (or your choice of protein) to the skillet, followed by the chicken or vegetable broth. Bring the mixture to a boil to allow the flavors to meld together, which should take about 2 minutes.
- Add Noodles and Sauces: Gently fold in the soaked Pancit Canton noodles, soy sauce, and oyster sauce. Toss everything together to guarantee the noodles are coated with the sauces and heated through. Stir-fry for an additional 3-5 minutes, allowing the noodles to absorb the broth.
- Season and Serve: Taste the dish and season with salt and pepper as needed. Once everything is well combined and heated, remove from heat. Garnish with chopped green onions and serve hot with lemon or calamansi wedges on the side for a zesty finish.
Extra Tips: When making Pancit Canton, feel free to experiment with different proteins and vegetables to suit your taste. You can also add more broth if you prefer a saucier dish.
For added flavor, consider marinating your protein in soy sauce and garlic before cooking. Remember to serve it immediately to enjoy the noodles at their best texture, and don’t hesitate to adjust the seasoning to your liking!
Tapsilog: Beef Tapa With Garlic Rice and Egg

Tapsilog is a beloved Filipino breakfast dish that perfectly captures the essence of comfort food with its combination of savory beef tapa, aromatic garlic rice, and a perfectly fried egg. Originating from the Philippines, this dish isn’t only filling but also packs a punch of flavor that makes it a favorite among many.
The term “tapsilog” is derived from the three components it consists of: “tapa” (cured beef), “sinangag” (garlic rice), and “itlog” (egg). Each element contributes to a delightful medley that’s certain to start your day on a high note.
Making tapsilog at home is easier than you might think. With a few simple ingredients and steps, you can enjoy this delicious Filipino classic in the comfort of your own kitchen. The key to a great tapsilog lies in the marination of the beef, which infuses it with flavors that are both sweet and savory, and the garlic rice, which complements the beef beautifully.
Serve this dish with a side of sliced tomatoes or pickled vegetables for a revitalizing contrast.
Ingredients (Serves 4-6):
- 1 lb beef sirloin or flank steak, thinly sliced
- 1/4 cup soy sauce
- 1/4 cup vinegar
- 3 tablespoons brown sugar
- 4 cloves garlic, minced
- 1 teaspoon black pepper
- 4 cups cooked rice (preferably day-old)
- 4 tablespoons vegetable oil
- 4 eggs
- Salt to taste
- Sliced tomatoes (optional for serving)
- Pickled vegetables (optional for serving)
Cooking Instructions:
1. Marinate the Beef: In a bowl, combine the soy sauce, vinegar, brown sugar, minced garlic, and black pepper. Add the thinly sliced beef and mix well to confirm all pieces are coated. Cover the bowl and let it marinate in the refrigerator for at least 1 hour, or overnight for best results.
2. Prepare the Garlic Rice: In a large pan or skillet, heat 2 tablespoons of vegetable oil over medium heat. Add the minced garlic and sauté until fragrant and lightly golden. Be careful not to burn the garlic.
Add the cooked rice and stir well to combine, confirming the rice is evenly coated with the garlic oil. Season with salt to taste and cook for about 5-7 minutes, stirring occasionally, until the rice is heated through. Transfer the garlic rice to a serving platter and cover to keep warm.
3. Cook the Beef Tapa: In the same skillet, add another 2 tablespoons of vegetable oil and heat over medium-high heat. Remove the marinated beef from the refrigerator and let any excess marinade drip off.
Add the beef slices in a single layer, cooking in batches if necessary to avoid overcrowding. Cook for about 3-4 minutes on each side until the beef is browned and cooked through. Remove from heat and set aside.
4. Fry the Eggs: In a separate non-stick pan, heat a small amount of oil over medium heat. Crack the eggs into the pan and fry until the whites are set but the yolks remain runny, or to your desired doneness. Remove from heat.
5. Assemble the Tapsilog: On a plate, serve a portion of garlic rice, top it with the beef tapa, and add a fried egg on the side. Garnish with sliced tomatoes and pickled vegetables if desired.
Extra Tips:
For the best flavor, allow the beef to marinate overnight; this will enhance the sweetness and depth of the tapa.
If you’re using fresh rice, consider letting it cool down a bit before frying to prevent it from becoming too sticky. Additionally, feel free to adjust the sweetness by varying the amount of brown sugar in the marinade to suit your taste.
Enjoy your tapsilog with a side of vinegar dipping sauce for an extra zing!
Kare-Kare: Peanut Butter Stew With Oxtail
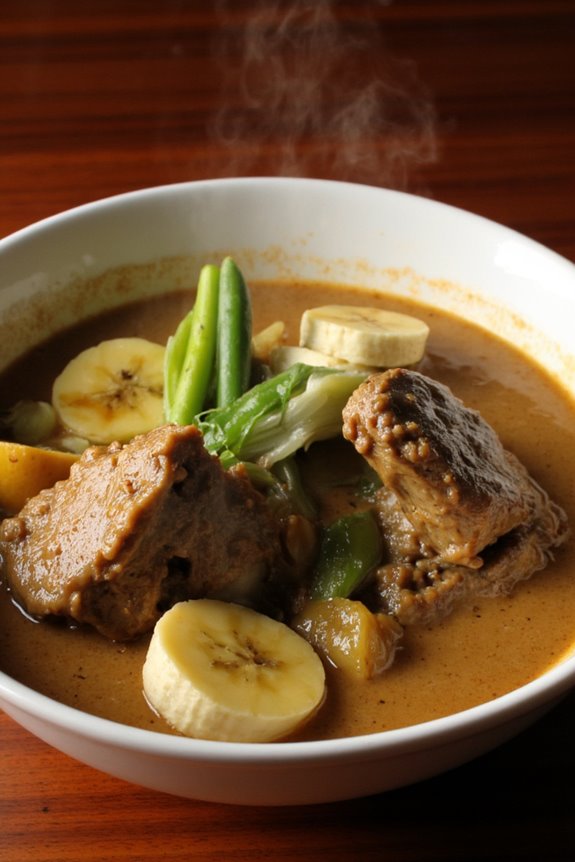
Kare-Kare is a traditional Filipino dish that’s beloved for its rich and creamy peanut sauce, often featuring tender oxtail as the star ingredient. This hearty stew is usually served with a side of bagoong (fermented shrimp paste) to enhance its flavor profile, making it an unforgettable meal for family gatherings and special occasions.
The combination of the nutty sauce and the succulent meat creates a unique and satisfying experience that showcases the essence of Filipino cuisine.
While the preparation of Kare-Kare may seem intimidating, especially with the need to balance flavors, the result is well worth the effort. This dish isn’t only comforting but also allows for variations, including the use of vegetables like banana hearts, eggplant, and string beans.
Whether you’re preparing it for a celebration or a cozy family dinner, Kare-Kare is sure to impress and satisfy all your guests.
Ingredients (Serves 4-6):
- 2 lbs oxtail, cut into pieces
- 1 cup peanut butter
- 1/2 cup ground rice (or toasted rice)
- 1 onion, chopped
- 4 cloves garlic, minced
- 4 cups water (or beef broth)
- 2 tbsp fish sauce (patis)
- 1/2 tsp salt (adjust to taste)
- 1/4 tsp black pepper
- 1-2 pieces eggplant, sliced
- 1 cup banana hearts (puso ng saging), sliced
- 1 cup string beans (sitaw), cut into 2-inch lengths
- Bagoong (fermented shrimp paste), for serving
Cooking Instructions:
- Prepare the Oxtail: In a large pot, add the oxtail and cover it with water. Bring to a boil over high heat, then reduce to a simmer. Skim off any foam that rises to the surface. Cover and cook for about 1.5 to 2 hours, or until the oxtail is tender. If using beef broth, you can substitute it for water in this step for added flavor.
- Sauté the Aromatics: In a separate large pan, heat a tablespoon of oil over medium heat. Add the chopped onion and minced garlic, sautéing until the onion is translucent and fragrant. This will enhance the overall flavor of the stew.
- Incorporate the Peanut Butter: Once the onion and garlic are sautéed, add the peanut butter to the pan. Stir it well until it becomes smooth and begins to release its oils, which takes about 2-3 minutes.
- Combine the Oxtail and Broth: After the oxtail has cooked, carefully transfer it into the pan with the peanut butter mixture. Pour in the broth (or water) from the pot, making sure to include any bits stuck to the bottom of the pot for added flavor. Stir to combine all ingredients.
- Add Ground Rice and Seasonings: Stir in the ground rice, fish sauce, salt, and black pepper. The ground rice will help thicken the sauce and add a nice texture. Let the mixture simmer for about 10 minutes, allowing the flavors to meld.
- Add the Vegetables: Gently add the sliced eggplant, banana hearts, and string beans to the stew. Simmer for an additional 10-15 minutes, or until the vegetables are tender but still crisp.
- Final Adjustments: Taste the Kare-Kare and adjust the seasoning as necessary. If you prefer a thicker sauce, you can simmer it a bit longer, or for a creamier texture, add more peanut butter.
- Serve: Once everything is cooked to your liking, ladle the Kare-Kare into bowls and serve hot with steamed rice and a side of bagoong.
Extra Tips:
When making Kare-Kare, feel free to customize the vegetables based on your preference or what you have on hand. Some people like to add more traditional ingredients like tripe or vegetables like radish (labanos).
Additionally, the quality of peanut butter can greatly affect the flavor of the dish, so choose a good-quality natural peanut butter for the best results. Finally, pairing your Kare-Kare with a well-seasoned bagoong is essential, as it provides a delicious contrast to the rich and creamy stew.
Enjoy your cooking!
Lechon Kawali: Crispy Fried Pork Belly
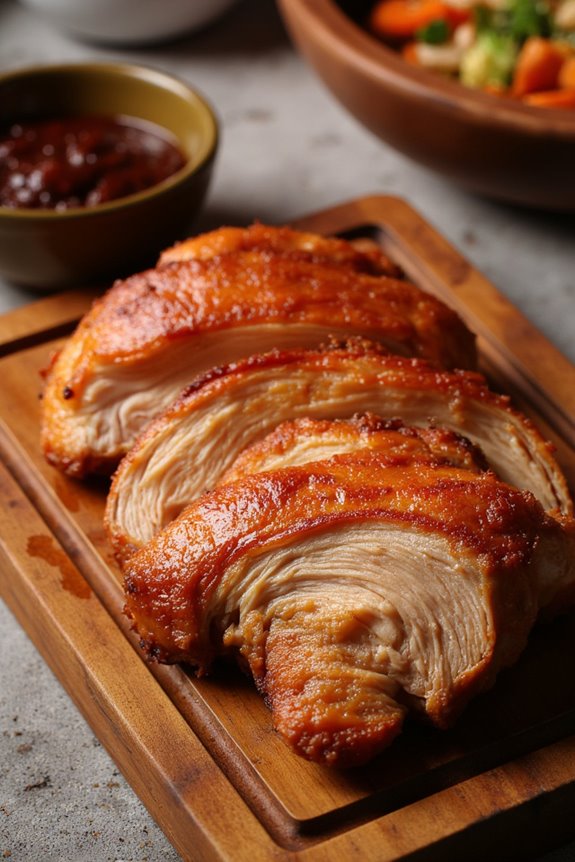
Lechon Kawali is a beloved Filipino dish that features crispy, golden-brown fried pork belly. Known for its tender meat and crunchy skin, this dish is often served with a side of liver sauce or vinegar dipping sauce, making it a perfect centerpiece for any meal.
While it may seem intimidating to achieve that perfect crispiness at home, this recipe will guide you through the process step-by-step, guaranteeing that you can enjoy this delectable dish in the comfort of your kitchen.
To get started, you’ll want to select a high-quality piece of pork belly. The secret to a successful Lechon Kawali is in the preparation and cooking method. Boiling the pork belly before frying allows for the fat to render out, resulting in a juicy interior and a crispy exterior. This dish is perfect for gatherings and celebrations, and it pairs wonderfully with rice and a fresh vegetable salad.
Ingredients (Serves 4-6):
- 2 lbs pork belly
- 4 cups water
- 1 tablespoon salt
- 1 teaspoon black peppercorns
- 3-4 cloves garlic, crushed
- 2-3 bay leaves
- Oil for deep frying
Cooking Instructions:
- Prepare the Pork Belly: Start by placing the pork belly in a large pot. Add enough water to cover the pork, then season it with salt, black peppercorns, crushed garlic, and bay leaves. This step infuses flavor into the meat as it cooks.
- Boil the Pork: Bring the water to a boil over medium heat, then reduce the heat and let it simmer for about 40-50 minutes, or until the pork is tender. You can check doneness by piercing the meat with a fork; it should easily break apart.
- Cool and Dry: Once the pork is tender, carefully remove it from the pot and let it cool on a wire rack. This is an essential step—allowing the pork to cool helps the skin dry out, which is necessary for achieving that crispy texture when frying.
- Score the Skin: After the pork has cooled, use a sharp knife to score the skin in a crisscross pattern. Be careful not to cut too deeply into the meat, as you only want to score the skin. This will help the skin crisp up during frying.
- Heat the Oil: In a large, deep skillet or pot, heat enough oil over medium-high heat for deep frying. You’ll want the oil to reach about 350°F (175°C) before frying the pork.
- Fry the Pork: Carefully place the scored pork belly into the hot oil, skin side down. Fry for about 5-7 minutes, or until the skin is golden brown and crispy. Flip the pork and cook for an additional 5 minutes on the meat side to guarantee it’s heated through.
- Drain and Serve: Once the pork is cooked to a crispy perfection, remove it from the oil and let it drain on paper towels to remove excess oil. Slice it into bite-sized pieces and serve immediately with your choice of dipping sauce.
Extra Tips:
When making Lechon Kawali, guarantee that the pork belly is as dry as possible before frying to achieve maximum crispiness. You can even refrigerate the boiled pork overnight, uncovered, to dry out the skin further.
Additionally, be cautious when frying, as the oil may splatter due to the moisture in the pork. A splatter guard can help with this. Enjoy your crispy Lechon Kawali with a side of chili vinegar for an extra kick!
Chopsuey: Stir-Fried Mixed Vegetables
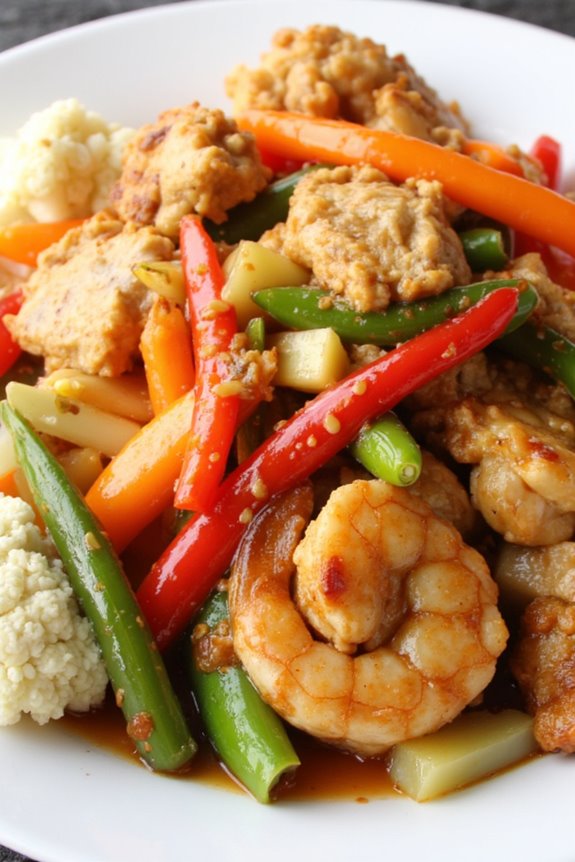
Chopsuey is a beloved Filipino dish known for its vibrant mix of vegetables and protein, creating a colorful and nutritious meal. This stir-fried dish isn’t only easy to prepare but also allows for flexibility in ingredients based on what you have on hand or personal preferences.
Traditionally, chopsuey is made with a combination of fresh vegetables, meats, and a savory sauce that brings all the flavors together in a delightful medley.
This dish is perfect for family gatherings or weeknight dinners, as it can serve 4-6 people. The beauty of chopsuey lies in its versatility; you can easily customize it by adding your favorite vegetables or proteins, making it a great way to use up leftover ingredients.
Whether you serve it on a bed of rice or enjoy it on its own, chopsuey is sure to satisfy your taste buds and brighten your table.
Ingredients (Serves 4-6)
- 1 cup of sliced chicken breast or pork (optional)
- 1 cup of shrimp, peeled and deveined (optional)
- 2 tablespoons vegetable oil
- 1 medium onion, sliced
- 3 cloves garlic, minced
- 1 cup carrots, julienned
- 1 cup bell peppers (red and green), sliced
- 1 cup snow peas or green beans, trimmed
- 1 cup cauliflower florets
- 1 cup cabbage, chopped
- 2 tablespoons soy sauce
- 1 tablespoon oyster sauce
- 1 tablespoon cornstarch mixed with 3 tablespoons water (for thickening)
- Salt and pepper to taste
Cooking Instructions
- Prepare the Ingredients: Begin by washing and cutting all the vegetables into bite-sized pieces. If you’re using protein, slice the chicken or pork into thin strips and prepare the shrimp by peeling and deveining them. Having everything ready will make the cooking process smoother.
- Heat the Oil: In a large skillet or wok, heat the vegetable oil over medium-high heat. Once the oil is hot, add the sliced onions and sauté until they become translucent and fragrant, about 2-3 minutes.
- Add the Garlic: Stir in the minced garlic and sauté for another minute until it becomes aromatic. Be careful not to burn the garlic, as it can turn bitter.
- Cook the Protein: If you’re using meat, add the sliced chicken or pork to the skillet and cook until it’s no longer pink, about 5-7 minutes. If you’re using shrimp, add them after the meat is cooked through, and sauté until they turn pink and opaque.
- Add the Vegetables: Begin adding the carrots, bell peppers, and snow peas (or green beans) to the skillet. Stir-fry for about 3-5 minutes until the vegetables start to soften but still retain some crunch.
- Incorporate Cauliflower and Cabbage: Add the cauliflower florets and chopped cabbage to the stir-fry. Continue to cook for another 3-4 minutes, stirring frequently, until all the vegetables are tender but still vibrant in color.
- Mix in the Sauces: Pour in the soy sauce and oyster sauce, stirring well to combine all the ingredients. Season with salt and pepper to taste.
- Thicken the Sauce: To thicken the sauce, add the cornstarch water mixture to the skillet. Stir continuously until the sauce thickens and coats the vegetables and meat evenly, about 2 minutes.
- Serve: Once everything is well combined and heated through, remove the skillet from heat. Serve the chopsuey hot over steamed rice or enjoy it on its own.
Extra Tips
For a more authentic twist, you can add other ingredients such as baby corn, mushrooms, or even tofu for a vegetarian version of chopsuey.
Adjust the seasonings according to your taste; adding a splash of sesame oil can enhance the flavor profile.
Arroz Caldo: Filipino Rice Porridge

Arroz Caldo is a comforting Filipino rice porridge that’s perfect for any time of the day, especially during cold weather or when you’re feeling under the weather. This dish is known for its warm, soothing properties and is often enjoyed as a hearty breakfast or a light meal.
Typically made with glutinous rice, chicken, and flavored with ginger, garlic, and scallions, Arroz Caldo is both flavorful and filling, making it a beloved staple in Filipino households.
The dish isn’t only delicious but also versatile; you can customize it with various toppings to suit your taste. Common garnishes include hard-boiled eggs, fried garlic, and fresh herbs. Arroz Caldo is often served with a side of calamansi (a citrus fruit) or soy sauce for an added zing.
With its simple ingredients and straightforward preparation, you can easily whip up this delightful porridge at home.
Ingredients (Serves 4-6)
- 1 cup glutinous rice
- 1 tablespoon vegetable oil
- 1 medium onion, chopped
- 4 cloves garlic, minced
- 1 thumb-sized ginger, sliced into thin strips
- 1 pound chicken thighs, cut into pieces
- 6 cups chicken broth
- 2 tablespoons fish sauce
- Salt and pepper to taste
- 3 green onions, chopped (for garnish)
- 2 hard-boiled eggs, halved (optional)
- Fried garlic (for garnish)
- Calamansi or lemon wedges (for serving)
Cooking Instructions
- Rinse the Rice: Start by rinsing the glutinous rice under cold running water until the water runs clear. This helps remove excess starch and prevents the porridge from becoming too sticky. Drain and set aside.
- Sauté Aromatics: In a large pot, heat the vegetable oil over medium heat. Add the chopped onion and sauté until translucent, about 3-4 minutes. Then, add the minced garlic and sliced ginger, stirring for another minute until fragrant.
- Cook the Chicken: Add the chicken pieces to the pot and cook until they’re no longer pink, stirring occasionally. This should take about 5-7 minutes. The goal is to brown the chicken slightly for added flavor.
- Add Rice and Broth: Once the chicken is cooked, add the rinsed rice to the pot, stirring to combine with the chicken and aromatics. Pour in the chicken broth and fish sauce, then bring the mixture to a boil.
- Simmer the Porridge: Reduce the heat to low and cover the pot. Let it simmer for about 30-40 minutes, stirring occasionally to prevent the rice from sticking to the bottom. The porridge should thicken and become creamy.
- Season and Serve: After simmering, season with salt and pepper to taste. If the porridge is too thick, you can add more broth or water to reach your desired consistency.
- Garnish: Ladle the Arroz Caldo into bowls and top with chopped green onions, halved hard-boiled eggs (if using), and fried garlic. Serve with calamansi or lemon wedges on the side for an extra burst of flavor.
Extra Tips
For an aromatic twist, consider adding safflower or turmeric for a subtle color and flavor enhancement. If you prefer a richer flavor, you can use a combination of chicken thighs and chicken breast.
Don’t hesitate to adjust the consistency of the porridge by adding more broth or water as needed. The beauty of Arroz Caldo lies in its comforting texture and warmth, so feel free to personalize it with your favorite toppings!
Ginataang Bilo-Bilo: Coconut Sticky Rice Dessert

Ginataang Bilo-Bilo is a delightful Filipino dessert that showcases the rich flavors of coconut milk combined with the chewy texture of glutinous rice balls, or “bilo-bilo.” This comforting dish is often enjoyed during special occasions and gatherings, providing a warm and sweet end to any meal.
The combination of ingredients creates a harmonious blend of flavors and textures, making it a favorite among both children and adults alike. This dessert isn’t just delicious; it’s also versatile. You can add various ingredients like sweet potatoes, jackfruit, or even sago pearls, allowing you to customize it according to your preferences.
The creamy coconut sauce enveloping the chewy rice balls makes every spoonful a delightful experience. Prepare to impress your family and friends with this easy yet delectable recipe that brings a taste of the Philippines to your kitchen.
Ingredients (Serves 4-6)
- 1 cup glutinous rice flour
- 1/2 cup water
- 1 cup coconut milk
- 1/2 cup sugar
- 1 cup sweet potato, diced
- 1 cup ripe jackfruit, sliced
- 1/2 cup sago pearls (optional)
- 1/4 teaspoon salt
- 2 cups water (for boiling)
Cooking Instructions
- Prepare the Bilo-Bilo: In a mixing bowl, combine the glutinous rice flour and water to form a smooth dough. Once mixed, roll the dough into small balls about the size of a marble. Set aside on a plate dusted with a little rice flour to prevent sticking.
- Cook Sweet Potatoes: In a pot, bring 2 cups of water to a boil. Add the diced sweet potatoes and cook until they’re tender, about 10-15 minutes. Drain and set aside.
- Cook the Sago Pearls (if using): In a separate pot, bring water to a boil. Add the sago pearls and cook according to package instructions, usually around 15 minutes, until they’re translucent. Drain and rinse under cold water, then set aside.
- Make the Coconut Sauce: In a large pot, combine the coconut milk, sugar, and salt. Stir well and bring to a gentle simmer over medium heat. Make sure the sugar dissolves completely.
- Combine Ingredients: Add the cooked sweet potatoes and jackfruit slices to the coconut sauce. If you’re using sago pearls, add them as well. Stir gently to combine all the ingredients.
- Add the Bilo-Bilo: Carefully drop the rice balls into the simmering coconut sauce. Cook for about 10-15 minutes, or until the rice balls float to the surface and become chewy.
- Serve: Once the bilo-bilo is cooked, remove the pot from heat. Allow it to cool slightly before serving. This dessert can be enjoyed warm or at room temperature.
Extra Tips
When preparing Ginataang Bilo-Bilo, feel free to get creative with the ingredients. You can substitute sweet potatoes with taro or add other fruits like bananas or purple yam for added flavor and color.
Adjust the sweetness of the coconut sauce to your liking by adding more or less sugar. For a creamier texture, consider using thick coconut milk or adding a splash of evaporated milk. Enjoy your cooking experience and share this delightful treat with loved ones!
Lumpiang Shanghai: Filipino Spring Rolls

Lumpiang Shanghai is a popular Filipino dish that’s often served during celebrations and gatherings. These crispy spring rolls are filled with a savory mixture of ground pork, vegetables, and spices, making them a delightful appetizer or snack.
The beauty of Lumpiang Shanghai lies not just in its taste, but also in its versatility; you can customize the filling to suit your preferences, whether by adding more vegetables or tweaking the seasonings.
Preparing Lumpiang Shanghai might seem intimidating at first, but with a little practice, you’ll be able to roll these delicious treats with ease. The golden, crispy exterior gives way to a flavorful filling that’s sure to impress your family and friends. Serve them with a sweet and sour sauce or vinegar dip for an authentic Filipino experience.
Ingredients (Serves 4-6)
- 1 pound ground pork
- 1 cup grated carrots
- 1 cup finely chopped green beans
- 1 cup finely chopped onions
- 3 cloves garlic, minced
- 2 tablespoons soy sauce
- 1 teaspoon ground black pepper
- 1 teaspoon salt
- 1 egg, beaten (for binding)
- 20-25 spring roll wrappers
- Oil for frying
Cooking Instructions
- Prepare the Filling: In a large mixing bowl, combine the ground pork, grated carrots, chopped green beans, onions, minced garlic, soy sauce, ground black pepper, salt, and the beaten egg. Mix everything together until well combined. This mixture will be the filling for your spring rolls.
- Assemble the Spring Rolls: Take a spring roll wrapper and place it on a clean surface with one corner facing you. Spoon about 2 tablespoons of the filling onto the wrapper, shaping it into a log near the corner. Fold the corner over the filling and roll it tightly. Tuck in the sides as you roll to secure the filling inside. Use a little water to seal the edge of the wrapper. Repeat this process until all the filling is used.
- Heat the Oil: In a deep skillet or frying pan, heat about 2 inches of oil over medium heat. You can test if the oil is hot enough by dropping a small piece of wrapper into the oil; it should sizzle immediately.
- Fry the Spring Rolls: Once the oil is hot, carefully add the spring rolls in batches, making sure not to overcrowd the pan. Fry them for about 3-4 minutes or until they’re golden brown and crispy. Turn them occasionally to guarantee even cooking.
- Drain and Serve: Using a slotted spoon, remove the cooked spring rolls from the oil and place them on a plate lined with paper towels to drain any excess oil. Serve hot with your favorite dipping sauce.
Extra Tips
For the best results, make sure the oil is at the right temperature before frying; if it’s too cool, the Lumpiang Shanghai will absorb too much oil and become soggy.
You can also experiment with different fillings, such as shrimp or chicken, to create variations of this classic dish. If you prefer to make these ahead of time, you can freeze the uncooked spring rolls; just fry them directly from the freezer when you’re ready to enjoy them.