

There’s something truly captivating about the simplicity and elegance of Japanese cuisine, especially when it features salmon. The clean flavors and fresh ingredients offer a refreshing experience. From teriyaki salmon to comforting udon noodle soup, these dishes provide a delightful variety for any meal. If you’re seeking light options that don’t skimp on taste, you might just find some new favorites among these ten recipes. Let’s explore them together.
Teriyaki Salmon
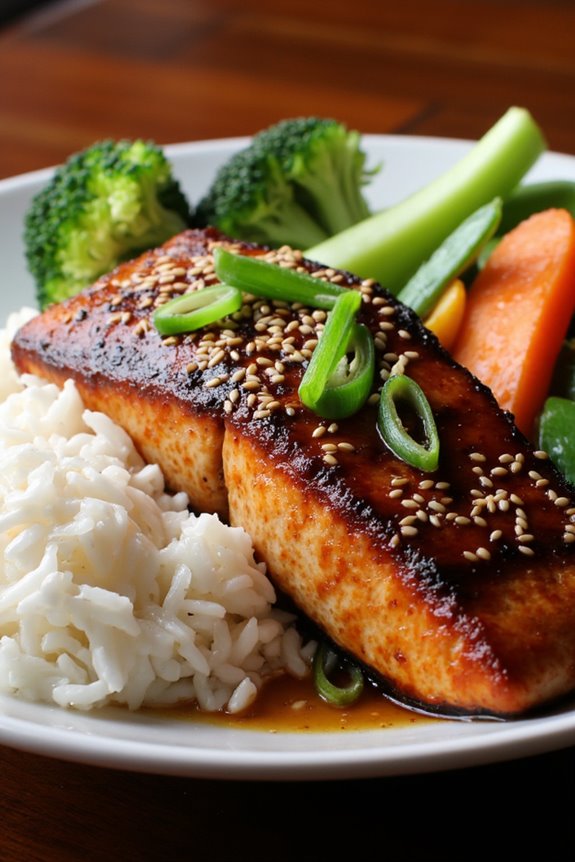
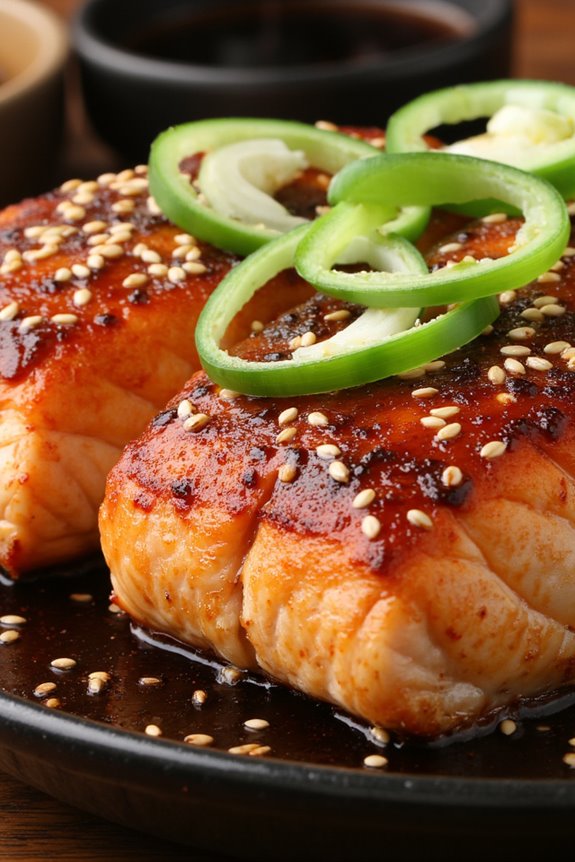
Teriyaki Salmon is a delightful dish that brings together the rich flavors of salmon with the sweet and savory notes of teriyaki sauce. This Japanese-inspired recipe isn’t only easy to prepare but also quick to cook, making it perfect for weeknight dinners or special occasions alike.
The tenderness of the salmon combined with the sticky glaze of the teriyaki sauce creates a mouthwatering experience that will impress family and friends. In addition to its delectable taste, Teriyaki Salmon is also packed with nutrients and healthy omega-3 fatty acids, making it a wholesome choice for your meal.
Serve it alongside steamed rice and sautéed vegetables for a complete and balanced dinner that everyone will adore. Whether you’re a seasoned cook or a beginner in the kitchen, this recipe will guide you through creating a restaurant-quality dish right at home.
Ingredients (serving size: 4-6 people)
- 4-6 salmon fillets (about 6 ounces each)
- 1/2 cup soy sauce
- 1/4 cup honey
- 2 tablespoons rice vinegar
- 2 tablespoons mirin (Japanese sweet rice wine)
- 2 cloves garlic, minced
- 1 teaspoon grated fresh ginger
- 1 tablespoon sesame oil
- 1/4 teaspoon black pepper
- 1 tablespoon cornstarch (optional, for thickening)
- 1 tablespoon water (optional, if using cornstarch)
- Sesame seeds and chopped green onions for garnish
Cooking Instructions
- Prepare the Marinade: In a medium bowl, whisk together the soy sauce, honey, rice vinegar, mirin, minced garlic, grated ginger, sesame oil, and black pepper. This mixture will serve as both a marinade and a glaze for the salmon.
- Marinate the Salmon: Place the salmon fillets in a shallow dish or a resealable plastic bag. Pour the teriyaki marinade over the salmon, ensuring each piece is well coated. Allow the salmon to marinate in the refrigerator for at least 30 minutes, or up to 2 hours for a more intense flavor.
- Preheat the Oven or Grill: Preheat your oven to 400°F (200°C) or prepare your grill for medium-high heat. If baking, line a baking sheet with parchment paper for easier cleanup.
- Cook the Salmon: Remove the salmon from the marinade, reserving the marinade for later. If baking, place the salmon on the prepared baking sheet and bake for about 12-15 minutes or until the salmon flakes easily with a fork. If grilling, place the salmon skin-side down on the grill and cook for about 6-8 minutes per side, depending on the thickness of the fillets.
- Prepare the Teriyaki Glaze: While the salmon is cooking, pour the reserved marinade into a small saucepan. Bring it to a boil over medium heat, then reduce the heat to low. If you’d like a thicker glaze, mix the cornstarch with water in a small bowl, then stir it into the simmering marinade. Allow it to thicken for a few minutes, stirring frequently.
- Glaze the Salmon: Once the salmon is cooked, brush the thickened teriyaki glaze over the fillets. Allow it to sit for a couple of minutes to let the flavors meld together before serving.
- Serve and Garnish: Transfer the teriyaki salmon to a serving platter. Garnish with sesame seeds and chopped green onions for added flavor and presentation. Serve with steamed rice and vegetables for a complete meal.
Extra Tips
To enhance the flavor of your Teriyaki Salmon, consider adding a touch of citrus zest, such as lime or lemon, to the marinade for a fresh twist. Additionally, for a more robust flavor, you can char the salmon slightly on the grill or in a skillet to achieve a delicious crust.
If you have leftovers, they can be stored in an airtight container in the fridge for up to 2 days; simply reheat gently to enjoy again.
Miso Glazed Salmon
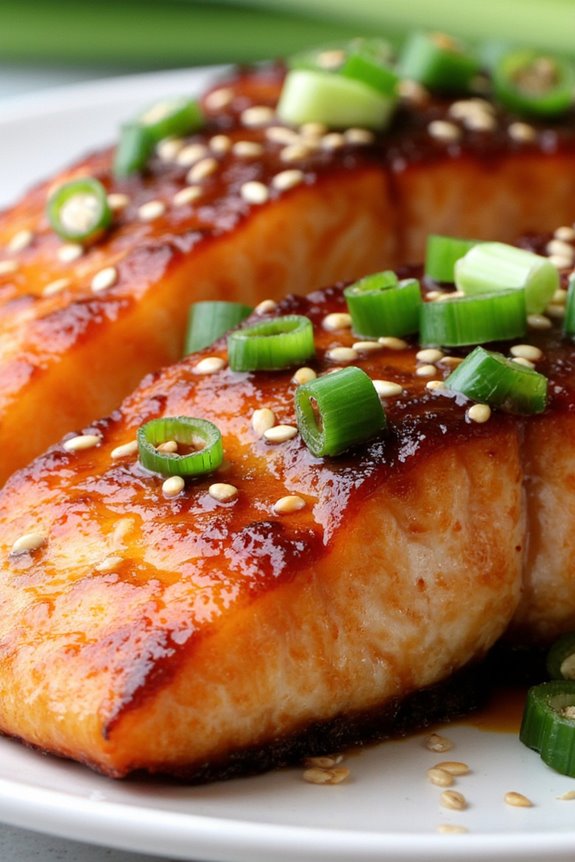
Miso Glazed Salmon is a delightful and savory dish that showcases the umami-rich flavors of miso paste, complemented by the natural sweetness of honey and the brightness of citrus. This dish isn’t only packed with flavor but is also incredibly easy to prepare, making it a perfect option for weeknight dinners or special occasions.
The salmon fillets become tender and flaky as they marinate in the miso glaze, caramelizing beautifully when cooked, resulting in a delectable meal that pairs wonderfully with steamed rice and sautéed vegetables.
This recipe serves 4-6 people, making it a fantastic choice for family gatherings or dinner parties. The combination of miso, honey, and soy sauce not only enhances the flavor of the salmon but also creates a beautiful glaze that makes the dish visually appealing.
Whether you’re a seasoned cook or a beginner in the kitchen, this Miso Glazed Salmon is sure to impress your guests and satisfy your taste buds.
Ingredients:
- 4-6 salmon fillets (about 6 ounces each)
- 1/4 cup white miso paste
- 2 tablespoons honey
- 2 tablespoons soy sauce
- 1 tablespoon rice vinegar
- 1 teaspoon sesame oil
- 2 cloves garlic, minced
- 1 teaspoon grated fresh ginger
- 2 green onions, chopped (for garnish)
- Sesame seeds (for garnish)
Cooking Instructions:
- Prepare the Marinade: In a medium bowl, combine the white miso paste, honey, soy sauce, rice vinegar, sesame oil, minced garlic, and grated ginger. Whisk the ingredients together until smooth and well combined. This marinade will create a delicious glaze that infuses the salmon with flavor.
- Marinate the Salmon: Place the salmon fillets in a shallow dish or a resealable plastic bag. Pour the miso marinade over the salmon, ensuring that each piece is evenly coated. Cover the dish or seal the bag and refrigerate for at least 30 minutes, or up to 2 hours for maximum flavor. This step allows the flavors to penetrate the fish.
- Preheat the Oven: While the salmon is marinating, preheat your oven to 400°F (200°C). A hot oven will help caramelize the miso glaze, giving the salmon a beautiful color and flavor.
- Prepare for Baking: Line a baking sheet with parchment paper or lightly grease it with cooking spray. This will prevent the salmon from sticking and make cleanup easier.
- Bake the Salmon: Remove the salmon from the marinade, letting the excess drip off. Place the fillets skin-side down on the prepared baking sheet. Bake in the preheated oven for about 12-15 minutes, or until the salmon is cooked through and flakes easily with a fork. The glaze should be slightly caramelized.
- Garnish and Serve: Once cooked, remove the salmon from the oven and let it rest for a few minutes. Garnish with chopped green onions and a sprinkle of sesame seeds before serving. This adds a fresh touch and a delightful crunch to the dish.
Extra Tips:
For an added layer of flavor, consider grilling the salmon instead of baking it. Simply preheat your grill and cook the salmon fillets for about 4-5 minutes per side, brushing with additional marinade as desired.
Additionally, you can experiment with different types of miso, such as red or yellow, to vary the flavor profile. Serve the Miso Glazed Salmon with a side of steamed rice and sautéed vegetables for a complete and satisfying meal. Enjoy your culinary creation!
Salmon Sashimi
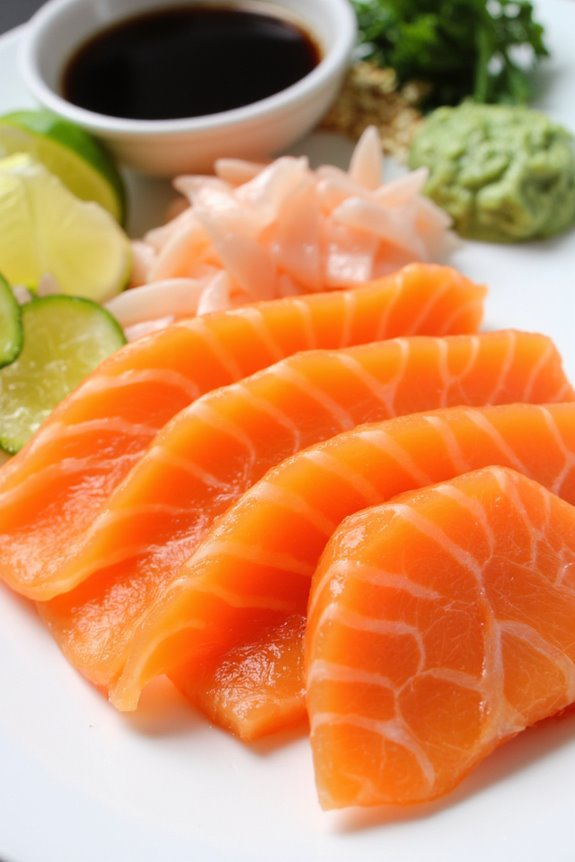
Salmon Sashimi is a quintessential Japanese dish that showcases the incredible flavors and textures of fresh salmon. It’s often served as an appetizer or as part of a larger sushi platter, highlighting the purity of the fish without any heavy sauces or seasoning.
Sashimi, by definition, refers to thinly sliced raw fish or meat, and salmon is one of the most popular choices due to its rich, buttery flavor and vibrant color. Preparing Salmon Sashimi at home allows you to enjoy this delicacy in its simplest form, making it an elegant addition to any meal or gathering.
To guarantee the best experience with Salmon Sashimi, it’s essential to source high-quality, sushi-grade salmon. This means the fish has been frozen to a specific temperature to eliminate any parasites, making it safe for raw consumption.
When preparing this dish, the focus should be on the freshness of the ingredients and the precision of the slicing. Serve it with traditional accompaniments like soy sauce, wasabi, and pickled ginger to elevate the flavors further and provide a perfect balance to the rich salmon.
Ingredients (Serves 4-6):
- 1 pound sushi-grade salmon fillet
- 2 tablespoons soy sauce
- 1 tablespoon wasabi
- 1 tablespoon pickled ginger
- 2 green onions, thinly sliced (for garnish)
- Lemon or lime wedges (for garnish)
- Sesame seeds (optional, for garnish)
Cooking Instructions:
- Select and Prepare the Salmon: Choose a high-quality sushi-grade salmon fillet. Make sure it’s bright in color and has a fresh ocean smell. Rinse the fillet under cold water and pat it dry with paper towels.
- Remove the Skin (if necessary): If your salmon fillet has skin, carefully use a sharp knife to remove it. Place the fillet skin-side down on a cutting board. Hold the skin firmly while sliding the knife between the flesh and skin, angling the knife slightly downwards.
- Slice the Salmon: Using a sharp knife, cut the salmon into thin slices. Aim for slices that are about 1/4 inch thick. Start at one end of the fillet, using a smooth, long motion to create even slices, and avoid sawing back and forth.
- Plate the Sashimi: Arrange the sliced salmon elegantly on a serving platter. You can fan out the slices for a beautiful presentation.
- Prepare Accompaniments: In small bowls, serve soy sauce, a dollop of wasabi, and pickled ginger. Garnish the sashimi with thinly sliced green onions and optional sesame seeds. Add lemon or lime wedges on the side for an extra zesty touch.
- Serve Immediately: Salmon Sashimi is best enjoyed fresh, so serve it immediately after preparation. Encourage guests to dip their slices in soy sauce and add a little wasabi for an extra kick.
Extra Tips:
When preparing Salmon Sashimi, always guarantee that your knife is extremely sharp, as a dull knife can tear the flesh rather than slice it cleanly.
Additionally, if you’re unsure about the quality of your salmon, consult your fishmonger for advice on sourcing sushi-grade fish. Keeping your workspace clean and organized will help maintain the freshness of the fish and enhance your overall experience while preparing this delightful dish.
Enjoy your Salmon Sashimi with a side of sake or green tea for an authentic Japanese dining experience!
Salmon Rice Bowl
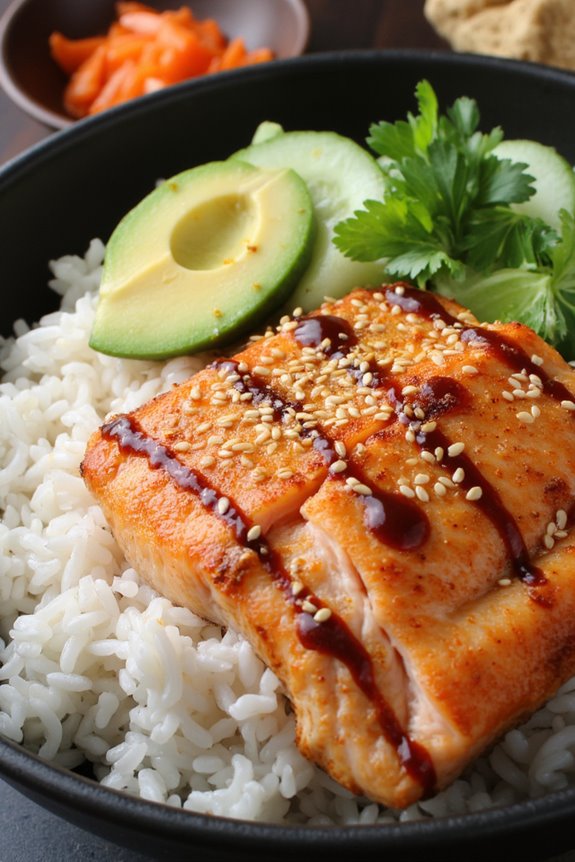
The Salmon Rice Bowl, known as “Sake Don” in Japan, is a delightful and nutritious dish that brings together the rich flavors of salmon with fragrant rice and a medley of fresh toppings. This dish isn’t only visually appealing but also offers a perfect balance of taste and texture, making it a favorite in Japanese cuisine.
The simplicity of this recipe allows the natural flavors of the salmon to shine, while the rice serves as a comforting base that complements the dish beautifully.
In this recipe, we’ll be using fresh salmon fillets, which can be grilled, seared, or even poached based on your preference. Topped with a variety of garnishes such as scallions, sesame seeds, and a drizzle of soy sauce, this Salmon Rice Bowl is perfect for a quick weeknight dinner or an impressive meal for guests.
Pair it with a side of pickled vegetables or miso soup for a complete Japanese dining experience.
Ingredients (Serves 4-6):
- 4 cups cooked Japanese short-grain rice
- 4 salmon fillets (about 6 oz each)
- 2 tablespoons vegetable oil
- Salt and pepper, to taste
- 1 avocado, sliced
- 1 cucumber, thinly sliced
- 1/4 cup chopped scallions
- 2 tablespoons sesame seeds
- Soy sauce, for drizzling
- Pickled ginger, for serving (optional)
- Wasabi, for serving (optional)
Cooking Instructions:
- Prepare the Rice: Start by cooking the Japanese short-grain rice according to package instructions. Typically, this involves rinsing the rice under cold water until the water runs clear, soaking it for about 30 minutes, and then steaming it with the appropriate amount of water. Once cooked, fluff the rice with a fork and keep it warm.
- Season the Salmon: While the rice is cooking, season the salmon fillets with salt and pepper on both sides. This will enhance the natural flavor of the fish and prepare it for cooking.
- Cook the Salmon: Heat the vegetable oil in a large skillet over medium-high heat. Once the oil is hot, add the seasoned salmon fillets, skin-side down. Cook for about 4-5 minutes until the skin is crispy, then carefully flip the fillets and cook for an additional 3-4 minutes, or until the salmon is cooked through and flakes easily with a fork. Remove from the skillet and let it rest for a few minutes.
- Prepare the Toppings: While the salmon is resting, prepare the toppings. Slice the avocado and cucumber, and chop the scallions. Set them aside for assembly.
- Assemble the Bowls: Begin by placing a generous scoop of warm rice into each bowl. Top with a salmon fillet, followed by slices of avocado and cucumber. Sprinkle the chopped scallions and sesame seeds over the top. Finish with a drizzle of soy sauce for added flavor.
- Serve: Serve the Salmon Rice Bowls immediately, accompanied by pickled ginger and wasabi on the side if desired.
Extra Tips: When choosing your salmon, opt for fresh, high-quality fish from a reputable source. If you prefer a different cooking method, you can also bake or poach the salmon for a healthier alternative.
To elevate the flavors further, consider marinating the salmon in a mixture of soy sauce and mirin before cooking. Customize your rice bowl by adding other fresh vegetables or toppings, such as radishes, seaweed salad, or soft-boiled eggs, to suit your taste. Enjoy your homemade Salmon Rice Bowl!
Grilled Salmon With Soy Sauce
Grilled Salmon with Soy Sauce is a delightful dish that beautifully combines the rich flavors of fresh salmon with the savory notes of soy sauce. This recipe isn’t only simple to prepare but also allows the natural taste of the salmon to shine through, making it an ideal option for a weeknight dinner or a special occasion.
The marinade infuses the fish with a depth of flavor that complements its buttery texture, and grilling adds a smoky char that elevates the overall dish. To achieve the best results, it’s important to choose high-quality salmon fillets. The grilling process helps to lock in moisture while creating a slightly crispy exterior.
This dish pairs wonderfully with steamed rice and sautéed vegetables, making it a well-rounded meal that the whole family will enjoy. Let’s explore the ingredients and cooking instructions to prepare this mouthwatering dish!
Ingredients (Serves 4-6):
- 4-6 salmon fillets (about 6 ounces each, skin-on)
- 1/3 cup soy sauce
- 2 tablespoons honey
- 2 tablespoons rice vinegar
- 2 tablespoons sesame oil
- 3 cloves garlic, minced
- 1 tablespoon fresh ginger, grated
- 2 green onions, sliced (for garnish)
- Sesame seeds (for garnish)
- Salt and pepper to taste
Cooking Instructions:
- Prepare the Marinade: In a medium-sized bowl, whisk together the soy sauce, honey, rice vinegar, sesame oil, minced garlic, and grated ginger. This marinade will provide a sweet and savory flavor that enhances the salmon.
- Marinate the Salmon: Place the salmon fillets in a shallow dish or a resealable plastic bag and pour the marinade over them, ensuring each fillet is well coated. Cover the dish or seal the bag, and refrigerate for at least 30 minutes, or up to 2 hours for a more intense flavor.
- Preheat the Grill: Preheat your grill to medium-high heat (about 400°F). Make sure the grill grates are clean and lightly oiled to prevent sticking.
- Remove Salmon from Marinade: After marinating, take the salmon fillets out of the fridge and discard the remaining marinade. Pat the fillets dry with paper towels to remove excess moisture, which will help achieve a nice sear.
- Season the Salmon: Lightly season the salmon fillets with salt and pepper. This step is essential as it enhances the flavor of the fish.
- Grill the Salmon: Place the salmon fillets on the grill, skin-side down. Grill for about 4-5 minutes, then carefully flip the fillets using a spatula. Grill for an additional 3-4 minutes, or until the salmon is cooked through and flakes easily with a fork. The cooking time may vary based on the thickness of the fillets.
- Garnish and Serve: Once cooked, remove the salmon from the grill and let it rest for a couple of minutes. Serve the grilled salmon garnished with sliced green onions and a sprinkle of sesame seeds for added texture and flavor.
Extra Tips:
For an even more enhanced flavor, consider adding a splash of citrus juice, such as lemon or lime, to the marinade. This will brighten the dish and add a revitalizing touch.
Additionally, if you prefer a more caramelized exterior, you can brush some of the marinade on the salmon during grilling, but be cautious of flare-ups due to the honey content.
Finally, feel free to customize the garnishes with your favorite herbs or serve alongside a fresh salad for a light and healthy meal. Enjoy your grilled salmon with soy sauce!
Salmon Sushi Rolls

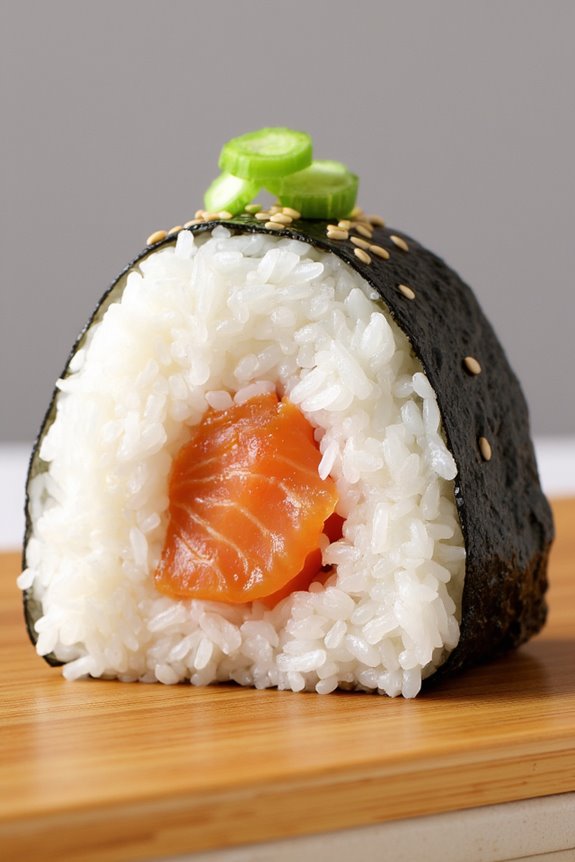
Japanese Salmon Sushi Rolls, also known as “Salmon Maki,” are a delicious and visually appealing dish that brings the flavors of the ocean directly to your home. These sushi rolls combine fresh, high-quality salmon with seasoned sushi rice and a variety of crunchy vegetables, all wrapped in a sheet of nori (seaweed).
Whether you’re hosting a sushi night with friends or simply want to indulge in a homemade treat, these rolls are bound to impress.
Making sushi at home may seem intimidating at first, but with a little practice and the right ingredients, you’ll be able to create beautiful and tasty sushi rolls in no time. The key to great sushi lies in the freshness of the ingredients and the technique used to roll them.
So, gather your supplies and get ready to enjoy the delightful experience of making Japanese Salmon Sushi Rolls!
Ingredients (Serves 4-6):
- 2 cups sushi rice
- 2 ½ cups water
- ¼ cup rice vinegar
- 2 tablespoons sugar
- 1 teaspoon salt
- 4 sheets of nori
- 8 ounces fresh salmon, skinless and boneless
- 1 small cucumber, julienned
- 1 avocado, sliced
- Soy sauce, for dipping
- Pickled ginger, for serving
- Wasabi, for serving
Cooking Instructions:
1. Prepare the Sushi Rice: Rinse the sushi rice under cold water until the water runs clear to remove excess starch. In a medium saucepan, combine the rinsed rice and water, then bring to a boil.
Once boiling, reduce the heat to low, cover, and simmer for about 18-20 minutes or until the rice is tender and water is absorbed. Remove from heat and let it sit, covered, for an additional 10 minutes.
2. Season the Rice: In a small bowl, mix the rice vinegar, sugar, and salt until dissolved. Transfer the cooked rice to a large bowl and gently fold in the vinegar mixture using a wooden spatula, being careful not to mash the rice.
Allow the rice to cool to room temperature.
3. Prepare the Fillings: While the rice cools, slice the fresh salmon into thin strips, julienne the cucumber, and slice the avocado. Make sure all ingredients are ready before assembling the rolls.
4. Assemble the Sushi Rolls: Place a bamboo sushi mat on a clean surface and lay a sheet of nori, shiny side down, on the mat. Wet your hands to prevent sticking, then grab a handful of sushi rice (about ¾ cup) and spread it evenly over the nori, leaving a 1-inch border at the top edge.
Press the rice down gently but firmly.
5. Add Fillings: Arrange a few strips of salmon, cucumber, and avocado horizontally across the center of the rice-covered nori.
6. Roll the Sushi: Starting from the edge closest to you, lift the bamboo mat and roll it away from you, tucking the filling inside the roll. Apply gentle pressure to shape the roll as you go, using the mat to help form a tight cylinder.
Roll until you reach the exposed edge of the nori, then dampen it with a little water to seal the roll.
7. Slice the Rolls: Using a sharp, wet knife, slice the roll into 6-8 equal pieces. Wipe the knife with a damp cloth between cuts to guarantee clean slices.
8. Serve: Arrange the sushi rolls on a serving platter. Serve with soy sauce, pickled ginger, and wasabi on the side.
Extra Tips:
When making sushi, freshness is vital, especially for the salmon. Be sure to purchase sushi-grade salmon from a reputable source to confirm safety and quality.
Additionally, practice makes perfect; don’t worry if your rolls don’t look perfect at first. With each attempt, you’ll develop better technique and find your rhythm. Enjoy the process and have fun experimenting with different fillings and flavors!
Salmon and Avocado Salad

Japanese Salmon and Avocado Salad is a delightful fusion of fresh ingredients that creates a light yet satisfying dish. This salad combines tender salmon, creamy avocado, and crisp vegetables, all dressed in a zesty sesame-soy vinaigrette. It’s perfect for a revitalizing lunch or a vibrant side dish at dinner.
The combination of flavors and textures makes this salad a favorite in Japanese cuisine, highlighting the natural richness of salmon and the buttery smoothness of avocado. This recipe isn’t only easy to prepare but also packs a nutritional punch. Salmon is an excellent source of omega-3 fatty acids, while avocados provide healthy fats and fiber.
When paired with crunchy vegetables and a tangy dressing, this salad becomes a well-rounded meal that’s both delicious and healthy. Whether you’re a sushi lover or just looking to enjoy a fresh seafood dish, this Japanese Salmon and Avocado Salad is sure to impress.
Ingredients (Serves 4-6):
- 1 pound fresh salmon fillet
- 2 ripe avocados, diced
- 2 cups mixed greens (such as arugula, spinach, and lettuce)
- 1 cucumber, thinly sliced
- 1 carrot, julienned
- 1/4 red onion, thinly sliced
- 1/4 cup sesame seeds
- 1/4 cup soy sauce
- 2 tablespoons rice vinegar
- 2 tablespoons sesame oil
- 1 tablespoon honey or maple syrup
- 1 teaspoon grated ginger
- Salt and pepper, to taste
- Optional: Chopped green onions for garnish
Cooking Instructions:
1. Prepare the Salmon: Start by preheating your oven to 375°F (190°C). Place the salmon fillet on a baking sheet lined with parchment paper. Season it with salt and pepper to taste. Bake the salmon for 15-20 minutes, or until it flakes easily with a fork.
Once cooked, let it cool slightly before flaking it into bite-sized pieces.
2. Make the Dressing: In a small bowl, whisk together the soy sauce, rice vinegar, sesame oil, honey (or maple syrup), and grated ginger. This dressing will bring all the flavors together and add a delicious umami taste to the salad.
3. Prepare the Vegetables: While the salmon is baking, prepare the vegetables. Wash and dry the mixed greens, then place them in a large salad bowl. Add the sliced cucumber, julienned carrot, and red onion to the bowl. Toss the vegetables together gently to combine.
4. Combine Salad Ingredients: Add the flaked salmon and diced avocados to the bowl with the mixed greens and vegetables. Be careful not to mash the avocado as you mix; you want to keep the pieces intact for texture.
5. Dress the Salad: Drizzle the prepared dressing over the salad and gently toss everything together until well coated. Sprinkle sesame seeds on top for added crunch and flavor.
6. Serve: Divide the salad among serving plates or bowls. If desired, garnish with chopped green onions for a fresh touch. Serve immediately and enjoy your Japanese Salmon and Avocado Salad!
Extra Tips:
For the best flavor and texture, use fresh, high-quality salmon for this dish. If you prefer a lighter option, you can grill or pan-sear the salmon instead of baking it.
Additionally, feel free to customize the salad by adding other vegetables such as bell peppers or radishes, or even adding a bit of spicy mayo for an extra kick. This salad is best enjoyed fresh, but it can be stored in the refrigerator for a few hours if needed; just be careful to add the dressing right before serving to keep the ingredients crisp.
Salmon Udon Noodle Soup
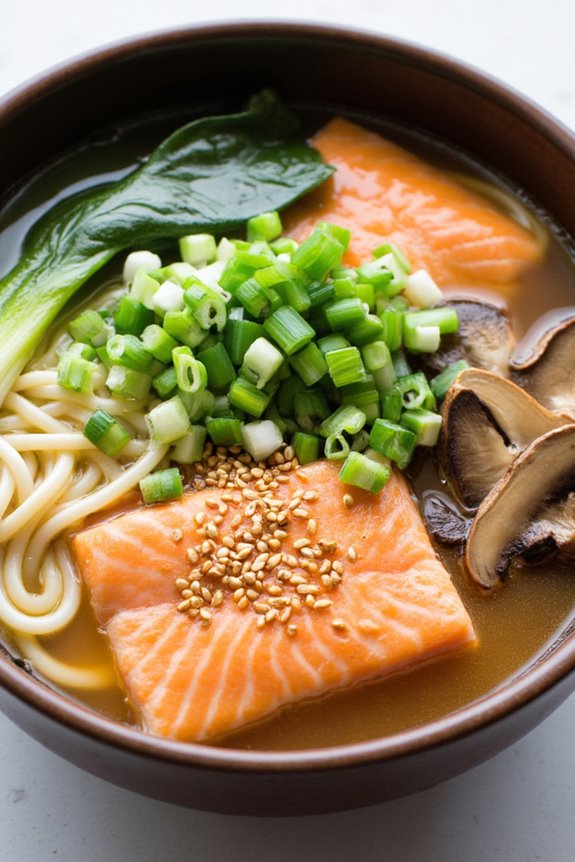
Salmon Udon Noodle Soup is a comforting Japanese dish that brings together tender salmon, chewy udon noodles, and a savory broth. This delightful meal is perfect for chilly evenings or when you’re in need of a warm, nourishing bowl of goodness.
The combination of fresh vegetables and fragrant seasonings elevates the dish, making it not just satisfying but also incredibly flavorful.
This soup is easy to prepare, making it suitable for both novice cooks and seasoned chefs. The udon noodles provide a hearty base, while the salmon adds a touch of richness. Topped with fresh scallions and a sprinkle of sesame seeds, this dish is as pleasing to the eye as it’s to the palate.
Gather your ingredients, and let’s plunge into this delicious recipe!
Ingredients (serves 4-6):
- 2 tablespoons vegetable oil
- 1 small onion, thinly sliced
- 2 garlic cloves, minced
- 1-inch piece of ginger, grated
- 4 cups dashi broth (or chicken broth)
- 2 tablespoons soy sauce
- 1 tablespoon mirin
- 1 tablespoon miso paste (optional)
- 400g (14 oz) udon noodles
- 400g (14 oz) salmon fillets, skinless and boneless
- 1 cup bok choy, chopped
- 1 cup shiitake mushrooms, sliced
- 4 green onions, chopped (for garnish)
- 1 tablespoon sesame seeds (for garnish)
- Salt and pepper to taste
Cooking Instructions:
1. Prepare the Broth: In a large pot, heat the vegetable oil over medium heat. Add the sliced onion and sauté until translucent, about 3-4 minutes. Stir in the minced garlic and grated ginger, cooking until fragrant, around 1-2 minutes.
2. Add Liquid Ingredients: Pour in the dashi broth (or chicken broth), soy sauce, mirin, and miso paste (if using). Bring the mixture to a gentle simmer, allowing the flavors to meld together, about 5-10 minutes.
Taste the broth and adjust the seasoning with salt and pepper as desired.
3. Cook the Udon Noodles: While the broth simmers, cook the udon noodles according to the package instructions in a separate pot. Once cooked, drain and set aside.
4. Cook the Salmon: Add the salmon fillets to the simmering broth. Cook for about 5-7 minutes, or until the salmon is cooked through and flakes easily with a fork.
Be careful not to overcook the salmon.
5. Add Vegetables: Once the salmon is cooked, gently stir in the chopped bok choy and sliced shiitake mushrooms. Allow them to cook for an additional 2-3 minutes until the vegetables are tender.
6. Combine and Serve: Divide the cooked udon noodles among serving bowls. Ladle the hot broth, salmon, and vegetables over the noodles.
Garnish with chopped green onions and a sprinkle of sesame seeds before serving.
Extra Tips:
When preparing Salmon Udon Noodle Soup, consider using fresh ingredients for the best flavor.
Feel free to customize the vegetables based on your preference or seasonal availability—carrots, spinach, or snap peas work wonderfully too.
If you have leftovers, store the soup and noodles separately to maintain the noodles’ texture. Reheat gently before serving, and add a splash of water or broth to revive the soup’s consistency.
Enjoy this heartwarming dish with a side of pickled vegetables for an authentic Japanese experience!
Baked Salmon With Daikon
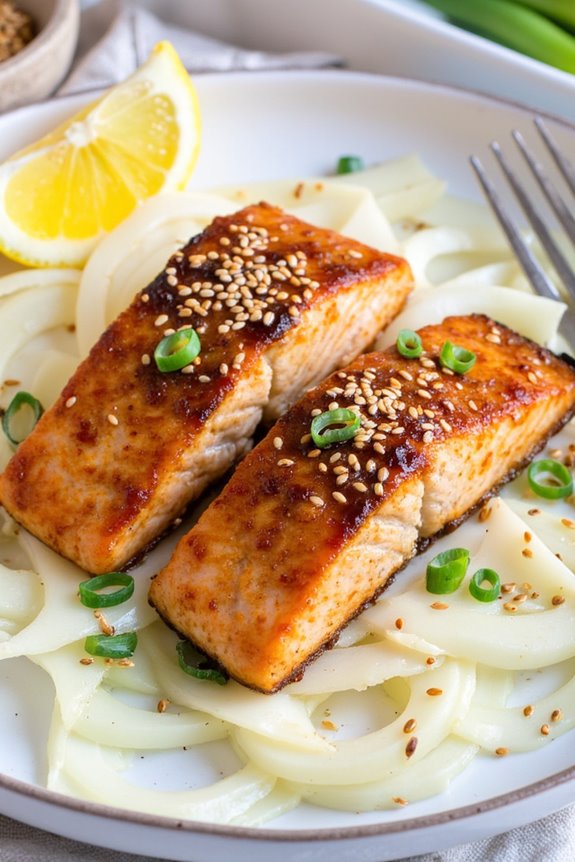
Baked Salmon with Daikon is a delicious and healthy dish that showcases the delicate flavors of fresh salmon paired with the subtle crunch of daikon radish. This Japanese-inspired recipe isn’t only easy to prepare but also highlights the natural umami of the ingredients, making it a perfect choice for both weeknight dinners and special occasions.
The daikon, known for its mild taste and crisp texture, complements the rich and buttery taste of salmon, creating a harmonious balance on the plate. In addition to being flavorful, this dish is packed with nutrients, making it a wholesome option for those looking to maintain a healthy diet.
The salmon is rich in omega-3 fatty acids, while the daikon offers a good source of vitamin C and fiber. Together, they create a colorful and appetizing dish that’s sure to impress your family and friends. Serve it with a side of steamed rice or a fresh salad to complete the meal.
Ingredients (serving size: 4-6 people)
- 4-6 salmon fillets (about 6 ounces each)
- 1 medium daikon radish, peeled and thinly sliced
- 2 tablespoons soy sauce
- 1 tablespoon mirin (sweet rice wine)
- 1 tablespoon sesame oil
- 2 cloves garlic, minced
- 1-inch piece of ginger, grated
- 2 green onions, chopped
- Salt and pepper, to taste
- Lemon wedges, for garnish (optional)
- Sesame seeds, for garnish (optional)
Cooking Instructions
- Preheat the Oven: Begin by preheating your oven to 400°F (200°C). A hot oven will guarantee that the salmon cooks evenly and the daikon retains its crispness.
- Prepare the Marinade: In a small bowl, whisk together the soy sauce, mirin, sesame oil, minced garlic, and grated ginger. This marinade will infuse the salmon with flavor and help keep it moist during baking.
- Marinate the Salmon: Place the salmon fillets in a shallow dish and pour the marinade over them. Let the salmon marinate for about 15-20 minutes, turning halfway through to guarantee even flavor absorption.
- Prepare the Daikon: While the salmon is marinating, arrange the thinly sliced daikon radish on a baking sheet lined with parchment paper. This will serve as a bed for the salmon, allowing it to absorb the flavors as it bakes.
- Place the Salmon on the Daikon: After marinating, remove the salmon fillets from the dish and place them on top of the daikon slices. Sprinkle salt, pepper, and chopped green onions over the salmon to enhance the flavor.
- Bake the Dish: Transfer the baking sheet to the preheated oven and bake for about 15-20 minutes, or until the salmon is cooked through and flakes easily with a fork. The daikon should be tender but still retain some crunch.
- Serve and Garnish: Once cooked, remove the dish from the oven and let it rest for a couple of minutes. Serve the baked salmon on a platter with the daikon, and garnish with sesame seeds and lemon wedges if desired.
Extra Tips
For an added depth of flavor, consider adding a splash of rice vinegar or a sprinkle of red pepper flakes to the marinade for a hint of acidity and spice.
If you prefer a more caramelized finish, broil the salmon for the last 2-3 minutes of cooking. Additionally, feel free to customize the dish by adding other vegetables such as bok choy or asparagus to the baking sheet for a complete one-pan meal.
Enjoy your Baked Salmon with Daikon!
Salmon Onigiri
Salmon Onigiri, or salmon rice balls, is a delightful Japanese dish that combines the rich flavor of salmon with the comforting texture of seasoned rice. This dish isn’t only simple to prepare but also offers a perfect balance of taste and nutrition, making it a popular choice for both lunch boxes and picnics in Japan.
The onigiri can be shaped into triangles or balls and often features a variety of fillings, with salmon being one of the most beloved options. It’s a versatile dish that can be enjoyed hot or cold and is perfect for any time of day.
To make Salmon Onigiri, you’ll need cooked sushi rice, which is seasoned with rice vinegar, sugar, and salt, along with grilled or canned salmon. The rice is typically hand-formed into the desired shape and may be wrapped in nori (seaweed) for added flavor and texture.
This dish isn’t only filling but also easy to customize, allowing you to add your favorite ingredients or sides. Whether you’re a seasoned cook or a beginner in the kitchen, making Salmon Onigiri is a rewarding experience that brings a taste of Japan to your home.
Ingredients (Serves 4-6 people):
- 2 cups sushi rice
- 2 1/2 cups water
- 1/4 cup rice vinegar
- 2 tablespoons sugar
- 1 teaspoon salt
- 1 cup cooked salmon (grilled or canned)
- 1 tablespoon soy sauce (optional)
- 2 sheets nori (seaweed), cut into strips (optional)
- Sesame seeds (for garnish, optional)
- Chopped green onions (for garnish, optional)
Cooking Instructions:
- Prepare the Sushi Rice: Rinse the sushi rice under cold water until the water runs clear. This removes excess starch and prevents the rice from becoming too sticky. After rinsing, drain the rice and let it sit for about 30 minutes.
- Cook the Rice: In a rice cooker, combine the rinsed sushi rice and 2 1/2 cups of water. Cook according to the rice cooker instructions. If you don’t have a rice cooker, bring the rice and water to a boil in a pot, then cover and reduce the heat to low. Cook for about 18-20 minutes until the water is absorbed. Remove from heat and let it sit covered for another 10 minutes.
- Season the Rice: While the rice is still warm, combine the rice vinegar, sugar, and salt in a small bowl until dissolved. Gently fold this mixture into the cooked rice using a spatula or wooden spoon. Be careful not to mash the rice; you want to keep the grains intact. Allow the seasoned rice to cool slightly.
- Prepare the Salmon Filling: If using grilled salmon, flake it into small pieces and mix with soy sauce if desired. If using canned salmon, drain it and break it up into smaller chunks. Set aside.
- Shape the Onigiri: Once the rice is cool enough to handle, wet your hands with water to prevent sticking. Take a small amount of rice (about a handful) and flatten it in your palm. Place a spoonful of the salmon filling in the center, then mold the rice around the filling to form a triangle or ball shape. Press gently to ascertain it holds together. Repeat with the remaining rice and filling.
- Add Nori and Garnish: If desired, wrap a strip of nori around the onigiri for added flavor. You can also sprinkle sesame seeds and chopped green onions on top for garnish.
Extra Tips:
When making Salmon Onigiri, it’s important to keep your hands wet while shaping the rice to prevent it from sticking. You can also experiment with different fillings, such as pickled vegetables or tuna, to create your own variations.
If you’re not serving the onigiri immediately, wrap them in plastic wrap to keep them fresh. For an enjoyable presentation, serve them on a platter with extra nori strips on the side for dipping or wrapping.