

When I crave something sweet yet unique, Korean desserts are my go-to. Their distinct textures and flavors, like the refreshing Patbingsu and the satisfying chewiness of Tteok, are simply delightful. Each dessert offers a taste of tradition and a sprinkle of creativity. I love how these gentle treats add a touch of culture to any gathering. Let’s explore the delicious variety these Korean sweets have to offer.
Patbingsu: Shaved Ice Delight
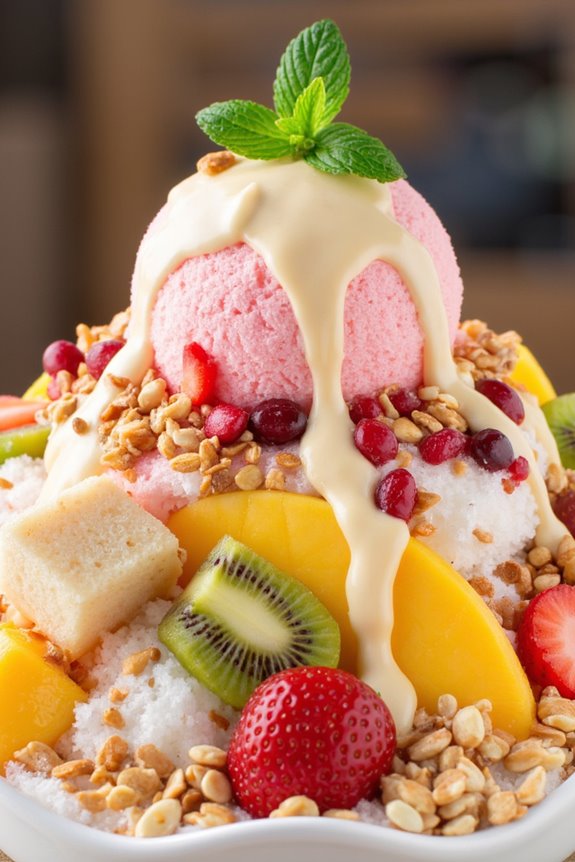
Patbingsu, a beloved Korean dessert, is a revitalizing treat particularly popular during the hot summer months. This delightful dish combines finely shaved ice with a variety of toppings, offering a perfect balance of textures and flavors. Traditionally, it features sweetened red bean paste, but the modern versions have expanded to include an array of ingredients such as fruits, condensed milk, and even ice cream. The beauty of Patbingsu lies in its versatility and the way it can be tailored to individual preferences.
To prepare Patbingsu at home, you’ll need to gather a few key ingredients and follow some simple steps. The process primarily involves creating a base of fluffy shaved ice and layering it with your choice of toppings. This dessert not only satisfies your sweet tooth but also provides a fun way to cool down while enjoying the flavors of Korea. Get ready to impress your family and friends with this stunning dessert that’s as enjoyable to make as it’s to eat!
Ingredients (Serves 4-6 people)
- 4 cups of ice
- 1 cup of sweetened red bean paste (pat)
- 1 cup of diced fresh fruit (e.g., strawberries, mangoes, kiwi)
- 1 cup of sweetened condensed milk
- 1 cup of mochi pieces (optional)
- 1 cup of finely crushed nuts (e.g., almonds, peanuts)
- 1/2 cup of powdered grass jelly (optional)
- 1/2 cup of chocolate syrup (optional)
- Fresh mint leaves for garnish (optional)
Cooking Instructions
- Prepare the Ice: Start by freezing water in a large bowl or ice mold. Allow it to freeze for several hours or overnight until solid. If you have a shaved ice machine, this will be your best option to achieve the perfect fluffy texture.
- Shave the Ice: Once the ice is fully frozen, remove it from the mold and use a sharp knife or a shaved ice machine to shave the ice into fine, fluffy shavings. The texture should resemble snow, which will help the toppings meld beautifully with the ice.
- Prepare the Toppings: While the ice is being shaved, prepare your toppings. Dice your choice of fresh fruit into bite-sized pieces, and if using mochi, cut it into small cubes. If you like a nutty flavor, crush the nuts into smaller pieces.
- Assemble the Patbingsu: In serving bowls, start by placing a generous mound of shaved ice at the bottom. Then, add a layer of sweetened red bean paste over the ice, followed by your selection of diced fruit, mochi, and crushed nuts.
- Drizzle Condensed Milk: Finish off the dessert by drizzling sweetened condensed milk over the top. If you’re using chocolate syrup or powdered grass jelly, now is the time to add those as well.
- Garnish and Serve: For a lovely presentation, add a few fresh mint leaves on top for garnish. Serve immediately with a spoon and enjoy the delightful mix of flavors and textures.
Extra Tips
When making Patbingsu, feel free to get creative with your toppings! You can customize your dessert based on seasonal fruits or your favorite sweets.
If you want to further enhance the flavor, consider infusing the shaved ice with a little fruit juice or flavored syrup before adding the toppings. Additionally, serving Patbingsu in clear bowls or cups can showcase the beautiful layers, making it visually appealing for gatherings or special occasions.
Tteok: Korean Rice Cakes
Tteok, the traditional Korean rice cake, is a beloved dessert that has been enjoyed for centuries. These chewy, sticky rice cakes are made from glutinous rice flour and can be filled or topped with a variety of sweet fillings. Tteok comes in several forms and flavors, making it a versatile treat perfect for any occasion, whether it’s a festive celebration or just a comforting snack at home.
The process of making tteok can seem intimidating at first, but with a little patience and practice, you’ll master the art of creating these delightful cakes.
In this recipe, we’ll focus on making a classic version of tteok, which is flavored with sweet red bean paste. The combination of the chewy rice cake and the sweet filling makes for a deliciously satisfying dessert. The preparation involves steaming the rice flour mixture and shaping it into rounds filled with red bean paste, creating a treat that’s perfect for sharing with family and friends. By following the steps outlined below, you’ll create a batch of tteok that serves 4-6 people, guaranteeing there’s plenty to go around!
Ingredients
- 2 cups of sweet rice flour (glutinous rice flour)
- 1 cup of water
- ½ cup of sugar
- 1 cup of sweet red bean paste (store-bought or homemade)
- Cornstarch or potato starch (for dusting)
- A pinch of salt
- Food coloring (optional, for decorative purposes)
Cooking Instructions
- Prepare the Steamer: Begin by preparing your steamer. Fill a pot with water and bring it to a boil. Line a steaming tray or a heatproof dish with parchment paper to prevent the tteok from sticking.
- Mix the Ingredients: In a mixing bowl, combine the sweet rice flour, sugar, and salt. Slowly add in the water, stirring until the mixture is smooth and free of lumps. If desired, you can add a few drops of food coloring to achieve a vibrant appearance.
- Steam the Mixture: Pour the rice flour mixture into the prepared steaming tray. Cover it with a clean kitchen towel and then place the lid on the steamer. Steam the mixture on medium heat for about 20 minutes, stirring halfway through to guarantee even cooking.
- Cool and Knead: Once the mixture is cooked and has a sticky consistency, remove it from the steamer and let it cool slightly. Once it’s cool enough to handle, dust your hands and a clean surface with cornstarch. Knead the dough for a few minutes until it becomes smooth and pliable.
- Shape the Tteok: Divide the dough into small portions (about the size of a golf ball). Flatten each portion in the palm of your hand, creating a small disc. Place a teaspoon of sweet red bean paste in the center, then carefully fold the edges of the disc over the filling and pinch to seal it. Roll it gently between your palms to form a smooth ball.
- Dust and Serve: Once all the tteok are shaped, roll them in cornstarch or potato starch to prevent sticking. Arrange them on a plate or platter. You can serve them immediately or store them in an airtight container.
Extra Tips
When making tteok, it’s important to keep your hands and surfaces dusted with cornstarch or potato starch to prevent sticking. Additionally, if you want to experiment with flavors, consider adding different fillings like sesame paste or chopped fruits.
Tteok can also be enjoyed warm or cold, and they can be stored in the refrigerator for a few days. If you prefer a softer texture, steam them again briefly before serving. Enjoy your homemade tteok with tea or as a delightful treat on its own!
Hotteok: Sweet Syrup-Filled Pancakes
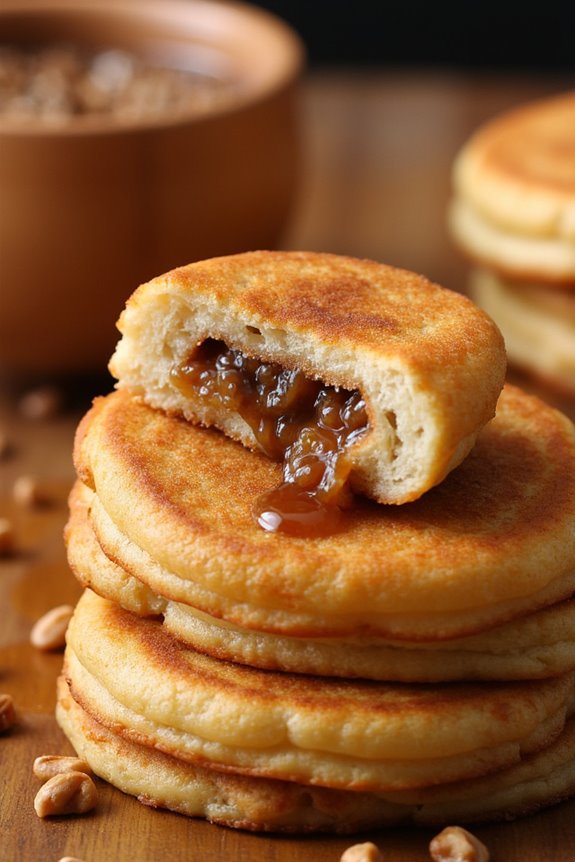
Hotteok is a popular Korean street food that has captured the hearts of many with its delightful combination of fluffy pancakes and a gooey, sweet syrup filling. Traditionally enjoyed during the winter months, these pancakes are a comforting treat that can be enjoyed year-round. The filling typically consists of brown sugar, cinnamon, and chopped nuts, providing a perfect balance of sweetness and texture.
Making hotteok at home allows you to customize the filling to your liking and enjoy the fun of cooking these delicious treats from scratch. The process of making hotteok is simple yet rewarding. The dough is made from a basic yeast mixture, which gives the pancakes a delightful rise and chewiness.
Once the dough has rested and risen, it’s rolled out and filled with the sweet syrup mixture before being pan-fried until golden brown. The result is a warm, crispy exterior with a luscious syrupy filling that oozes out with every bite. Perfect for sharing with family and friends, hotteok is sure to be a hit.
Ingredients (serving size: 4-6 people):
- 2 cups all-purpose flour
- 1 cup warm water
- 2 tablespoons sugar
- 1 teaspoon salt
- 1 teaspoon instant yeast
- 2 tablespoons vegetable oil
- 1/2 cup brown sugar
- 1 teaspoon ground cinnamon
- 1/4 cup chopped walnuts or peanuts (optional)
- Additional oil for frying
Cooking Instructions:
- Prepare the Dough: In a large mixing bowl, combine the warm water, sugar, and instant yeast. Allow the mixture to sit for about 5-10 minutes until it becomes frothy. This indicates that the yeast is active. Next, add the flour, salt, and vegetable oil to the bowl. Mix until a rough dough forms.
- Knead the Dough: Transfer the dough to a lightly floured surface and knead for about 5-7 minutes until it becomes smooth and elastic. If the dough is too sticky, you can add a little more flour. Once kneaded, place the dough in a lightly oiled bowl, cover it with a damp cloth, and let it rise in a warm place for about 1 hour, or until it has doubled in size.
- Prepare the Filling: While the dough is rising, mix together the brown sugar, ground cinnamon, and chopped nuts in a small bowl. This will be the sweet filling for your hotteok.
- Shape the Pancakes: After the dough has risen, punch it down to release the air. Divide the dough into 8 equal pieces. Take one piece and flatten it into a small circle (about 4 inches in diameter) on a lightly floured surface. Place a tablespoon of the filling in the center, then fold the edges of the dough over the filling, pinching to seal it securely. Repeat this with the remaining pieces of dough.
- Cook the Hotteok: Heat a non-stick skillet over medium heat and add a little oil. Place the filled dough balls in the skillet, seam side down. Cook for about 2-3 minutes until the bottom is golden brown. Flip the pancakes and press them down gently with a spatula. Cover the skillet and cook for another 2-3 minutes until the other side is golden and the filling is melted.
- Serve and Enjoy: Remove the hotteok from the skillet and let them cool slightly before serving. These pancakes are best enjoyed warm, as the syrup filling will be gooey and delicious!
Extra Tips: When cooking hotteok, make sure to keep the heat at medium to prevent burning. If the pancakes are browning too quickly, lower the heat slightly. Additionally, feel free to experiment with different fillings; you can add ingredients like chocolate chips or even sweetened red bean paste for a unique twist. Enjoy the process and have fun sharing these delightful pancakes with your loved ones!
Bungeoppang: Fish-Shaped Pastry
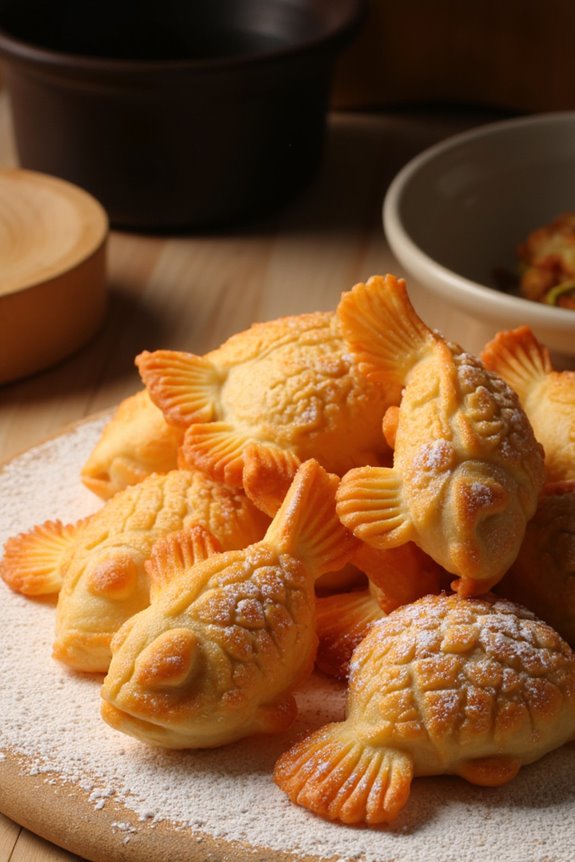
Bungeoppang, a delightful Korean street food, is a fish-shaped pastry traditionally filled with sweet red bean paste. The name “Bungeoppang” translates to “carp bread,” inspired by the shape of the pastry resembling a carp. This warm, crispy treat has gained popularity not only for its charming appearance but also for its delicious taste and versatility in fillings.
While red bean paste is the most common filling, you can also explore variations with custard, chocolate, or sweet potato.
Making Bungeoppang at home is a fun and rewarding experience. With a specialized fish-shaped mold, you can easily create these pastries that are perfect for sharing with family and friends. Whether enjoyed as a snack during chilly weather or as a sweet treat at any time of the year, Bungeoppang is sure to delight everyone who takes a bite.
Ingredients (Serves 4-6 people)
- 2 cups all-purpose flour
- 2 tablespoons granulated sugar
- 1 teaspoon baking powder
- ½ teaspoon baking soda
- ½ teaspoon salt
- 1 large egg
- 1 ¼ cups milk
- ½ teaspoon vanilla extract
- 1 cup sweet red bean paste (or desired filling)
- Vegetable oil (for greasing the mold)
Cooking Instructions
1. Prepare the Batter: In a large mixing bowl, combine the all-purpose flour, granulated sugar, baking powder, baking soda, and salt. Whisk these dry ingredients together until they’re well mixed.
In a separate bowl, beat the egg, then add the milk and vanilla extract. Pour the wet ingredients into the dry ingredients and stir until just combined. Be careful not to over-mix; a few lumps are okay.
2. Preheat the Mold: Heat a Bungeoppang mold on medium heat, ensuring it gets hot enough to cook the batter evenly. Lightly grease the inside of the mold with vegetable oil using a brush or a paper towel. This will help the pastries to easily release once cooked.
3. Fill the Mold: Once the mold is hot, pour a small amount of batter into one side of the mold, filling it just enough to cover the bottom. Add about a tablespoon of sweet red bean paste (or your chosen filling) in the center on top of the batter, then cover it with another layer of batter, ensuring the filling is completely enclosed.
4. Cook the Bungeoppang: Close the mold and cook for about 3-4 minutes on one side, then carefully flip the mold over to cook the other side. Cook for an additional 3-4 minutes until both sides are golden brown and crispy. Keep an eye on the pastries to prevent burning.
5. Serve and Enjoy: Once cooked, carefully open the mold and remove the Bungeoppang. Let them cool for a minute before serving. You can sprinkle some powdered sugar on top for an added touch or enjoy them plain.
Extra Tips
When making Bungeoppang, be sure to preheat your mold properly to achieve that crispy exterior.
Experimenting with different fillings can also enhance the experience, so don’t hesitate to try various sweet fillings such as custard, Nutella, or even fruit preserves. If you find the batter too thick, you can add a bit more milk to achieve your desired consistency. Enjoy this delightful dessert fresh from the mold for the best taste and texture!
Injeolmi: Chewy Rice Cake With Soybean Powder
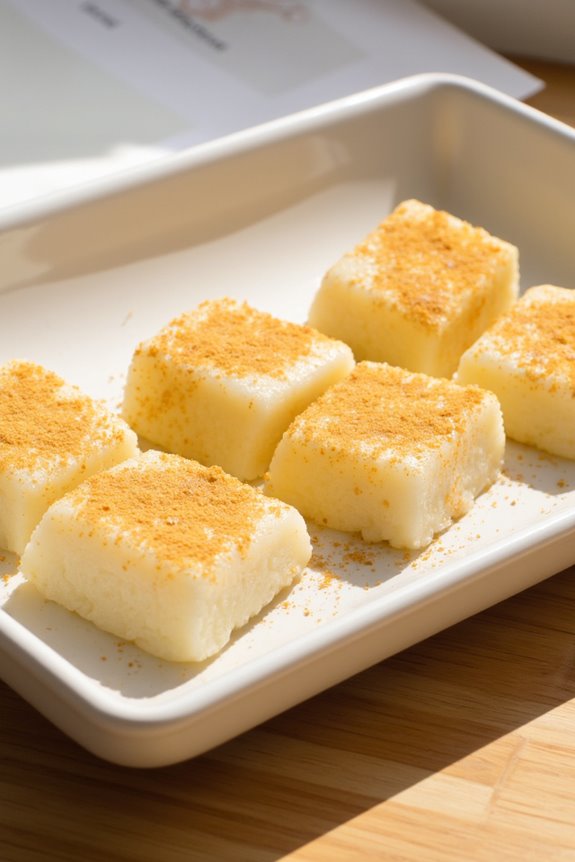
Injeolmi is a traditional Korean rice cake that’s cherished for its chewy texture and nutty flavor. Made from glutinous rice flour, this delightful dessert is often coated in finely powdered soybean flour, giving it a unique taste that pairs perfectly with the soft, sticky rice cake. Injeolmi can be enjoyed on its own or served alongside various toppings, making it a versatile snack or dessert that appeals to many.
Preparing Injeolmi requires a few simple ingredients and some patience, but the end result is well worth the effort. This dish isn’t only a favorite during festive occasions in Korea but also serves as a comforting treat that can be enjoyed year-round. Whether you’re familiar with Korean cuisine or trying it for the first time, making Injeolmi will undoubtedly be a rewarding experience.
Ingredients (Serves 4-6)
- 2 cups glutinous rice flour
- 1 cup water
- 1/4 cup sugar
- 1/4 teaspoon salt
- 1/2 cup roasted soybean flour (also known as “kinako”)
- Cornstarch (for dusting)
Cooking Instructions
- Prepare the Steamer: Start by preparing a steamer. Fill the bottom with water and bring it to a gentle boil. Line a heatproof dish or a steaming pan with parchment paper to prevent sticking.
- Mix the Ingredients: In a mixing bowl, combine the glutinous rice flour, sugar, and salt. Gradually add the water while stirring until the mixture becomes a smooth batter without lumps.
- Steam the Mixture: Pour the batter into the prepared dish and spread it evenly. Place the dish in the steamer and cover it with a lid. Steam for about 20-30 minutes, or until the mixture is firm and translucent. Stir the batter halfway through to guarantee even cooking.
- Cool the Rice Cake: Once cooked, carefully remove the dish from the steamer and let it cool for about 10-15 minutes. This will make it easier to handle when shaping the rice cake.
- Shape the Injeolmi: Dust your hands and a clean surface with cornstarch to prevent sticking. Take the cooled rice cake and cut it into small, bite-sized pieces. You can shape it into squares or rectangles, depending on your preference.
- Coat with Soybean Powder: Place the roasted soybean flour in a shallow dish. Roll each piece of rice cake in the soybean flour until fully coated. This not only adds flavor but also helps to prevent the pieces from sticking together.
- Serve and Enjoy: Arrange the coated Injeolmi on a serving plate and enjoy! You can also serve it with additional soybean flour or other toppings like honey or sweetened red bean paste, if desired.
Extra Tips
When making Injeolmi, it’s important to adjust the steaming time based on your stove and steamer type, as variations in heat can affect the texture. If you want to experiment with flavors, consider adding ingredients like matcha or sweet red bean paste to the rice cake mixture before steaming.
Additionally, make certain your hands and work surface are well dusted with cornstarch to prevent sticking, making the shaping process much smoother. Enjoy your homemade Injeolmi fresh, as it’s best consumed within a few days!
Yakgwa: Honey Cookies

Yakgwa, also known as Korean honey cookies, is a traditional dessert that combines the rich flavors of honey, sesame oil, and wheat flour, creating a sweet treat with a unique texture and taste. Originating from Korea, these cookies are often enjoyed during festive occasions and celebrations, symbolizing good fortune and happiness. Their chewy consistency and delightful sweetness make them a beloved dessert among many.
Making Yakgwa can be a rewarding experience, as the process involves mixing, shaping, and frying the dough, followed by a delightful honey syrup bath that imbues each cookie with flavor. While the recipe may seem intricate, the end result is well worth the effort, yielding a delectable treat that you can share with family and friends.
Whether you’re introducing this dessert to someone new or preparing it for a special event, Yakgwa is sure to impress with its unique taste and beautiful presentation.
Ingredients (Serves 4-6):
- 2 cups all-purpose flour
- 1/2 cup sesame oil
- 1/2 cup honey
- 1/4 cup brown sugar
- 1/4 cup water
- 1/2 tsp baking soda
- 1/4 tsp salt
- 1/2 tsp cinnamon (optional)
- Oil for frying
- Chopped walnuts or sesame seeds for garnish (optional)
Cooking Instructions:
- Prepare the Dough: In a mixing bowl, combine the all-purpose flour, baking soda, salt, and optional cinnamon. In another bowl, mix together the sesame oil, honey, and brown sugar until well combined. Gradually add the wet mixture to the dry ingredients, stirring until a dough forms.
- Knead the Dough: Transfer the dough to a lightly floured surface and knead it gently for about 5-7 minutes until it becomes smooth and elastic. If the dough is too sticky, sprinkle a little more flour as needed.
- Shape the Cookies: Divide the dough into small pieces (about the size of a golf ball). Roll each piece into a small ball, then flatten it slightly. Using a traditional Yakgwa mold or a fork, create patterns or impressions on the surface of each cookie to give them a decorative touch.
- Heat the Oil: In a deep frying pan, pour enough oil for deep frying and heat it over medium heat until it reaches about 350°F (175°C). You can test if the oil is ready by dropping a small piece of dough into it; if it bubbles and rises to the surface, it’s ready for frying.
- Fry the Cookies: Carefully place the shaped cookies into the hot oil, being cautious not to overcrowd the pan. Fry the cookies for 3-4 minutes on each side or until they turn golden brown. Use a slotted spoon to remove them from the oil and drain on a paper towel.
- Prepare the Honey Syrup: In a small saucepan, combine the remaining honey and water, and bring it to a gentle simmer. Allow the mixture to reduce slightly for about 5 minutes, creating a syrup.
- Soak the Cookies: Once the cookies are fried and slightly cooled, dip each cookie into the warm honey syrup, making sure to coat them thoroughly. Allow the excess syrup to drip off before placing them on a serving platter.
- Garnish and Serve: If desired, sprinkle chopped walnuts or sesame seeds on top of the Yakgwa for added texture and flavor. Let the cookies cool completely before serving.
Extra Tips: When making Yakgwa, consistency is key. Confirm that the oil is at the right temperature to achieve a crispy exterior while keeping the inside chewy. For a healthier twist, you can substitute some of the all-purpose flour with whole wheat flour, and you can also experiment with different flavored syrups by adding a hint of vanilla or ginger.
Storing the cookies in an airtight container will help retain their freshness, and they can be enjoyed for several days.
Seolgi Cake: Steamed Sponge Cake
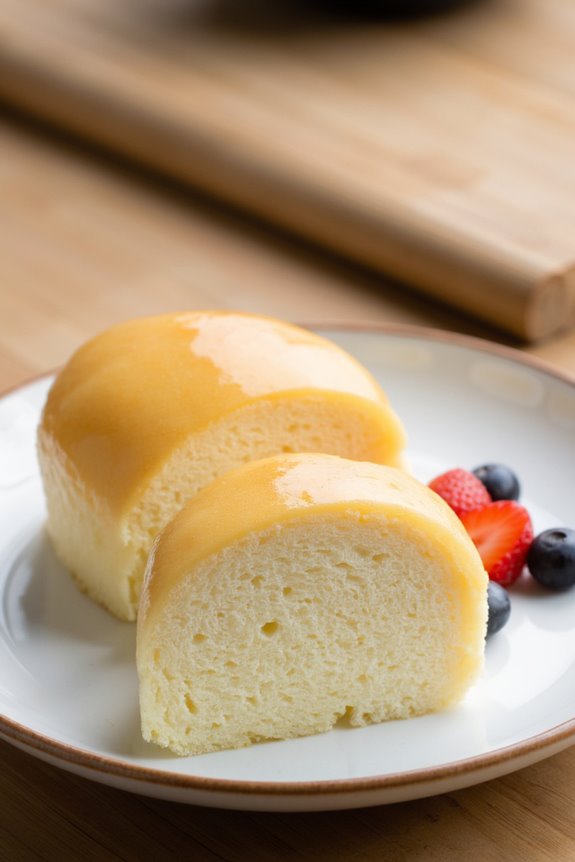
Seolgi Cake, a traditional Korean steamed sponge cake, is a delightful treat known for its soft, fluffy texture and subtly sweet flavor. This cake is often enjoyed during special occasions and celebrations, making it a beloved dessert in Korean culture.
The process of steaming the cake rather than baking it allows for a moist consistency that’s both light and airy, creating a unique experience for those who indulge in it.
Preparing Seolgi Cake is a straightforward process that requires only a few basic ingredients, making it an accessible dessert for both novice and experienced bakers alike. The cake can be enjoyed on its own or served with various toppings such as fresh fruit, whipped cream, or sweetened red bean paste.
Whether you’re celebrating a special occasion or simply want to satisfy your sweet tooth, this steamed sponge cake is sure to captivate.
Ingredients (Serves 4-6):
- 2 cups all-purpose flour
- 1 cup granulated sugar
- 1 cup milk
- 4 large eggs
- 2 teaspoons baking powder
- 1 teaspoon vanilla extract
- A pinch of salt
Cooking Instructions:
- Prepare the Steaming Equipment: Begin by preparing your steamer. If you don’t have a traditional bamboo steamer, you can use a large pot with a steaming rack or a heatproof dish. Fill the pot with about 2 inches of water and bring it to a simmer over medium heat. Make sure the water doesn’t touch the bottom of the cake pan.
- Mix Dry Ingredients: In a mixing bowl, combine the all-purpose flour, baking powder, and salt. Whisk them together until they’re well combined. This step guarantees that the baking powder is evenly distributed throughout the flour.
- Beat the Eggs and Sugar: In a separate large mixing bowl, beat the eggs and granulated sugar together using an electric mixer or a whisk until the mixture is pale and fluffy. This process usually takes about 5 minutes. It incorporates air into the batter, which helps the cake rise.
- Add Milk and Vanilla: Gradually pour in the milk and vanilla extract into the egg and sugar mixture, continuing to mix until everything is well incorporated.
- Combine Dry and Wet Ingredients: Slowly add the dry mixture (flour, baking powder, and salt) into the wet ingredients. Gently fold the mixture with a spatula until just combined. Be careful not to overmix, as this can lead to a denser cake.
- Prepare the Cake Pan: Grease a round cake pan (about 8 inches in diameter) with some oil or cooking spray. Pour the batter into the prepared pan, smoothing the top with a spatula.
- Steam the Cake: Carefully place the cake pan into the steamer. Cover it with a lid, making sure to create a tight seal to prevent steam from escaping. Steam the cake for about 30-40 minutes or until a toothpick inserted into the center comes out clean.
- Cool and Serve: Once cooked, remove the cake from the steamer and let it cool in the pan for about 10 minutes before transferring it to a wire rack to cool completely. Once cooled, slice and serve as desired.
Extra Tips:
When making Seolgi Cake, it’s vital to keep the steaming water at a gentle simmer rather than a rolling boil to guarantee even cooking.
If you want to add a twist to your cake, consider incorporating flavors such as matcha powder or cocoa into the batter. Additionally, you can top the cake with a light dusting of powdered sugar or serve it with a drizzle of honey for added sweetness.
Enjoy your Seolgi Cake warm for the best texture and flavor!
Sangwa: Sweet Fruit Salad

Sangwa, a delightful Korean sweet fruit salad, is a revitalizing dessert that captures the essence of seasonal fruits with a sweet twist. It’s an easy-to-make dish that’s perfect for gatherings, picnics, or simply as a sweet treat to enjoy at home. The vibrant colors and natural sweetness of the fruits combined with a light syrup make Sangwa not only visually appealing but also a nutritious option.
Traditionally, Sangwa includes a variety of fruits such as apples, pears, and grapes, but you can customize it based on your preferences and what’s available in your pantry. The addition of a sweet syrup, often made with honey and lemon, enhances the flavors and brings the dish together. Whether enjoyed on a warm day or served after a hearty meal, Sangwa is sure to be a crowd-pleaser.
Ingredients (Serving Size: 4-6 People)
- 2 cups diced apples (preferably Fuji or Gala)
- 2 cups diced pears
- 1 cup seedless grapes, halved
- 1 cup diced kiwi
- 1 cup diced strawberries
- 1/4 cup honey
- 2 tablespoons lemon juice
- 1 tablespoon water
- Fresh mint leaves for garnish (optional)
Cooking Instructions
- Prepare the Fruits: Begin by washing all your fruits thoroughly. Dice the apples and pears into bite-sized pieces, making sure to remove the cores. Halve the grapes and chop the kiwi and strawberries. Place all the prepared fruits into a large mixing bowl.
- Make the Syrup: In a small saucepan, combine the honey, lemon juice, and water. Heat over low heat, stirring continuously until the honey is fully dissolved and the mixture is well combined. This should take about 2-3 minutes. Remove from heat and let it cool slightly.
- Combine Fruits and Syrup: Once the syrup has cooled down, pour it over the mixed fruits in the bowl. Gently toss the fruits and syrup together using a spatula or spoon, ensuring that all the fruits are evenly coated with the sweet mixture.
- Chill the Salad: Cover the bowl with plastic wrap or a lid and place it in the refrigerator for at least 30 minutes. Chilling allows the flavors to meld together and enhances the overall taste of the Sangwa.
- Serve and Garnish: After chilling, give the fruit salad a gentle stir. Serve the Sangwa in individual bowls or a large serving dish. If desired, garnish with fresh mint leaves for a pop of color and added freshness.
Extra Tips
When making Sangwa, feel free to experiment with different fruits based on your taste preferences or seasonal availability. Melons, blueberries, and oranges can be great additions as well.
Additionally, for a touch of uniqueness, consider adding a sprinkle of roasted nuts or seeds for crunch. Adjust the sweetness of the syrup to your liking by adding more or less honey, and remember that the quality of the fruits will greatly impact the overall flavor of the dish.
Enjoy this revitalizing dessert with family and friends!
Chapssaltteok: Sweet Red Bean Rice Cake
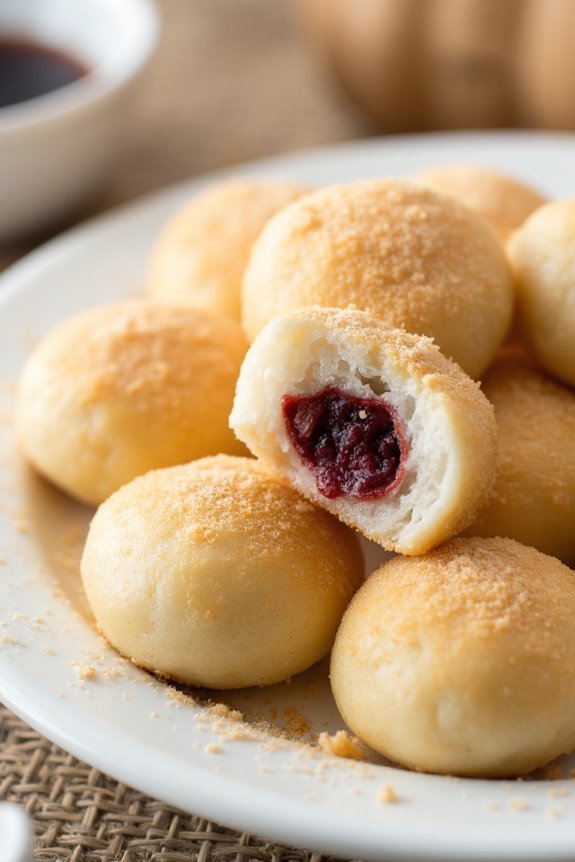
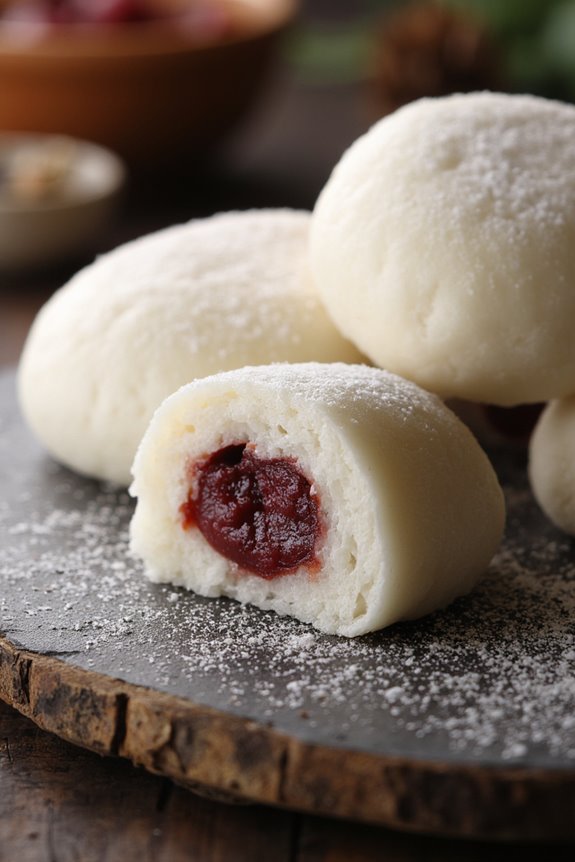
Chapssaltteok, also known as sweet red bean rice cake, is a delightful Korean dessert that’s both chewy and sweet. This traditional treat is made from glutinous rice flour and filled with a sweetened red bean paste. Commonly enjoyed during celebrations and festive occasions, Chapssaltteok isn’t only delicious but also visually appealing, often shaped into small, round cakes that can be enjoyed by the handful.
The soft, chewy texture of the rice cake pairs perfectly with the rich sweetness of the red bean filling, making it a favorite among both children and adults alike.
To create the perfect Chapssaltteok, it’s crucial to use high-quality ingredients and follow the steps carefully. The process may seem a bit intricate, but with patience and practice, you can master this delightful dessert. Whether you serve it at a family gathering, a festive celebration, or simply as a sweet treat for yourself, Chapssaltteok is sure to impress your guests and satisfy your sweet tooth.
Ingredients (Serves 4-6):
- 1 cup glutinous rice flour
- 1/2 cup water
- 1/4 cup sugar
- 1/2 teaspoon salt
- 1 cup cooked adzuki beans (or canned red beans, drained)
- 1/4 cup sugar (for red bean filling)
- 1 tablespoon vegetable oil
- Cornstarch (for dusting)
Cooking Instructions:
- Prepare the Red Bean Filling:
- If using dried adzuki beans, soak them overnight and then boil until soft. Drain and mash the beans in a bowl. Mix in 1/4 cup sugar until well combined. Set aside to cool. If using canned red beans, simply drain them and mash, then mix with sugar.
- Make the Rice Cake Mixture:
- In a mixing bowl, combine 1 cup of glutinous rice flour, 1/2 cup of water, 1/4 cup of sugar, and 1/2 teaspoon of salt. Mix well until you have a smooth batter without lumps.
- Steam the Rice Cake Mixture:
- Prepare a steamer by boiling water. Line a heatproof dish or a steaming tray with parchment paper. Pour the rice cake mixture into the prepared dish and smooth it out. Steam over medium heat for about 20-25 minutes, or until the mixture becomes translucent and firm to the touch.
- Shape the Rice Cake:
- Once steamed, remove the dish from the steamer and let it cool slightly. Dust your work surface with cornstarch to prevent sticking. Transfer the rice cake onto the dusted surface and flatten it gently with your hands into a rectangle.
- Fill the Rice Cake:
- Cut the rice cake into small squares or circles. Take a piece, make a small indentation in the center, and place a spoonful of the cooled red bean filling in it. Carefully wrap the rice cake around the filling and pinch to seal, shaping it into a round ball.
- Final Cooking:
- Once all the rice cakes are filled and shaped, you can either serve them immediately or steam them for an additional 5 minutes to confirm the filling is warm and the texture is perfect.
Extra Tips:
When making Chapssaltteok, be sure to use glutinous rice flour rather than regular rice flour to achieve the desired chewy texture. It’s also important to keep your hands and surfaces dusted with cornstarch to prevent the rice cakes from sticking.
Feel free to experiment with different fillings, such as sesame or chestnut paste, to customize the flavor to your liking. Finally, serve the Chapssaltteok fresh for the best taste, and consider pairing it with a warm cup of tea for a delightful treat.
Cheongpung: Korean Honey Jelly
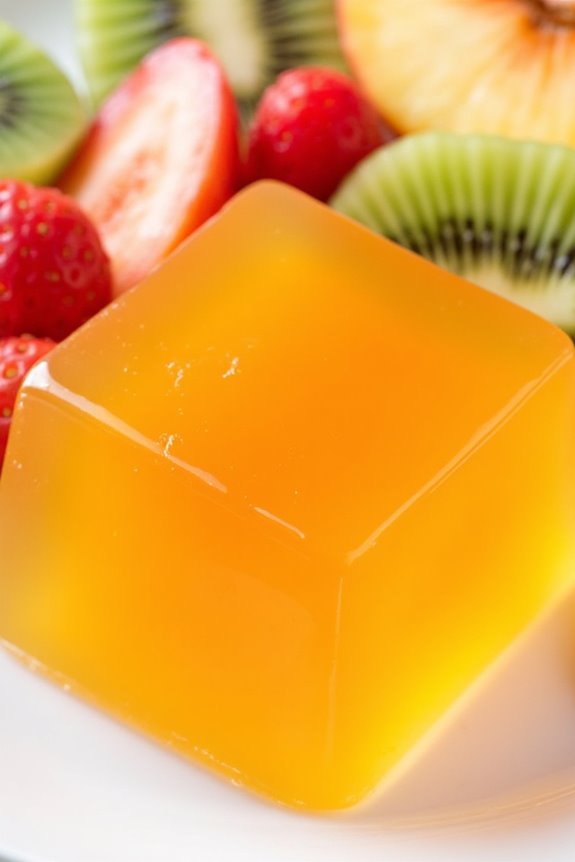
Cheongpung, also known as Korean honey jelly, is a delightful and invigorating dessert that highlights the natural sweetness of honey combined with the smooth texture of gelatin. This traditional treat isn’t only visually appealing but also offers a unique taste that’s both light and satisfying.
Often served chilled, Cheongpung is perfect for warm days or as a delightful end to any Korean meal.
Making Cheongpung is quite straightforward, and it requires just a few simple ingredients. The key to achieving the best flavor lies in selecting high-quality honey and ensuring that the gelatin is properly dissolved for the perfect jelly-like consistency.
This dessert can be garnished with seasonal fruits or nuts to enhance both its presentation and taste. Here’s how you can make this delicious Korean honey jelly at home.
Ingredients (serving size: 4-6 people)
- 2 cups water
- 2 tablespoons agar-agar powder
- 1/2 cup honey
- 1/4 cup sugar
- 1 teaspoon vanilla extract
- 1/4 cup lemon juice
- Fresh fruits (such as sliced strawberries, kiwi, or peaches) for garnish
Cooking Instructions
- Prepare the Gelatin Mixture: In a medium saucepan, combine 2 cups of water and 2 tablespoons of agar-agar powder. Stir well to dissolve the powder into the water. Allow the mixture to sit for about 10 minutes to hydrate the agar-agar.
- Heat the Mixture: Place the saucepan over medium heat and bring the mixture to a gentle boil, stirring constantly. Once it reaches a boil, continue to stir for another 2-3 minutes until the agar-agar is completely dissolved. This is essential for achieving a smooth jelly consistency.
- Add Sweeteners: Reduce the heat to low and add 1/2 cup of honey, 1/4 cup of sugar, and 1 teaspoon of vanilla extract to the mixture. Stir well until the honey and sugar are fully dissolved. This step infuses the jelly with sweetness and flavor.
- Incorporate Lemon Juice: Remove the saucepan from heat and stir in 1/4 cup of lemon juice. This will add a zesty tang that balances the sweetness of the honey and sugar.
- Pour into Molds: Carefully pour the mixture into individual molds or a large dish. Allow it to cool at room temperature for about 30 minutes before transferring it to the refrigerator. Let the Cheongpung chill for at least 4 hours or until fully set.
- Serve: Once set, gently remove the jelly from the molds. You can cut it into cubes if using a large dish. Serve chilled, garnished with fresh fruits for added flavor and decoration.
Extra Tips
When preparing Cheongpung, it’s important to adjust the sweetness to your preference, especially if you plan to add sweet fruits as a garnish.
Experiment with different types of honey to discover unique flavors, and consider adding a splash of your favorite fruit juice for a twist.
For an even more delightful presentation, serve the jelly in clear dishes to showcase the vibrant colors of the fruit garnishes. Enjoy this invigorating dessert any time!