

Exploring Korean fusion cuisine is such an exciting culinary journey. The bold flavors and creative combinations truly stand out. Think of enjoying a Spicy Kimchi Taco or relishing the umami of Bulgogi Pizza. These inventive recipes are sure to delight your taste buds and ignite your culinary creativity. Are you ready to elevate your next meal with these delicious creations?
Spicy Kimchi Tacos
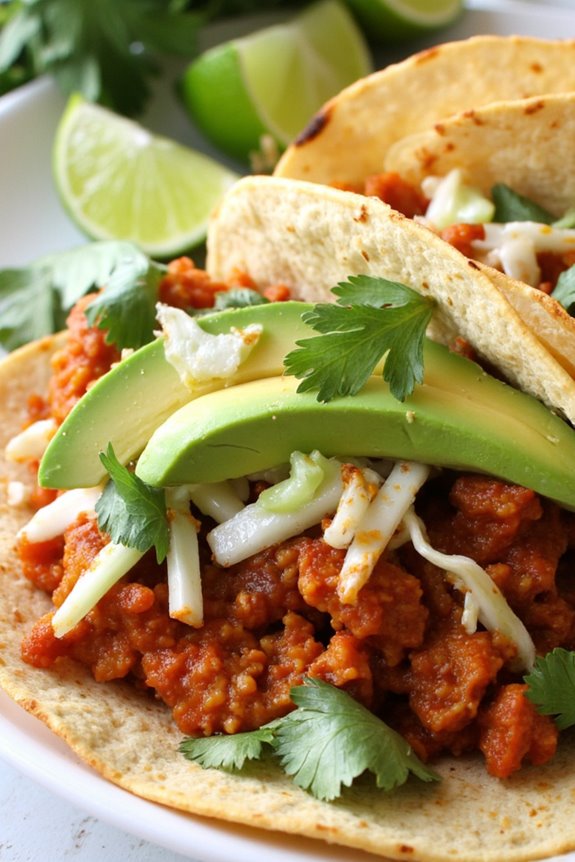
Combining the vibrant flavors of Korean cuisine with the beloved convenience of Mexican tacos, Spicy Kimchi Tacos offer a unique and tantalizing culinary experience. This fusion dish showcases spicy, fermented kimchi paired with tender meat, fresh vegetables, and a zesty sauce, all wrapped in warm tortillas. The result is a playful yet satisfying meal that’s perfect for gatherings or a quick weeknight dinner.
The beauty of Spicy Kimchi Tacos lies not only in their taste but also in their versatility. You can customize them with your choice of protein—whether it’s marinated beef, grilled chicken, or even tofu for a vegetarian option. Topped with fresh cilantro and a squeeze of lime, these tacos are sure to impress anyone who takes a bite. Gather your ingredients and get ready to bring this delicious fusion to your table!
Ingredients (Serves 4-6):
- 1 lb ground beef (or chicken, pork, or tofu)
- 1 cup kimchi, chopped
- 1 tablespoon vegetable oil
- 1 tablespoon gochugaru (Korean red pepper flakes)
- 1 tablespoon soy sauce
- 1 teaspoon sesame oil
- 1 tablespoon sugar
- 8 small corn or flour tortillas
- 1 cup shredded cabbage
- 1 avocado, sliced
- Fresh cilantro, for garnish
- Lime wedges, for serving
Cooking Instructions:
- Prepare the Protein: In a large skillet, heat the vegetable oil over medium-high heat. Add the ground beef (or your chosen protein) and cook until browned, breaking it apart with a spatula. This should take about 5-7 minutes. Confirm the meat is cooked through and nicely browned.
- Flavor the Meat: Once the meat is browned, add the chopped kimchi, gochugaru, soy sauce, sesame oil, and sugar to the skillet. Stir well to combine all the ingredients, letting the flavors meld together as you cook for an additional 3-5 minutes. This step enhances the savory and spicy profile of the dish.
- Warm the Tortillas: In a separate pan or directly over the flame, warm the tortillas for about 30 seconds on each side until they’re pliable and lightly toasted. This adds a nice texture to the tacos and helps prevent them from tearing when filled.
- Assemble the Tacos: Lay the warm tortillas flat on a serving platter. Spoon the spicy kimchi meat mixture onto each tortilla, distributing evenly among them. Top with shredded cabbage and sliced avocado for added crunch and creaminess.
- Garnish and Serve: Finish the tacos by garnishing them with fresh cilantro. Serve with lime wedges on the side, allowing everyone to add a squeeze of lime juice to their tacos for an extra burst of flavor.
Extra Tips:
When making Spicy Kimchi Tacos, feel free to adjust the level of spiciness according to your preference by adding more or less gochugaru.
Additionally, allowing the kimchi to marinate with the cooked meat for a few extra minutes can deepen the flavors. If you prefer a crunchier texture, add sliced radishes or pickled vegetables as toppings. Enjoy experimenting with different proteins and toppings to find your perfect combination!
Bulgogi Pizza

Bulgogi Pizza is a delightful fusion of Korean and Italian cuisines that showcases the rich, savory flavors of bulgogi alongside the comforting, cheesy goodness of pizza. This dish combines tender, marinated beef with a crispy crust, topped with vibrant vegetables and melted cheese, making it the perfect dish for gatherings or a unique family dinner.
The blend of sweet and savory flavors from the bulgogi marinade complements the gooey cheese and crispy crust, resulting in a mouthwatering experience that’s bound to impress.
Making Bulgogi Pizza isn’t only fun but also allows for customization based on personal preferences. You can adjust the toppings, add more veggies, or even switch up the cheese for a different taste experience.
Whether you’re a fan of traditional Korean flavors or simply looking to try something new, this dish is a harmonious mix that brings together the best of both worlds.
Ingredients (Serves 4-6)
- 1 pound of beef sirloin, thinly sliced
- 1/4 cup soy sauce
- 2 tablespoons sugar
- 1 tablespoon sesame oil
- 2 cloves garlic, minced
- 1/2 teaspoon black pepper
- 1/4 cup green onions, chopped
- 1 pizza dough (store-bought or homemade)
- 1 cup mozzarella cheese, shredded
- 1/2 cup kimchi, chopped (optional)
- 1/2 cup bell peppers, sliced
- 1/4 cup mushrooms, sliced
- 1 tablespoon sesame seeds (for garnish)
Cooking Instructions
- Prepare the Bulgogi Marinade: In a medium bowl, combine soy sauce, sugar, sesame oil, minced garlic, and black pepper. Whisk until the sugar is dissolved. Add the sliced beef sirloin to the marinade, mixing well to guarantee all pieces are coated. Cover the bowl with plastic wrap and let it marinate in the refrigerator for at least 30 minutes or up to several hours for better flavor absorption.
- Cook the Beef: After marinating, heat a large skillet over medium-high heat. Once hot, add the marinated beef to the skillet. Stir-fry the beef for about 5-7 minutes, or until the meat is cooked through and caramelized. Remove from heat and stir in the chopped green onions. Set aside to cool slightly.
- Preheat the Oven: While the beef is cooling, preheat your oven to 475°F (245°C) and prepare a baking sheet or pizza stone by lightly greasing it or using parchment paper.
- Roll Out the Pizza Dough: On a floured surface, roll out the pizza dough to your desired thickness, then transfer it to the prepared baking sheet or pizza stone. Make sure to create a small edge for the crust.
- Assemble the Pizza: Spread a thin layer of kimchi (if using) over the dough, then evenly distribute the cooked bulgogi beef across the top. Add the sliced bell peppers and mushrooms, followed by sprinkling the shredded mozzarella cheese generously over the entire pizza.
- Bake the Pizza: Place the assembled pizza in the preheated oven and bake for 12-15 minutes, or until the crust is golden and crispy and the cheese is bubbly and slightly browned.
- Garnish and Serve: Once baked, remove the pizza from the oven and let it cool for a minute. Sprinkle sesame seeds on top for added texture and garnish with extra green onions if desired. Slice the pizza into wedges and serve hot.
Extra Tips
When making Bulgogi Pizza, consider customizing it with your favorite toppings. Feel free to add jalapeños for heat, or substitute with different cheeses like provolone or cheddar for a unique twist.
Additionally, making your own pizza dough can enhance the flavor and texture, but store-bought is perfectly fine for a quicker meal. If you prefer a vegetarian option, substitute the beef with marinated mushrooms or tofu for a similar taste profile. Enjoy your culinary adventure!
Korean BBQ Quesadillas

Korean BBQ Quesadillas combine the savory, smoky flavors of traditional Korean barbecue with the gooey, cheesy goodness of quesadillas, resulting in a delightful fusion dish. Perfect for a casual dinner or a fun appetizer, these quesadillas bring a unique twist to your table. By incorporating marinated meats, fresh vegetables, and a blend of cheeses, this dish is sure to impress both Korean cuisine enthusiasts and quesadilla lovers alike.
To make these Korean BBQ Quesadillas, you’ll need to prepare the marinated meat and gather fresh ingredients to build your quesadillas. The cooking process is straightforward and allows for customization based on your taste preferences. Whether you choose to use beef, pork, or chicken, these quesadillas will deliver a satisfying crunch paired with the soft, flavorful filling. Let’s explore the ingredients and cooking steps to create this delicious dish for a serving size of 4-6 people.
Ingredients:
- 1 lb of beef bulgogi (or your choice of marinated meat)
- 8 flour tortillas
- 2 cups shredded Monterey Jack cheese
- 1 cup shredded mozzarella cheese
- 1 cup kimchi, chopped
- 1 bell pepper, thinly sliced
- 1 small onion, thinly sliced
- 2 green onions, chopped
- 2 tablespoons vegetable oil (for cooking)
- Soy sauce (to taste)
- Sesame oil (to taste)
Cooking Instructions:
- Prepare the Marinated Meat: If you’re using store-bought bulgogi, confirm it’s thawed and ready to use. If you’re making your own, marinate thinly sliced beef in a mixture of soy sauce, sesame oil, garlic, and sugar for at least 30 minutes. This step allows the meat to absorb the flavors, enhancing the overall taste of your quesadillas.
- Cook the Meat: In a skillet over medium-high heat, add a tablespoon of vegetable oil. Once hot, add the marinated beef and cook until it’s browned and cooked through, about 5-7 minutes. Remove from heat and set aside. This step infuses the quesadillas with that classic Korean BBQ flavor.
- Sauté the Vegetables: In the same skillet, add another tablespoon of vegetable oil and toss in the sliced onion and bell pepper. Sauté for about 3-4 minutes until they’re soft and slightly caramelized. This step adds sweetness and texture to the filling.
- Assemble the Quesadillas: On half of each tortilla, layer a generous amount of beef, sautéed vegetables, chopped kimchi, and a mix of Monterey Jack and mozzarella cheeses. Fold the tortilla over to create a half-moon shape. This step secures the filling and guarantees even melting of the cheese as you cook.
- Cook the Quesadillas: Wipe the skillet clean and return it to medium heat. Add a little more vegetable oil if needed. Cook the quesadillas for 3-4 minutes on each side or until golden brown and crispy, and the cheese has melted. This step gives the quesadilla a delightful crunch while keeping the filling warm and gooey.
- Slice and Serve: Remove the quesadillas from the skillet and let them cool for a minute before slicing them into wedges. Serve them warm with your choice of dipping sauces such as sriracha or a soy dipping sauce. This step allows you to present the quesadillas appealingly while making them easy to eat.
Extra Tips:
For an extra layer of flavor, consider adding additional toppings such as avocado slices, fresh cilantro, or a drizzle of spicy mayonnaise. If you want a vegetarian option, you can substitute the meat with tofu or additional vegetables, and don’t forget to adjust the cooking time accordingly.
Experiment with different cheese combinations or add a touch of gochujang for a spicy kick. Enjoy the fusion of flavors in every bite!
Kimchi Fried Rice Burrito
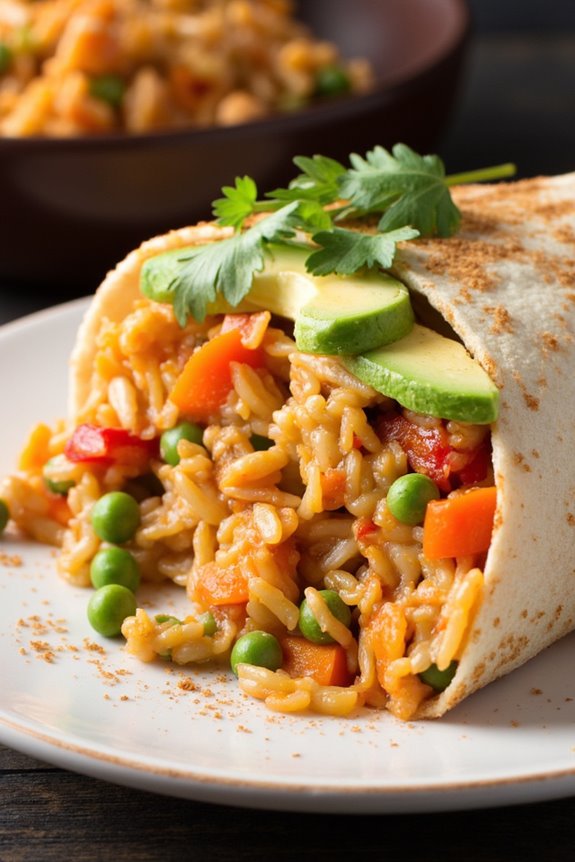
Kimchi Fried Rice Burrito is a delightful twist on traditional burritos, infusing bold flavors from Korean cuisine into a beloved Mexican staple. This fusion dish combines spicy and tangy kimchi fried rice with fresh vegetables and protein, all wrapped in a soft tortilla. Perfect for a hearty lunch or dinner, these burritos aren’t just filling but are also packed with nutrients, making them a wholesome choice for any meal.
The dish is highly customizable, allowing you to tailor it to your taste preferences or dietary needs. You can choose your favorite protein, whether it’s chicken, beef, tofu, or even go vegetarian by adding extra veggies. The addition of fresh ingredients like avocado and cilantro provides a revitalizing contrast to the savory rice, while the burrito format makes it easy to enjoy on the go.
Ingredients (Serves 4-6)
- 2 cups cooked rice (preferably day-old)
- 1 cup kimchi, chopped
- 1 tablespoon vegetable oil
- 2 cloves garlic, minced
- 1 small onion, diced
- 1 cup mixed vegetables (carrots, peas, bell peppers)
- 2 large eggs, beaten
- 1 tablespoon soy sauce
- 1 tablespoon gochujang (Korean chili paste)
- 1 teaspoon sesame oil
- Salt and pepper to taste
- 4-6 large flour tortillas
- 1 avocado, sliced (optional)
- Fresh cilantro, chopped (optional)
- Lime wedges (optional)
Cooking Instructions
- Prepare the Kimchi Fried Rice: In a large skillet or wok, heat the vegetable oil over medium heat. Add the diced onion and minced garlic, and sauté until the onion becomes translucent. This will infuse the oil with flavor and create a savory base for the rice.
- Add Vegetables and Kimchi: Stir in the mixed vegetables and chopped kimchi, cooking for about 3-4 minutes until the vegetables are tender. The kimchi will add a spicy and tangy flavor that’s characteristic of this dish.
- Incorporate the Rice: Add the cooked rice to the skillet, breaking up any clumps. Stir well to combine all the ingredients and let the rice fry for about 5 minutes. This will give the rice a slightly crispy texture and allow it to absorb the flavors.
- Egg and Seasoning: Push the rice mixture to one side of the skillet and pour the beaten eggs into the other side. Scramble the eggs until fully cooked, then mix them into the rice. Add the soy sauce, gochujang, sesame oil, salt, and pepper. Stir until everything is well combined and heated through.
- Assemble the Burritos: Lay out a tortilla on a flat surface. Spoon a generous amount of the kimchi fried rice mixture into the center of the tortilla. If desired, add avocado slices and chopped cilantro for extra flavor and freshness.
- Wrap the Burrito: Fold the sides of the tortilla inwards, then roll it tightly from the bottom up to encase the filling. Repeat this process with the remaining tortillas and filling.
- Serve: Slice the burritos in half if desired, and serve with lime wedges on the side for an added zesty kick.
Extra Tips
When preparing Kimchi Fried Rice Burritos, using day-old rice is highly recommended as it has a firmer texture which prevents the dish from becoming mushy. Additionally, feel free to experiment with different proteins or even add some cheese for a creamy element.
If you prefer a milder flavor, you can reduce the amount of gochujang or substitute it with sriracha. Finally, don’t skip the lime wedges—they add a bright finish that elevates the entire dish!
Gochujang Ramen Noodle Salad
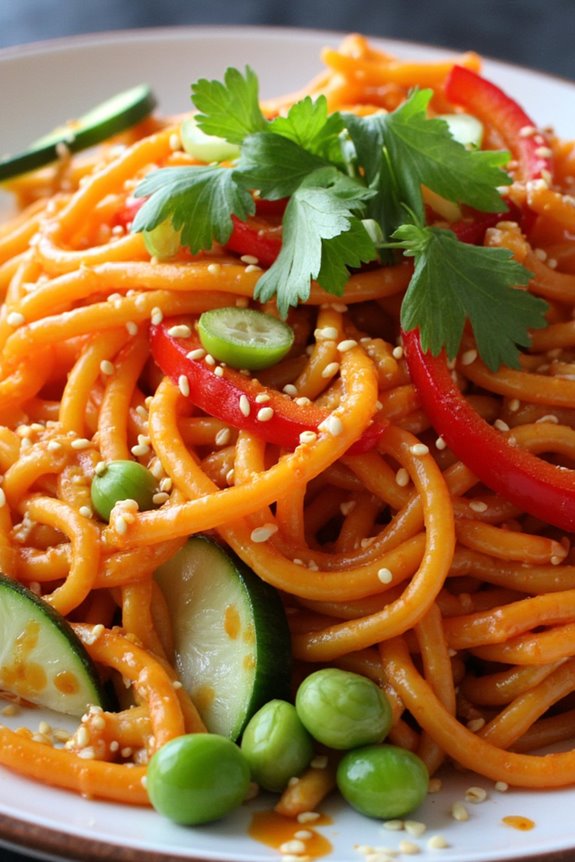
Gochujang Ramen Noodle Salad is a delightful blend of flavors that brings the vibrant essence of Korean cuisine to a revitalizing dish. This cold salad is perfect for warm weather or as a side dish for a summer barbecue. The star of the dish is gochujang, a spicy and savory Korean chili paste that adds depth and umami to the salad, while the ramen noodles provide a satisfying texture.
The combination of fresh vegetables and a light sesame dressing makes this salad not only delicious but also visually appealing, making it a perfect addition to any table. Creating this salad is a breeze and can be customized based on your preference for vegetables. It’s a versatile recipe that allows you to incorporate seasonal produce or leftovers you have on hand.
Whether you’re serving it as a main dish or a side, Gochujang Ramen Noodle Salad is sure to be a hit. Gather your ingredients and get ready to create a vibrant, flavorful dish that will tantalize your taste buds.
Ingredients (serving size: 4-6 people):
- 2 packs of instant ramen noodles (discard seasoning packets)
- 1 cup shredded carrots
- 1 cup thinly sliced cucumber
- 1 cup red bell pepper, thinly sliced
- 1 cup green onions, chopped
- 1 cup edamame (shelled)
- 1/4 cup fresh cilantro, chopped
- 1/4 cup gochujang
- 2 tablespoons soy sauce
- 2 tablespoons rice vinegar
- 1 tablespoon sesame oil
- 1 tablespoon honey or maple syrup
- 1 tablespoon sesame seeds (for garnish)
Instructions:
- Cook the Ramen Noodles: Bring a pot of water to a boil. Add the instant ramen noodles and cook according to package instructions, usually about 3-4 minutes. Once cooked, drain the noodles and rinse them under cold water to stop the cooking process. Set aside to cool completely.
- Prepare the Vegetables: While the noodles are cooling, prepare your vegetables. Shred the carrots, slice the cucumber and red bell pepper, chop the green onions, and shell the edamame if necessary. Place all the prepared vegetables in a large mixing bowl.
- Make the Dressing: In a small bowl, whisk together the gochujang, soy sauce, rice vinegar, sesame oil, and honey or maple syrup until smooth. This dressing will provide the salad with a sweet and spicy flavor.
- Combine the Ingredients: Once the noodles have cooled, add them to the bowl of vegetables. Pour the dressing over the noodles and vegetables, and toss everything together until well combined and evenly coated with the dressing.
- Garnish and Serve: Transfer the Gochujang Ramen Noodle Salad to a serving platter or individual bowls. Sprinkle sesame seeds and fresh cilantro on top for garnish. Serve immediately or refrigerate for up to an hour to allow the flavors to meld before serving.
Extra Tips: For added texture and flavor, consider adding grilled chicken, tofu, or shrimp to the salad. You can also experiment with different vegetables based on what’s in season or your personal taste—think snap peas, shredded cabbage, or even avocado.
If you prefer a milder flavor, reduce the amount of gochujang in the dressing or substitute it with a milder chili paste. Remember to taste and adjust the seasoning as needed to guarantee a perfect balance of flavors!
Korean Fried Chicken Wings With Honey Soy Glaze
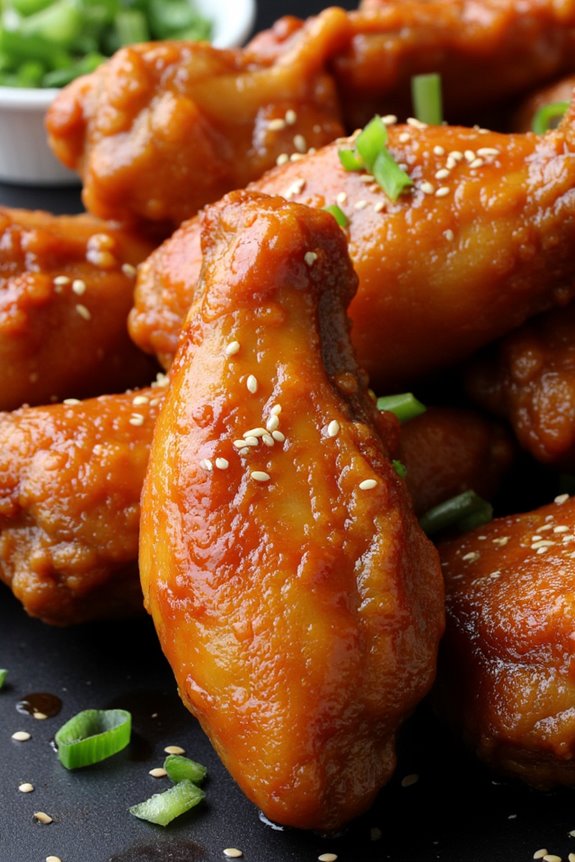
Korean Fried Chicken Wings With Honey Soy Glaze is a scrumptious dish that marries the crispy texture of fried chicken with a sweet and savory glaze that’s quintessentially Korean. The unique flavor profile is achieved through a mix of soy sauce, honey, garlic, and sesame oil, resulting in a finger-licking treat that will leave you wanting more.
These wings are perfect for sharing at parties, game days, or simply enjoying a cozy night in with family.
The key to achieving perfectly crispy wings lies in the double-frying method, which guarantees that the skin is ultra-crunchy while keeping the meat juicy and tender. Once the wings are fried to golden perfection, they’re tossed in the honey soy glaze, which adds a delightful stickiness and flavor that elevates the dish.
Prepare to impress your friends and family with this easy yet delectable Korean fusion recipe!
Ingredients (Serves 4-6):
- 2 lbs chicken wings
- 1 cup all-purpose flour
- 1/2 cup cornstarch
- 1 tsp baking powder
- 1 tsp salt
- 1 tsp black pepper
- 1 tsp garlic powder
- 1/2 tsp paprika
- 1 cup vegetable oil (for frying)
For the Honey Soy Glaze:
- 1/4 cup soy sauce
- 1/4 cup honey
- 2 cloves garlic, minced
- 1 tbsp sesame oil
- 1 tbsp rice vinegar
- 1 tsp sesame seeds (for garnish)
- 2 green onions, chopped (for garnish)
Cooking Instructions:
- Prepare the Chicken Wings: Start by rinsing the chicken wings under cold water and patting them dry with paper towels. Removing excess moisture is key to achieving a crispy finish. Place the wings in a large bowl.
- Make the Coating: In a separate bowl, combine the flour, cornstarch, baking powder, salt, black pepper, garlic powder, and paprika. This mixture will create a light, crispy coating for the wings. Mix well to confirm the dry ingredients are evenly distributed.
- Coat the Wings: Sprinkle the dry mixture over the chicken wings in the bowl. Toss the wings in the mixture until they’re fully coated. Confirm that every wing is covered to achieve maximum crunchiness when fried.
- Heat the Oil: In a large, deep skillet or fryer, heat the vegetable oil over medium-high heat. You want enough oil to submerge the wings partially. To check if the oil is ready, drop a small amount of the coating mixture into the oil; it should sizzle immediately.
- Fry the Wings (First Fry): Carefully add the coated wings to the hot oil in batches, ensuring not to overcrowd the pan. Fry them for about 8-10 minutes until they’re lightly golden. Remove the wings and drain them on a wire rack or paper towels.
- Fry the Wings (Second Fry): Increase the heat slightly and return the wings to the hot oil for a second fry. This step helps achieve an extra crispy texture. Fry for an additional 5-7 minutes until they’re golden brown and crispy. Drain again on a wire rack or paper towels.
- Prepare the Glaze: While the wings are frying, combine soy sauce, honey, minced garlic, sesame oil, and rice vinegar in a small saucepan. Heat over medium heat until the mixture is warmed through and slightly thickened, about 3-5 minutes.
- Glaze the Wings: Once the wings are fried and crispy, place them in a large mixing bowl and pour the honey soy glaze over the top. Toss the wings gently to confirm they’re evenly coated in the glaze.
- Serve: Transfer the glazed wings to a serving platter. Garnish with sesame seeds and chopped green onions for an added touch of flavor and presentation.
Extra Tips:
To elevate the flavor of your Korean Fried Chicken Wings even more, consider marinating the wings in a mixture of soy sauce, garlic, and ginger for a few hours before coating and frying. This will infuse the meat with additional flavor.
Additionally, serve the wings with a side of pickled radishes or a revitalizing cucumber salad to balance the richness of the dish. Enjoy your culinary adventure into Korean fusion cuisine!
Tteokbokki Mac and Cheese
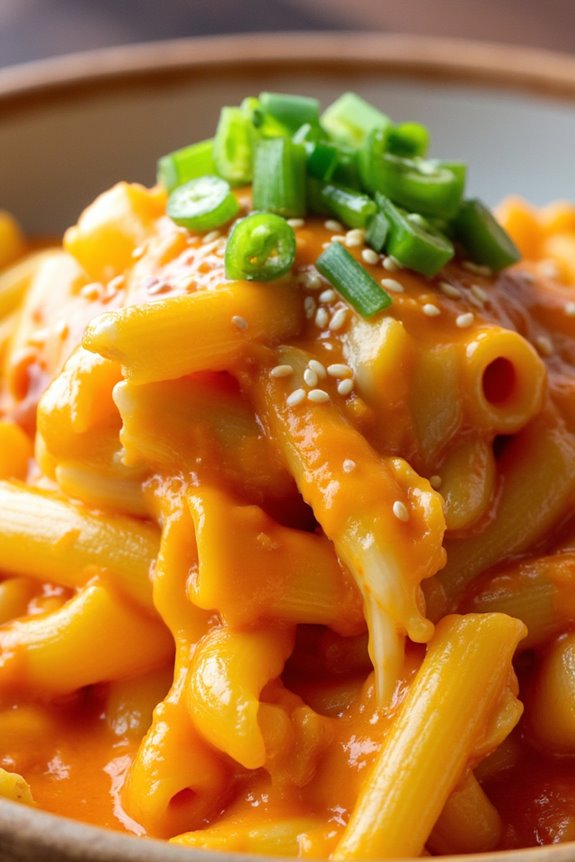
Tteokbokki Mac and Cheese is a delightful fusion dish that combines the creamy, cheesy goodness of classic macaroni and cheese with the spicy, chewy texture of Korean tteokbokki rice cakes. This unique recipe offers a comforting yet adventurous dining experience, making it perfect for gatherings or a cozy night in.
The bold flavors of gochujang (Korean chili paste) paired with the richness of cheese create an irresistible dish that will leave your taste buds craving more.
To prepare this dish, you’ll need to gather some essential ingredients and follow the cooking steps closely. The combination of pasta, tteokbokki, and a delectable cheese sauce guarantees that each bite is packed with flavor. Whether you’re a fan of Korean cuisine or just looking to try something new, Tteokbokki Mac and Cheese is sure to impress.
Ingredients (Serves 4-6):
- 8 oz elbow macaroni
- 1 cup tteokbokki (Korean rice cakes), sliced
- 2 tbsp vegetable oil
- 1 small onion, diced
- 2 cloves garlic, minced
- 1/4 cup gochujang (Korean chili paste)
- 2 cups milk
- 2 cups shredded cheese (cheddar or a blend)
- 1/2 cup grated Parmesan cheese
- 1/2 cup green onions, chopped
- Salt and pepper to taste
- Sesame seeds for garnish (optional)
Instructions:
- Cook the Pasta: Begin by boiling a large pot of salted water. Add the elbow macaroni and cook according to package instructions until al dente. Drain and set aside.
- Prepare the Tteokbokki: In a large skillet, heat the vegetable oil over medium heat. Add the diced onion and sauté for about 3-4 minutes until translucent.
- Add the minced garlic and cook for an additional 1 minute until fragrant.
- Add Gochujang: Stir in the gochujang, mixing it well with the onions and garlic. Allow it to cook for about a minute to enhance the flavor.
- Combine with Milk: Pour in the milk and bring the mixture to a gentle simmer. Stir continuously to incorporate the gochujang into the milk, affirming it thickens slightly.
- Incorporate Cheese: Gradually add the shredded cheese and grated Parmesan cheese into the skillet, stirring until the cheese is fully melted and the sauce is creamy.
- Adjust the consistency with a little more milk if it becomes too thick.
- Mix in Pasta and Tteokbokki: Add the cooked macaroni and sliced tteokbokki to the cheese sauce. Gently fold everything together, confirming the pasta and rice cakes are well coated with the sauce.
- Season with salt and pepper to taste.
- Garnish and Serve: Once everything is well combined, remove from heat and transfer to a serving dish. Garnish with chopped green onions and sesame seeds if desired. Serve hot and enjoy!
Extra Tips:
For an extra layer of flavor, consider adding vegetables such as bell peppers or spinach to the dish while sautéing the onions.
You can also adjust the level of spiciness by modifying the amount of gochujang used. If you want a crispy topping, transfer the mixture to a baking dish, sprinkle some additional cheese on top, and broil for a few minutes until golden and bubbly.
This dish is best enjoyed fresh, but leftovers can be stored in the refrigerator for a day or two; just reheat in the oven or stovetop before serving.
Kimchi Sliders With Sriracha Mayo

Kimchi sliders with Sriracha mayo are a delectable fusion dish that brings together the bold flavors of Korean cuisine with the classic appeal of a slider. These mini burgers are perfect for gatherings, game day, or simply as a fun weeknight meal. The juicy patty is infused with the tangy and spicy notes of kimchi, while the creamy Sriracha mayo adds a kick that complements the flavors beautifully. Served on soft slider buns and topped with fresh vegetables, these sliders are sure to impress your family and friends.
Making kimchi sliders at home is easier than you might think. With a few simple ingredients and steps, you can whip up these delicious sliders in no time. Whether you’re a kimchi lover or a newcomer to this iconic Korean side dish, these sliders will introduce you to the wonderful world of Korean fusion cuisine. So gather your ingredients, and let’s get cooking!
Ingredients (serving size: 4-6 people)
- 1 pound ground beef (or ground pork)
- 1 cup kimchi, chopped
- 1/4 cup green onions, finely sliced
- 1 tablespoon soy sauce
- 1 tablespoon sesame oil
- 1 teaspoon garlic powder
- Salt and pepper, to taste
- 12 slider buns
- 1/2 cup mayonnaise
- 2-3 tablespoons Sriracha (adjust to taste)
- Lettuce leaves, for topping
- Sliced cucumbers, for topping
- Pickled jalapeños (optional), for topping
Cooking Instructions
- Prepare the Slider Patties: In a large mixing bowl, combine the ground beef (or pork), chopped kimchi, green onions, soy sauce, sesame oil, garlic powder, salt, and pepper. Mix gently until all ingredients are evenly incorporated, being careful not to overmix, which can make the patties tough.
- Form the Patties: Divide the mixture into equal portions and shape them into small patties, about 2-3 inches in diameter. You should get around 8-12 sliders depending on the size you prefer. Place them on a plate or a baking sheet lined with parchment paper.
- Cook the Patties: Heat a large skillet or griddle over medium-high heat. Add a little oil to prevent sticking. Once hot, add the slider patties in batches, making sure not to overcrowd the pan. Cook for about 3-4 minutes on one side, then flip and cook for another 3-4 minutes, or until they’re cooked through and have a nice golden-brown crust.
- Make the Sriracha Mayo: While the patties are cooking, prepare the Sriracha mayo by combining the mayonnaise and Sriracha in a small bowl. Mix well until smooth. Taste and adjust the Sriracha quantity based on your heat preference.
- Assemble the Sliders: Once the patties are done, remove them from the skillet and let them rest for a minute. Toast the slider buns lightly on the skillet if desired. Spread a generous amount of Sriracha mayo on the bottom half of each bun. Place a patty on top, followed by lettuce, sliced cucumbers, and pickled jalapeños if using. Top with the other half of the bun.
- Serve and Enjoy: Arrange the assembled sliders on a serving platter and enjoy them warm. They’re perfect for sharing or for a satisfying meal all to yourself!
Extra Tips
When preparing kimchi sliders, consider using homemade kimchi for an authentic taste, or choose a high-quality store-bought variety if you’re short on time.
If you want to add more flavor and texture, try incorporating finely chopped mushrooms or grated carrots into the patty mixture. For a fun twist, consider grilling the patties for a smoky flavor, and don’t hesitate to experiment with different toppings like avocado or spicy pickles to customize your sliders.
Enjoy your culinary adventure!
Japchae Stir-Fried Noodles With Pesto
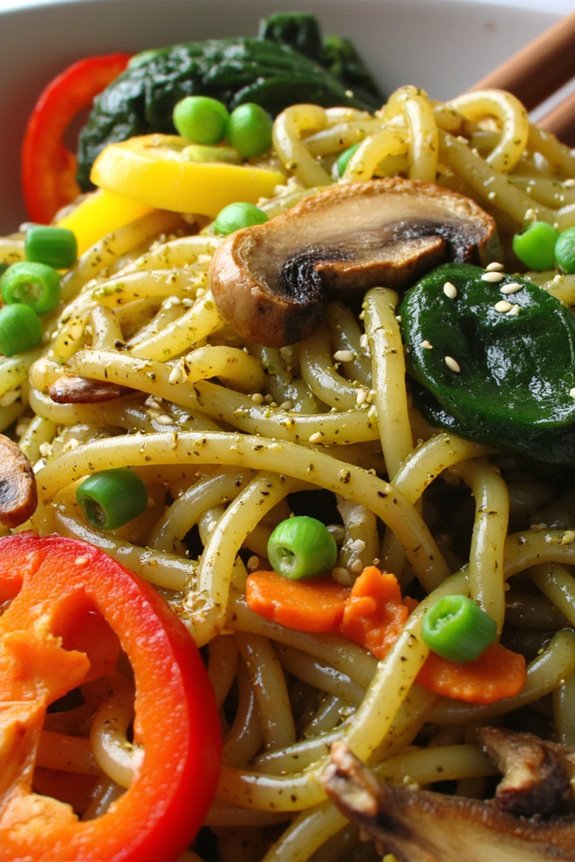
Japchae, a beloved Korean dish, is traditionally made with sweet potato starch noodles stir-fried with a variety of vegetables and proteins. This recipe takes the classic Japchae and infuses it with an Italian twist by incorporating pesto, blending the savory flavors of Korean cuisine with the aromatic herbs of Italy. The result is a unique and delicious dish that’s perfect for any occasion, from weeknight dinners to special gatherings.
The combination of chewy noodles, vibrant vegetables, and the rich, nutty flavor of pesto creates a harmony that’s certain to please a crowd. Whether you’re a fan of traditional Korean dishes or looking to try something new, Japchae Stir-Fried Noodles With Pesto is a delightful fusion that showcases the versatility of both culinary traditions.
Ingredients (Serving Size: 4-6 people)
- 8 ounces sweet potato starch noodles (dangmyeon)
- 2 tablespoons vegetable oil
- 1 cup sliced bell peppers (red, yellow, and green)
- 1 cup sliced carrots
- 1 cup spinach (fresh or frozen)
- 1 cup sliced mushrooms (shiitake or button)
- 3 green onions, chopped
- 1/2 cup pesto (store-bought or homemade)
- 2 tablespoons soy sauce
- 1 tablespoon sesame oil
- 1 tablespoon sesame seeds (for garnish)
- Salt and pepper to taste
Cooking Instructions
1. Cook the Noodles: Begin by boiling a large pot of water. Once it’s boiling, add the sweet potato starch noodles and cook according to package instructions, usually about 6-8 minutes. Once cooked, drain and rinse the noodles under cold water to stop the cooking process. Set aside.
2. Prepare the Vegetables: While the noodles are cooking, wash and slice the vegetables. Make sure to cut the bell peppers, carrots, and mushrooms into thin strips to guarantee even cooking. If using frozen spinach, thaw it and squeeze out excess water.
3. Stir-Fry the Vegetables: In a large skillet or wok, heat the vegetable oil over medium-high heat. Add the sliced carrots first and stir-fry for about 2 minutes until slightly softened. Next, add the bell peppers and mushrooms, cooking for another 3-4 minutes until the vegetables are tender-crisp.
Finally, add the spinach and green onions, stirring for an additional 1-2 minutes until just wilted.
4. Combine Noodles and Pesto: Once the vegetables are cooked, add the drained noodles to the skillet. Pour in the pesto, soy sauce, and sesame oil. Toss everything together gently to ascertain the noodles are evenly coated with the sauce and all the ingredients are combined well. Cook for another 2-3 minutes until everything is heated through.
5. Season and Serve: Taste the dish and add salt and pepper as needed. Once seasoned to your liking, remove from heat and transfer to a serving platter. Sprinkle sesame seeds on top for garnish and serve warm.
Extra Tips
When making Japchae Stir-Fried Noodles With Pesto, feel free to customize the vegetables based on what you have on hand or your personal preferences. You can also add proteins like chicken, beef, or tofu for a heartier meal.
For a more intense flavor, consider making your own pesto with fresh basil, pine nuts, and Parmesan cheese. Finally, be mindful not to overcook the vegetables; they should be vibrant and crisp for the best texture in your dish. Enjoy the fusion of flavors!
K-Pop Sushi Rolls
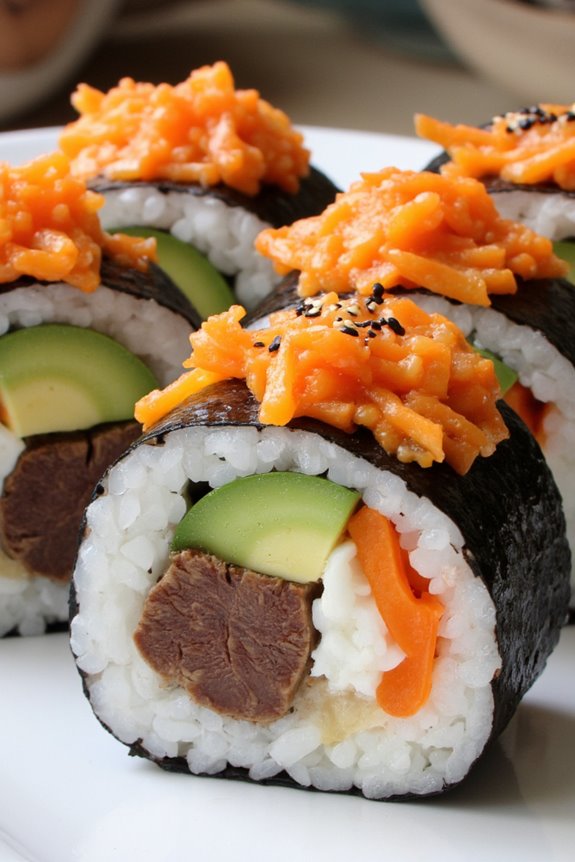
K-Pop Sushi Rolls are a vibrant and delicious fusion dish that combines the traditional elements of sushi with the bold flavors of Korean cuisine. Inspired by the global phenomenon of K-Pop, these colorful sushi rolls aren’t only visually appealing but also packed with a variety of ingredients that create an explosion of taste in every bite.
The combination of sushi rice, fresh vegetables, and Korean-style fillings allows you to enjoy a unique twist on a classic Japanese dish, making it perfect for parties, gatherings, or a fun family dinner.
Making K-Pop Sushi Rolls is an engaging process that encourages creativity and personalization, allowing you to customize each roll with your favorite ingredients. Whether you prefer spicy tuna, bulgogi beef, or a medley of fresh vegetables, the possibilities are endless.
Serve these rolls with a side of soy sauce, kimchi, or spicy gochujang for an extra kick. Let’s plunge into the recipe and create this delightful fusion dish that will impress your friends and family alike.
Ingredients (Serves 4-6 people):
- 2 cups sushi rice
- 2 1/2 cups water
- 1/2 cup rice vinegar
- 2 tablespoons sugar
- 1 teaspoon salt
- 4 sheets nori (seaweed)
- 1/2 pound cooked bulgogi beef, sliced
- 1/2 cucumber, julienned
- 1 carrot, julienned
- 1/2 avocado, sliced
- 1/4 cup kimchi, chopped (optional)
- Soy sauce for dipping
- Sesame seeds for garnish
- Gochujang (Korean chili paste) for serving (optional)
Cooking Instructions:
1. Prepare the Sushi Rice: Rinse the sushi rice under cold water until the water runs clear. This removes excess starch and prevents the rice from becoming gummy.
Combine the rinsed rice and water in a rice cooker or pot and cook according to the rice cooker instructions or bring to a boil, then reduce heat to low, cover, and simmer for 20 minutes. Once cooked, let it sit for 10 minutes off the heat.
2. Season the Rice: In a small bowl, mix the rice vinegar, sugar, and salt until dissolved. Gently fold this mixture into the warm sushi rice using a wooden spatula.
Be careful not to mash the rice; you want to keep the grains intact. Allow the rice to cool to room temperature.
3. Prepare the Fillings: While the rice cools, prepare your fillings. Cook the bulgogi beef if not already cooked, and slice it into thin strips.
Julienne the cucumber and carrot, and slice the avocado. Chop the kimchi if using. Set all ingredients aside in a neat arrangement.
4. Assemble the Sushi Rolls: Lay a sheet of nori, shiny side down, on a bamboo sushi mat. Wet your hands to prevent sticking, then grab a handful of sushi rice and spread it evenly over the nori, leaving about 1 inch at the top edge of the nori.
Layer your desired fillings (bulgogi, cucumber, carrot, avocado, and kimchi) horizontally across the center of the rice.
5. Roll the Sushi: Starting from the bottom edge of the mat, carefully Roll the Sushi away from you, applying gentle pressure to keep the roll tight.
Use the mat to help shape the roll, tucking in the fillings as you go. Once you reach the exposed edge of the nori, dampen it slightly with water to seal the roll.
6. Slice and Serve: Using a sharp knife, slice the roll into 6-8 pieces. Clean the knife with a damp cloth between cuts to guarantee clean edges.
Arrange the slices on a platter, sprinkle with sesame seeds, and serve with soy sauce and gochujang on the side.
Extra Tips:
When making K-Pop Sushi Rolls, feel free to experiment with different fillings and flavors based on your preferences. You can include ingredients like pickled radish, shrimp tempura, or even tofu for a vegetarian option.
Additionally, confirm your sushi rice is at room temperature before assembling the rolls; this helps avoid soggy nori. Finally, practice makes perfect when rolling, so don’t hesitate to try a few times to master your technique! Enjoy your culinary adventure with this delightful fusion dish.
Korean-Inspired Veggie Stir-Fry Bowls
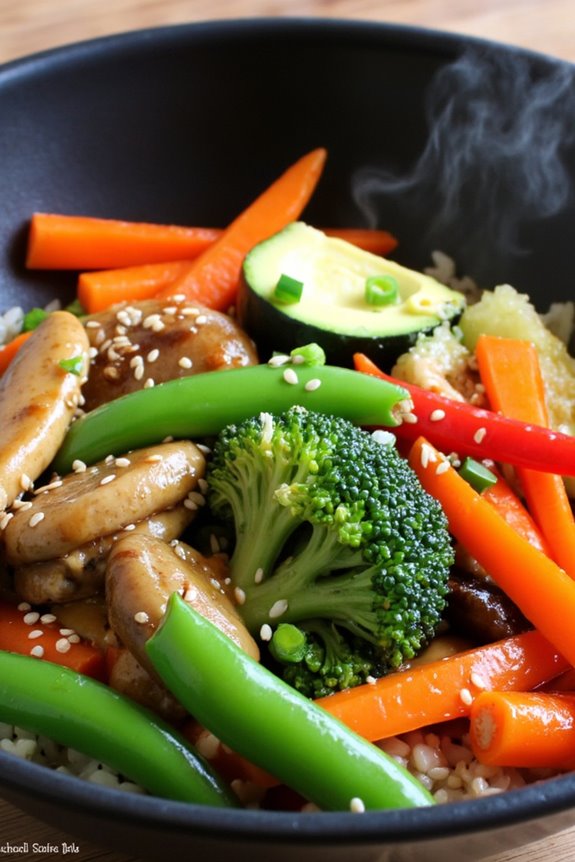
Korean-Inspired Veggie Stir-Fry Bowls are a vibrant and flavorful dish that brings together the essence of traditional Korean ingredients with a variety of fresh vegetables. This dish is perfect for anyone looking for a healthy yet satisfying meal that’s easy to prepare. Packed with color and nutrition, these bowls allow for customization based on what you have on hand, making them a versatile addition to your weeknight dinner rotation.
The combination of textures and the savory-sweet sauce elevates simple vegetables into a delightful culinary experience.
To create the ultimate veggie stir-fry bowls, you can incorporate a mix of seasonal vegetables alongside some pantry staples like soy sauce, sesame oil, and garlic. The addition of cooked grains, such as rice or quinoa, serves as a hearty base that absorbs all the delicious flavors of the stir-fry. Feel free to get creative with the toppings—think sesame seeds, green onions, or even a fried egg for added richness.
This dish isn’t only a feast for the eyes but also a comfort food that brings the family together.
Ingredients (serving size: 4-6 people)
- 2 cups cooked rice (or quinoa)
- 2 tablespoons vegetable oil
- 1 cup broccoli florets
- 1 bell pepper, sliced (any color)
- 1 cup carrots, julienned
- 1 cup snap peas
- 1 medium zucchini, sliced
- 1 cup mushrooms, sliced
- 4 cloves garlic, minced
- 1 tablespoon fresh ginger, minced
- 3 tablespoons soy sauce
- 2 tablespoons sesame oil
- 1 tablespoon rice vinegar
- 1 tablespoon honey or maple syrup
- 2 green onions, sliced (for garnish)
- 1 tablespoon sesame seeds (for garnish)
Cooking Instructions
- Prepare the Base: Start by cooking your rice or quinoa according to package instructions. Once cooked, set it aside and keep it warm. This will serve as the base of your stir-fry bowl, providing a filling and nutritious component.
- Heat the Oil: In a large skillet or wok, heat the vegetable oil over medium-high heat. This will help to achieve that perfect stir-fry texture and allow the vegetables to cook evenly while maintaining their crunch.
- Sauté Aromatics: Add the minced garlic and ginger to the hot oil. Sauté for about 30 seconds, or until fragrant. Be careful not to burn them, as burnt garlic can impart a bitter flavor to the dish.
- Add Vegetables: Toss in the broccoli, bell pepper, carrots, snap peas, zucchini, and mushrooms. Stir-fry the vegetables for about 5-7 minutes, or until they’re tender but still crisp. Stir frequently to guarantee even cooking.
- Make the Sauce: In a small bowl, whisk together the soy sauce, sesame oil, rice vinegar, and honey (or maple syrup). Once the vegetables are cooked to your liking, pour the sauce over them and stir well to combine. Cook for an additional 1-2 minutes until everything is heated through.
- Assemble the Bowls: To serve, spoon the cooked rice or quinoa into each bowl and top with the veggie stir-fry mixture. Garnish with sliced green onions and a sprinkle of sesame seeds for added texture and flavor.
Extra Tips
For an even more authentic Korean flavor, consider adding a dollop of gochujang (Korean chili paste) to the sauce mixture, which will provide a nice kick.
You can also experiment with different vegetables based on the season or what you have available—bok choy, spinach, or even cabbage work wonderfully in this stir-fry. Additionally, if you want to make the dish heartier, feel free to add a protein of your choice, such as tofu, chicken, or beef, guaranteeing that it’s cooked thoroughly before adding the vegetables.
Enjoy your cooking adventure!
Matcha Chiffon Cake With Red Bean Cream
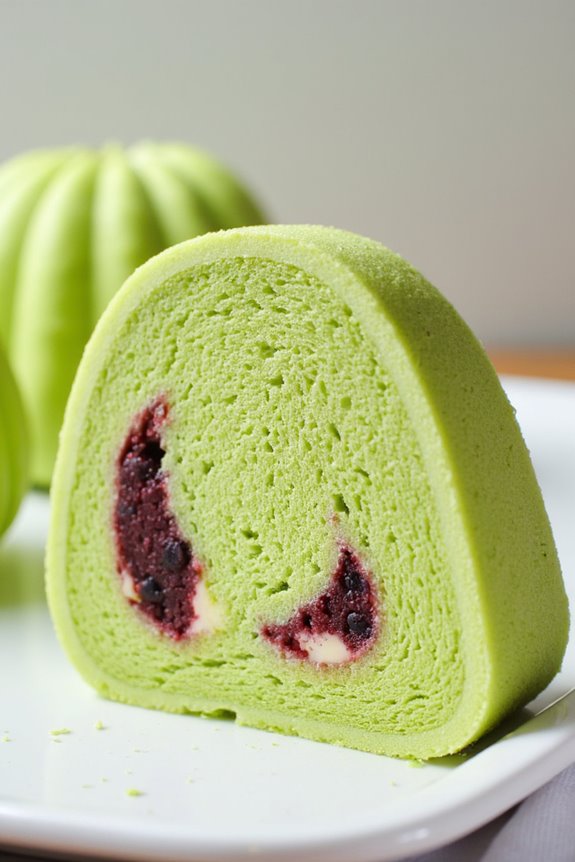
Matcha Chiffon Cake with Red Bean Cream is a delightful fusion dessert that combines the earthy flavors of matcha green tea with the rich sweetness of red bean paste. This cake is light and airy, thanks to the chiffon technique, which incorporates beaten egg whites into the batter. The vibrant green color of the matcha not only makes it visually appealing but also adds a unique taste profile that pairs beautifully with the creamy, sweet red bean filling.
Whether you’re hosting a special occasion or simply indulging in a sweet treat, this cake is sure to impress. The red bean cream is a vital component of this dessert, creating a luscious layer that complements the fluffy chiffon cake. The combination of textures—from the soft cake to the smooth cream—makes each bite a delightful experience.
This recipe serves 4-6 people, making it perfect for sharing with friends and family. Let’s get started on this delicious journey of flavors!
Ingredients:
- 1 cup cake flour
- 1 cup granulated sugar
- 1/2 cup vegetable oil
- 1/2 cup water
- 6 large eggs, separated
- 1 tablespoon matcha powder
- 1 teaspoon baking powder
- 1/4 teaspoon salt
- 1 cup sweet red bean paste (store-bought or homemade)
- 1/2 cup heavy whipping cream
- 2 tablespoons powdered sugar
- 1 teaspoon vanilla extract
Instructions:
- Preheat the Oven: Preheat your oven to 325°F (160°C). This temperature is ideal for baking chiffon cakes, guaranteeing a light and airy texture.
- Prepare the Dry Ingredients: In a mixing bowl, sift together the cake flour, granulated sugar, matcha powder, baking powder, and salt. This guarantees there are no lumps and that all dry ingredients are well combined.
- Combine Wet Ingredients: In another bowl, whisk together the vegetable oil, water, and egg yolks until smooth. Make sure the mixture is well blended for even flavor distribution.
- Mix the Batter: Gradually add the dry ingredients to the wet mixture, stirring gently until just combined. Be careful not to overmix, as this can affect the cake’s fluffiness.
- Whip the Egg Whites: In a clean bowl, use an electric mixer to beat the egg whites until soft peaks form. Gradually add the remaining granulated sugar and continue to beat until stiff peaks are achieved. This step is vital for the cake’s texture.
- Fold in the Egg Whites: Gently fold a third of the whipped egg whites into the batter to lighten it. Then, carefully fold in the remaining egg whites until no white streaks remain. This technique helps maintain the airiness of the batter.
- Pour and Bake: Pour the batter into an ungreased chiffon cake pan. Bake for about 40-45 minutes, or until a toothpick inserted into the center comes out clean. The ungreased pan allows the cake to cling to the sides as it rises.
- Cool the Cake: Once baked, remove the cake from the oven and invert the pan to cool completely. This prevents the cake from collapsing and helps maintain its height.
- Prepare the Red Bean Cream: In a separate bowl, whip the heavy cream to soft peaks. Add the powdered sugar and vanilla extract, and continue whipping until stiff peaks form. Gently fold in the red bean paste until well incorporated.
- Assemble the Cake: Once the cake is completely cool, remove it from the pan. Slice the cake horizontally into two layers. Spread a generous layer of red bean cream on the bottom layer, then place the top layer back on. Top with more red bean cream if desired and serve.
Extra Tips:
When preparing Matcha Chiffon Cake with Red Bean Cream, guarantee all your ingredients are at room temperature for better emulsification.
Be gentle when folding the egg whites into the batter; this will preserve the airiness necessary for a light cake. If you prefer a stronger matcha flavor, feel free to adjust the amount of matcha powder according to your taste.
Additionally, the red bean cream can be prepared in advance and stored in the refrigerator, making the assembly process quicker on the day of serving. Enjoy your baking!